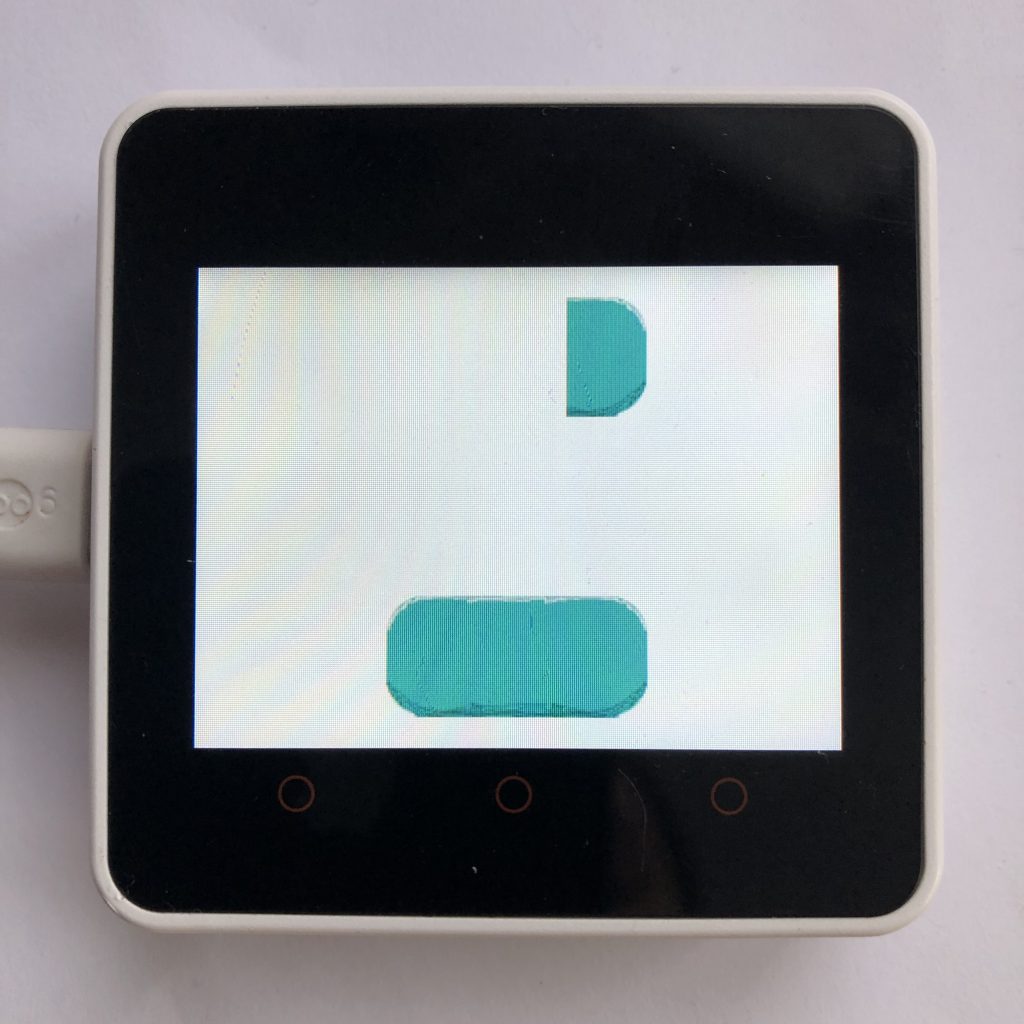
If you need a button that has a lot of detail, it is usually best to create it with an image instead of drawing it from scratch. Doing it this way can simplify the process .
Today we will see how you can create a image button with LVGL. The images we will use to create the button are at the bottom of the page if you want to follow this tutorial exactly.
Setting Up a Micropython Screen
Because there are so many different screens out there, I can’t add support for all of them to this example, so to make this example work, you will need to add your screen’s setup code to the beginning of it.
There is a little more information on this process at How to get a LVGL Micropython Screen to Work if you aren’t familiar on how it’s done.
Here is the code
import lvgl
import fs_driver

drv = lvgl.fs_drv_t()
fs_driver.fs_register(drv,'A')


btn = lvgl.imgbtn(lvgl.scr_act())
btn.set_src(lvgl.imgbtn.STATE.RELEASED,'A:sd/left_button.png','A:sd/middle_button.png','A:sd/right_button.png')
btn.align(lvgl.ALIGN.BOTTOM_MID,0,-15)

otherbtn = lvgl.imgbtn(lvgl.scr_act())
otherbtn.set_src(lvgl.imgbtn.STATE.RELEASED,None,None,'A:sd/right_button.png')
otherbtn.align(lvgl.ALIGN.TOP_MID,0,15)


def clicked(data):
    print('button one clicked')

btn.add_event_cb(clicked,lvgl.EVENT.CLICKED,None)

def clicked_two(data):
    print('button two clicked')

otherbtn.add_event_cb(clicked_two,lvgl.EVENT.CLICKED,None)
How Does This Code Work?
Since you’ve seen the program above, why don’t we walk through the code and see how it works. This should make it clearer how you can use image buttons in your projects.
The Setup
First, we import the LVGL module. This is also a good spot to put your screen setup code.
import lvglThe File System
Because images take up so much memory it is easiest if they are stored in a separate file than the code but, to be able to use those images, we need to tell LVGL how to use the file system.
To begin, we import the fs_driver module.
import fs_driverAfter that, we create a new LVGL file system driver.
drv = lvgl.fs_drv_t()Then we use the fs_driver module to setup that driver and install it. Every driver gets a single letter name in our case ‘A’. Later we will use that letter to access this driver.
fs_driver.fs_register(drv,'A')The Button
We start by creating a new image button object.
btn = lvgl.imgbtn(lvgl.scr_act())Image buttons are made of three images: Left, Middle, and Right. The left and right buttons are the ends of the button often times they have rounded corners. The middle image is the main body of the button.
To make our image button work we need to set those three images. I put mine on a SD card connected to my board. If you put them some where else, you will need to update the addresses below to the correct ones.
RELEASED is the default state, but you can add images to any of the other states and those images will be show when the buttons in that state.
btn.set_src(lvgl.imgbtn.STATE.RELEASED,'A:sd/left_button.png','A:sd/middle_button.png','A:sd/right_button.png')Lastly we put the button near the botton of the screen.
btn.align(lvgl.ALIGN.BOTTOM_MID,0,-15)The Other Button
If you don’t want to use three different images, you can use the None keyword instead. We will create one more image button, except this one will only use the right image.
otherbtn = lvgl.imgbtn(lvgl.scr_act())
otherbtn.set_src(lvgl.imgbtn.STATE.RELEASED,None,None,'A:sd/right_button.png')
otherbtn.align(lvgl.ALIGN.TOP_MID,0,15)
Connecting Everything Up
Once you create an image button they can be used just like a normal button. Lets make the computer print which button was pressed
We will begin by create a simple handler function.
def clicked(data):Inside that function we print if that button one was pressed.
print('button one clicked')Then we connect it to the first image button we created.
btn.add_event_cb(clicked,lvgl.EVENT.CLICKED,None)We repeat that process for the other button too.
def clicked_two(data):
    print('button two clicked')

otherbtn.add_event_cb(clicked_two,lvgl.EVENT.CLICKED,None)
Things To Think About
Creating a button and having it do something when its clicked is normally one of the simplest things you could do but when you use image buttons it gets really complicated both to code and to run.
That brings us to the last point images buttons require powerful microcontrollers to use them. You have to have a lot of ram and flash, plus you need a fast processor. I ran the above code on a esp32 which has both and there was some lag after you press the button to it responding.
All and all, image buttons are very useful but you need a good computer to run them.
LVGL has many types of interesting inputs, if you like image buttons you might also like LVGL Spinboxes.
I am not much of an artist but here is the images I used.


