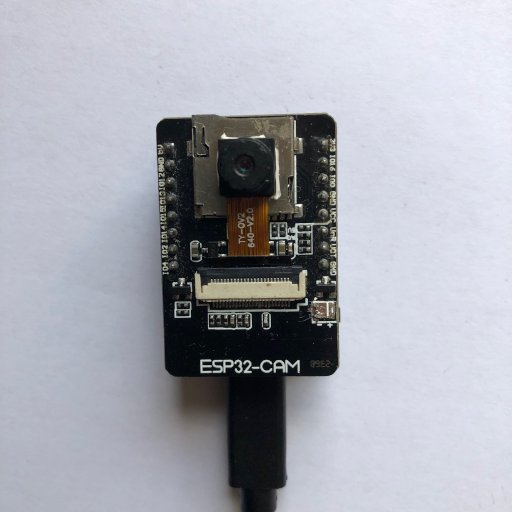
Putting an ESP32 camera in your projects is just fun, but programming one is not always that fun. Normally you would program a microcontroller camera with c++ which is a very powerful and very complicated language, but if you are just creating a project for fun, micropython is a little simpler to use and has some powerful features of its own.
The Firmware
Because cameras take a lot of computer power to run and micropython is not the fastest language, the best thing to do is to write the camera driver in a fast language like c++ and compile it into the firmware.
Thankfully, somebody has all ready done this for us. All you have to do is download one of the firmwares and upload it to your board with what ever tool you like.
On that page, there are actually two firmwares you can choose from. I am using the one with BLE, but the code we are working with today does not use Bluetooth, so it does not matter which one you choose.
The Code
Taking a picture with micropython is a breeze. You just import the camera module, then initialize it, and finally take a picture.
import camera
camera.init(0)
pic = camera.capture()
Unfortunately, pictures take a lot of memory. If you start taking lots of pictures, your ESP32 is going to run out of memory fast, so we have to find somewhere to put those images.
Because the ESP32-CAM comes with a SD card slot built in, we will use it to store the pictures.
import camera,os,machine

os.mount(machine.SDCard(),'/sd')

camera.init(0)
camera.speffect(camera.EFFECT_GREEN)
print("Camera Initlized")

pic = camera.capture()
print("Picture Taken")
print("Size:",len(pic))

file = open("/sd/picture.jpeg",'wb')
file.write(pic)
file.close()

print("Finished Storing")

del pic
camera.deinit()
os.umount('/sd')
How That Code Works
Let’s quickly run through that code, and see the interesting parts.
Setting Up
The code starts by importing the needed libraries and initializing the SD card.
import camera,os,machine

os.mount(machine.SDCard(),'/sd')
Initializing the Camera
The simplest way to initialize the camera is like this.
camera.init(0)You always have to put the zero there, but I can’t find any information about what it actually does.
If your camera is wired differently than the ESP32-CAM board, you can tell micropython the different pins you want to use like this.
camera.init(0,d0 = 14,d1 = 15,... )There is also a few other functions you can use to change the camera. For example, here is one that filters out all the colors except green.
camera.speffect(camera.EFFECT_GREEN)You can find the rest that are available by running this snippet of code on your board. It will print out all the functions and some of the values you can set them to.
import camera
print(help(camera))
Taking the Picture
All you have to do to take a picture is call the capture funciton.
pic = camera.capture()The pic variable now has a picture in it. The picture will be in the JPEG format. It is possible to use a different format, but it is known to be glitchy and every time I have done it, I get error after error.
Storing the Photo
To save the picture to the SD card, we first create a file called picture.jpeg on the SD card and open it.
file = open("/sd/picture.jpeg",'wb')Then, we write the picture to that file.
file.write(pic)And finally, we close the file.
file.close()To make sure this program can be run more than once without rebooting, we will add a little clean up code.
del pic
camera.deinit()
os.umount('/sd')
What Next?
Once you have run the above program, you can take your SD card out of the ESP32 and put it in your computer. On it, you will find a file called picture.jpeg. If you open it, you will see the picture the ESP32 took.
Now that you have a basic understanding of how to use the ESP32-CAM with micropython, you probably want to hook your camera up to wifi. The same people that made the firmware also made a example sketch that uses wifi.
To use it, you will need to upload about 7 files to your ESP32 and edit at least one of them, but you will have a cool web server when you’re done.
If you are interested in cameras, you might also like to see how to get a microphone to work with micropython.