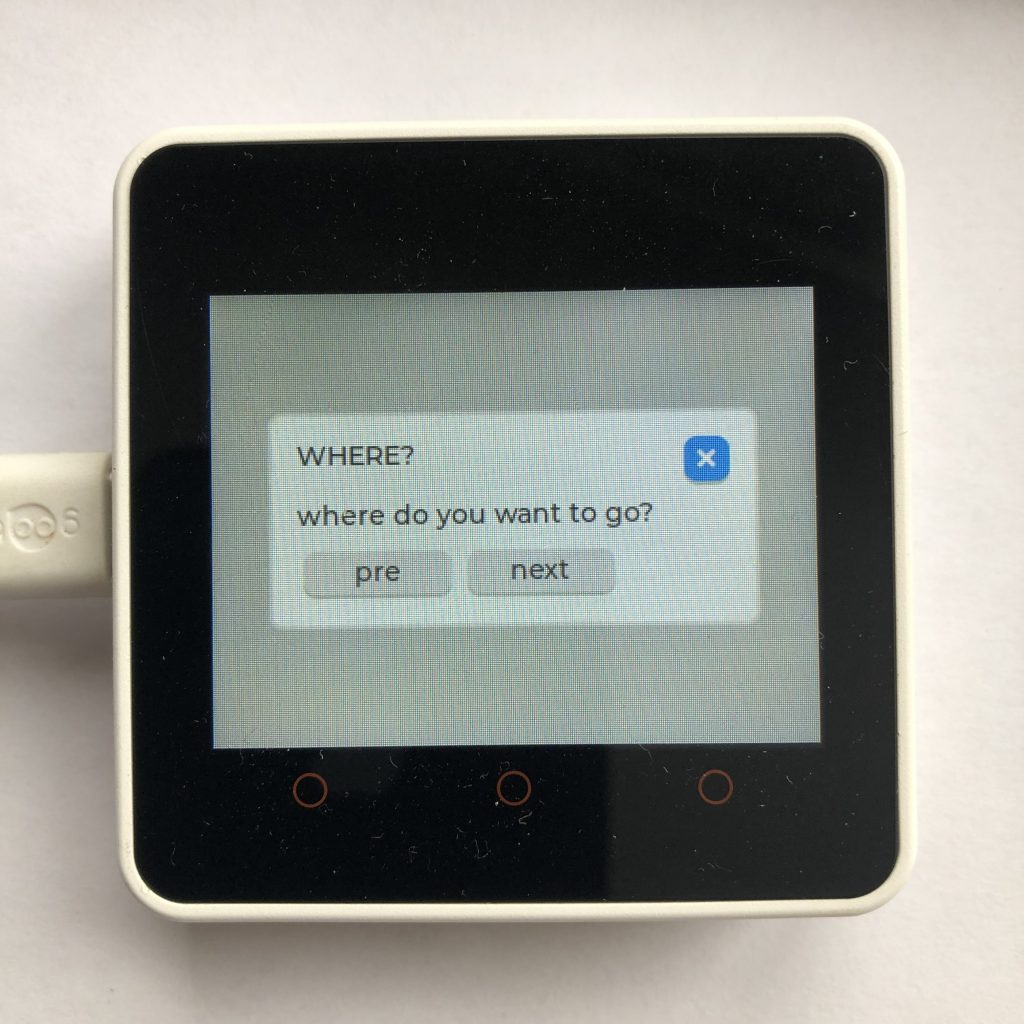
The micropython lvgl library can be hard to find any good information on, so today I am going to give you some code and explain it. When you finish, you will have a program that creates 3 different message boxes and by pressing different buttons you will be able to pick which one is on the screen.
To get this example to work you will need to add your screen code to the beginning of the example. If you want more information try How to get a LVGL Micropython screen to work.
Here is the code:
import lvgl

msg = lvgl.msgbox( None, 'WHERE?', 'where do you want to go?', ['pre', 'next'], True )
msg.center()

def handler( data ):
    msg = data.get_current_target()
    btn = msg.get_active_btn_text()
    if btn == 'next':
        msg.close()
        new = lvgl.msgbox( lvgl.scr_act(), 'HERE', 'message here', None, True )
        new.center()
    elif btn == 'pre':
        msg.close()
        new = lvgl.msgbox( None, 'HELLO', 'you made it', None, False )
        new.center()
        title = new.get_title()
        title.set_style_text_color( lvgl.color_hex(0x0FFF00), 0 )

msg.add_event_cb( handler, lvgl.EVENT.VALUE_CHANGED, None )
Understanding This LVGL Code
Ok, now that you have seen all the code, let’s step through each section, so you can understand exactly what each part does. This will make it much easier to actually use the code in your future projects…
The Import Command
This adds the lvgl library to our project so we can use it.
import lvglCreating the Msgbox
This code creates a msgbox with the title ‘WHERE?’, the description ‘where do you want to go?’, and two buttons ‘pre’ and ‘next’.
msg = lvgl.msgbox( None, 'WHERE?', 'where do you want to go?', ['pre', 'next'], True )Centering the Msgbox
It looks nicer if the box is in the center of the screen, so we add this.
msg.center()Creating the Event Handler
This function will be used to control the active msgbox. The next steps will be mostly setting up the controls.
def handler( data ):Finding the Button
First we need to find which button was pressed. This is the code that does that.
    msg = data.get_current_target()
    btn = msg.get_active_btn_text()
Check the Pressed button
Then we check if the pressed button has the text ‘next’. If it does, we will close the old msgbox and create a new one.
    if btn == 'next':
        msg.close()
        new = lvgl.msgbox( lvgl.scr_act(), 'HERE', 'message here', None, True )
        new.center()
Check again
If the button was not the ‘next’ button, we will check if it was the ‘pre’ button. If it is, the code will close the old box, create another box, and change the title color on the new box.
    elif btn == 'pre':
        msg.close()
        new = lvgl.msgbox( None, 'HELLO', 'you made it', None, False )
        new.center()
        title = new.get_title()
        title.set_style_text_color( lvgl.color_hex(0x0FFF00), 0 )
Start the Handler
Finally we connect the handler function to the msgbox, so when a button is pressed the function is called.
msg.add_event_cb( handler, lvgl.EVENT.VALUE_CHANGED, None )What Happens Next
Once you have this code running, a message box will appear if you press the ‘pre’ button and a new box will appear and will have a green title. If on the first box you had pressed the ‘next’ button, it would make a new message box with some text and a close button.
Experimenting with examples is a great way to learn code. If you modified this code, you could make a popup that warns you if your battery is low or a notification that your board has finished downloading a file.