Baxter Builds

Micropython LVGL Tabview Examples

November 15, 2022 by Baxter

night styled micropython lvgl tabview

What are LVGL tabviews?

Tabviews allow you to have multiple pages and create buttons on the screen that move between the pages. Tabviews often allow you to swipe between pages too, instead of just pressing a button.

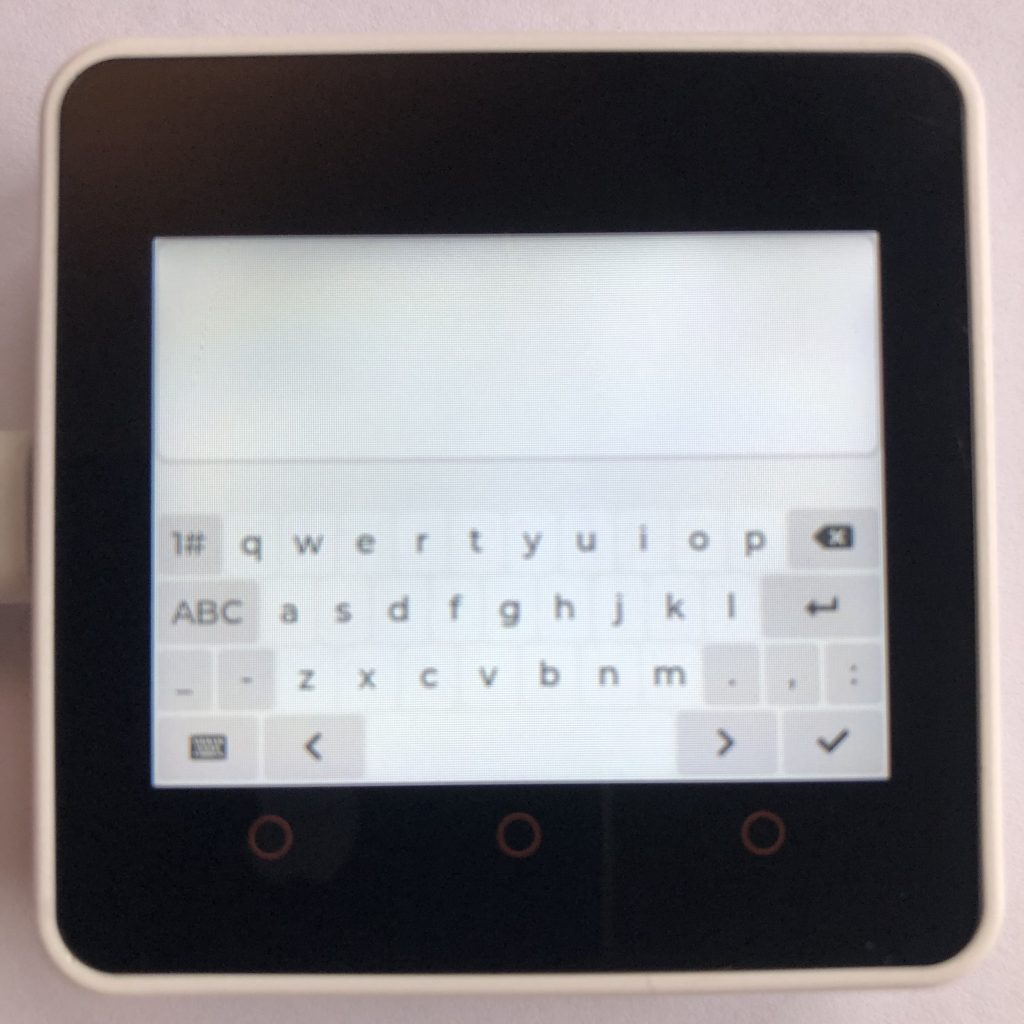
How to use these examples

To get these examples to work you will need to add some screen code to the beginning of each example. If you want more information try How to get a LVGL Micropython screen to work.
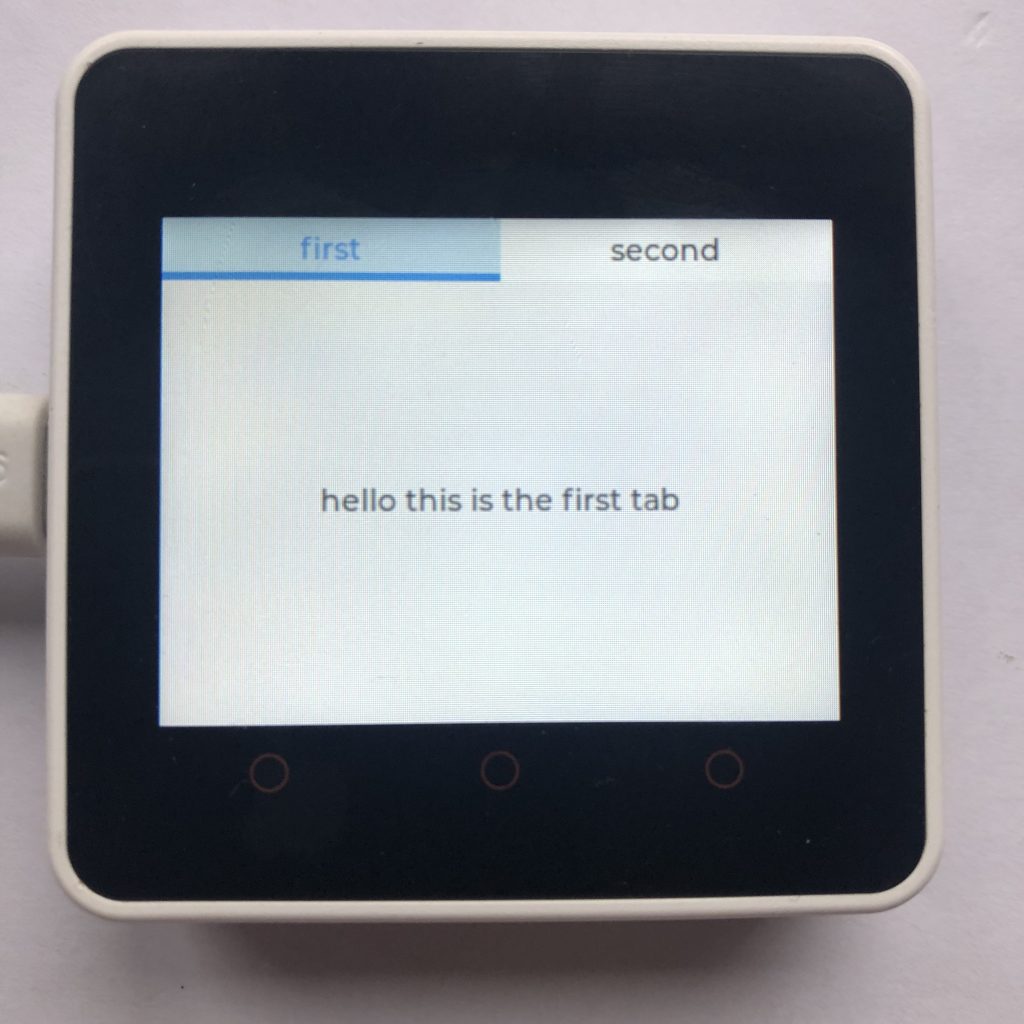
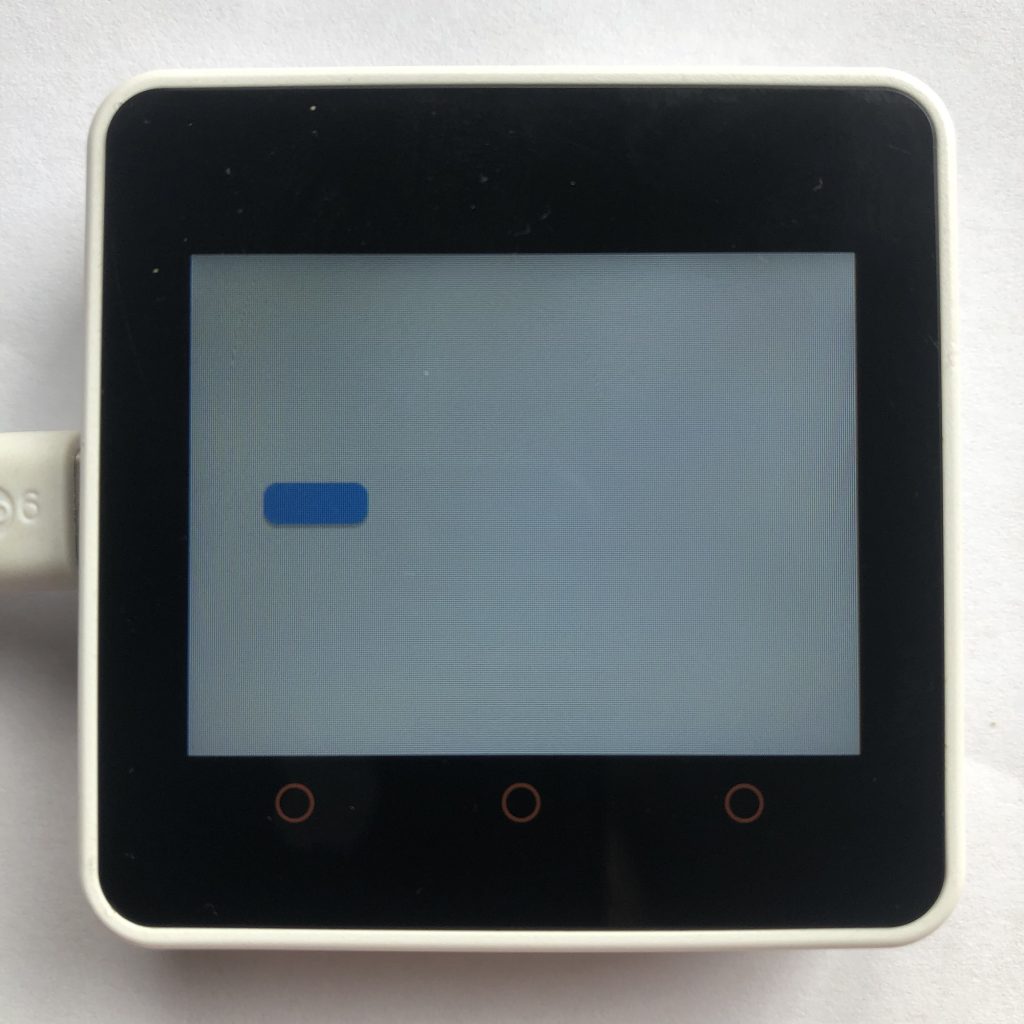
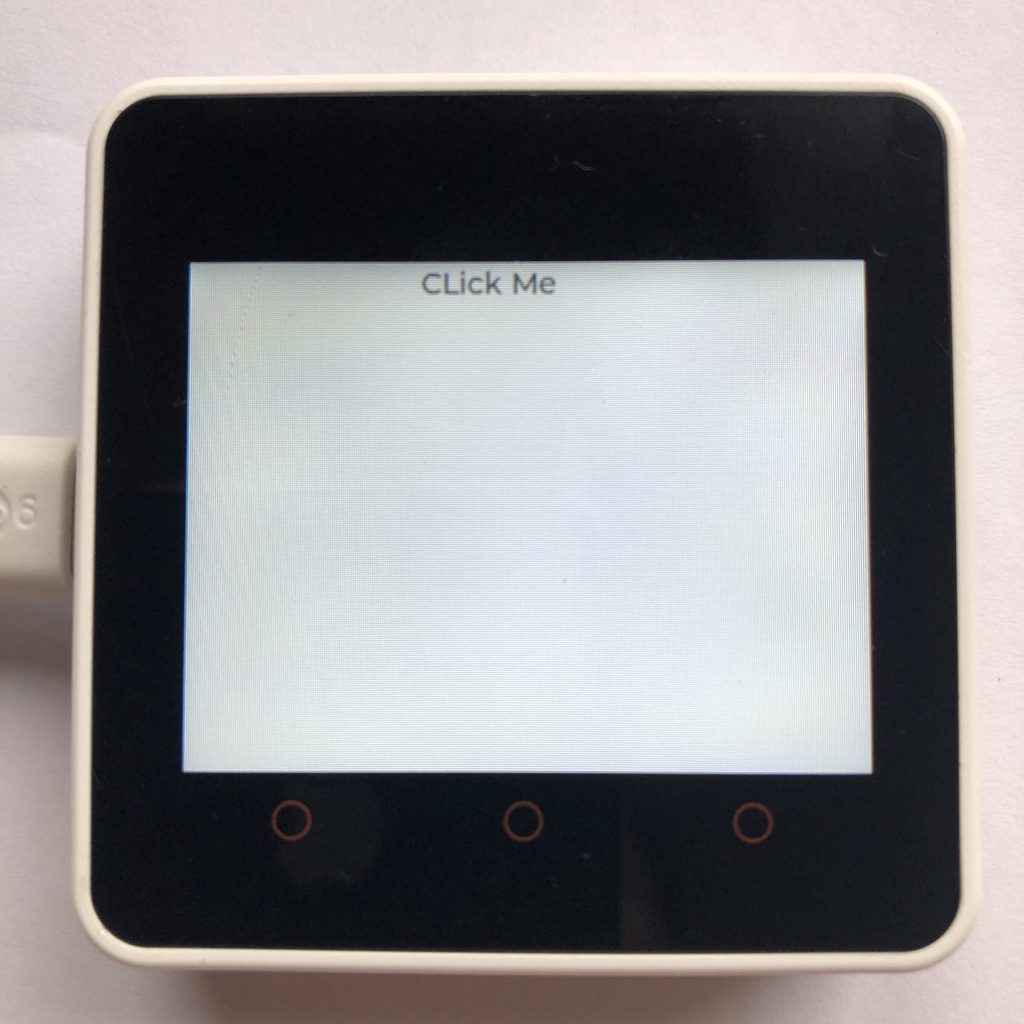
simple micropython lvgl tabview

The Basic Example

This code will create a tabview with two pages, and place the tabs on the top of the screen.

import lvgl

tabview = lvgl.tabview( lvgl.scr_act(), lvgl.DIR.TOP, 30 )
tabview.set_size( 320, 240 )
tabview.center()

firstTab = tabview.add_tab( 'first' )
firstLabel = lvgl.label( firstTab ) 
firstLabel.set_text( 'hello this is the first tab' )
firstLabel.center()

secondTab = tabview.add_tab( 'second' )
secondLabel = lvgl.label( secondTab )
secondLabel.set_text( 'somthing really interesting' )
micropython lvgl tabview that automatically changes the page

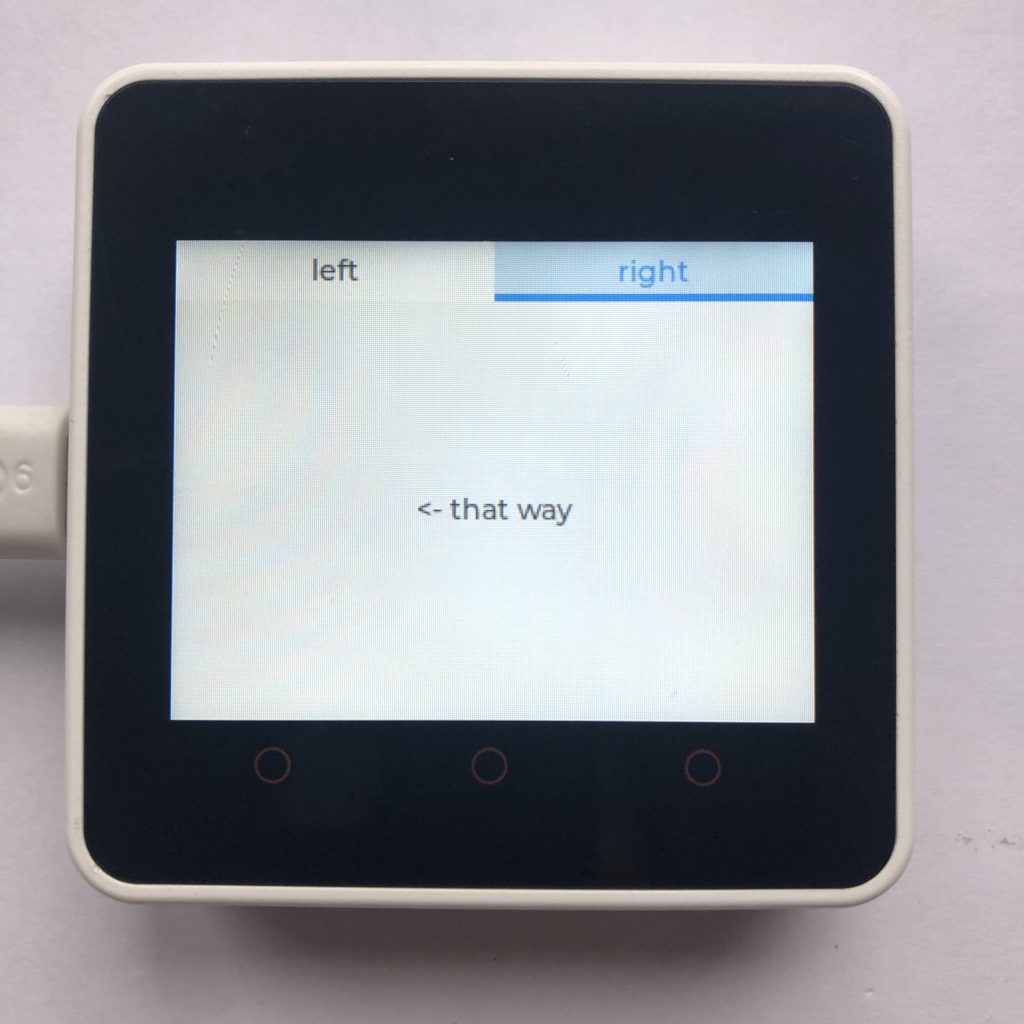
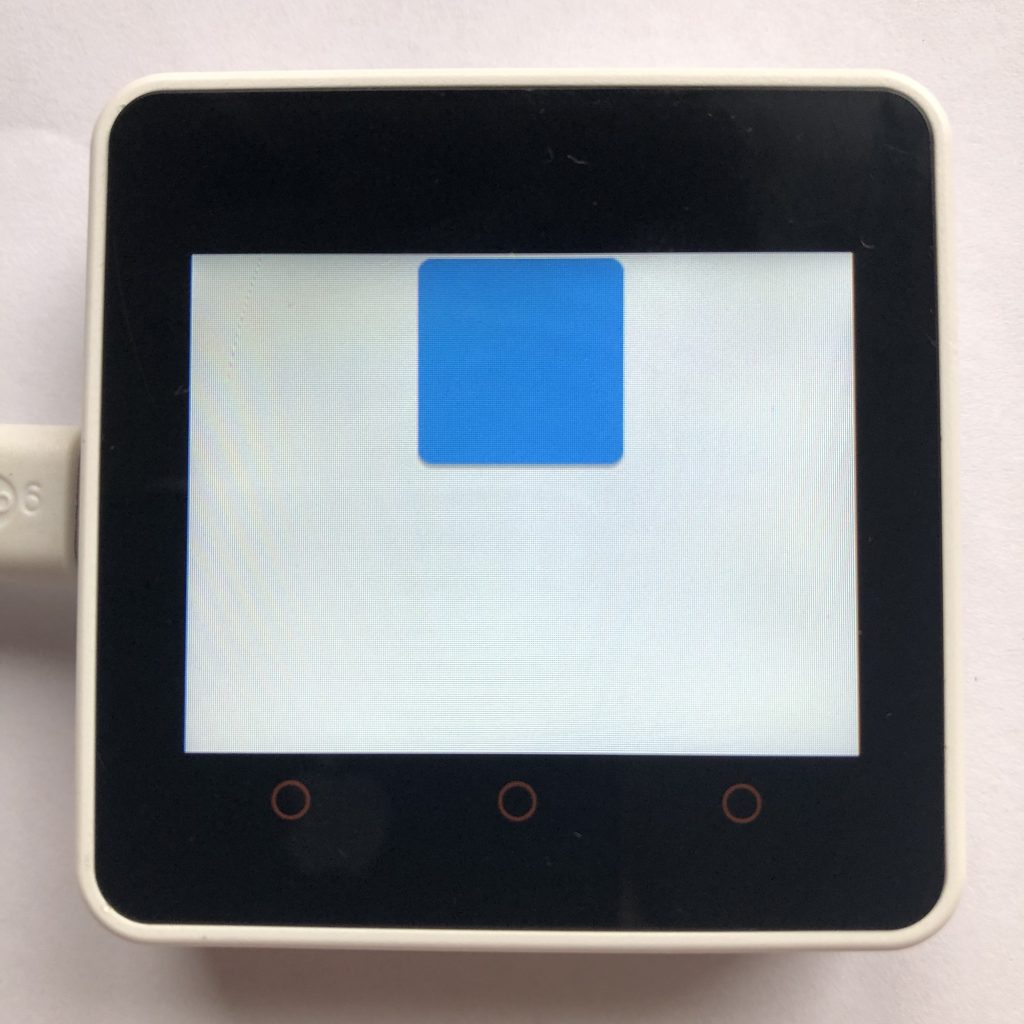
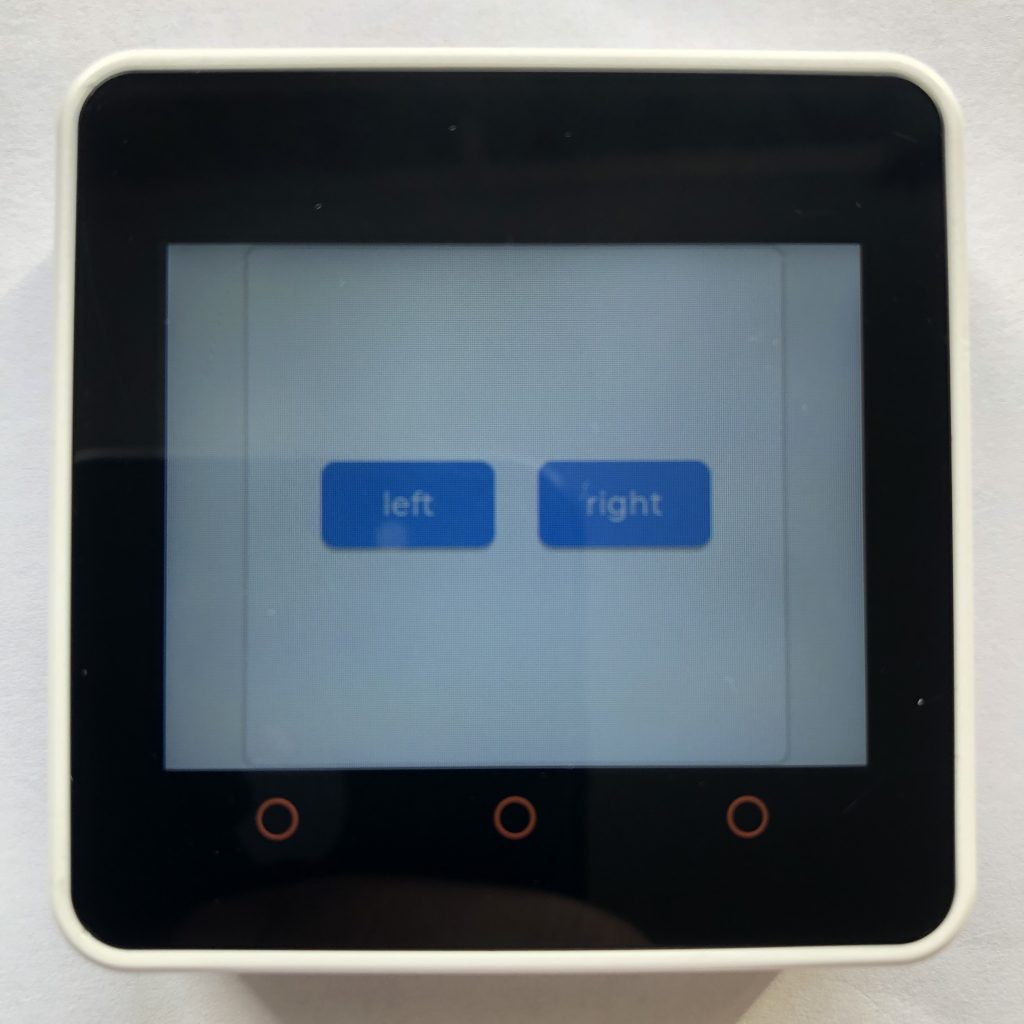
Having Code Set The Current Tab

Besides pressing the tab buttons or swiping, you can change the current open tab in code with the .set_act function.

import lvgl

tabview = lvgl.tabview( lvgl.scr_act(), lvgl.DIR.TOP, 30 )
tabview.set_size( 320, 240 )
tabview.center()

firstTab = tabview.add_tab( 'left' )
firstLabel = lvgl.label( firstTab )
firstLabel.set_text( 'that way ->' )
firstLabel.center()

secondTab = tabview.add_tab( 'right' )
secondLabel = lvgl.label( secondTab )
secondLabel.set_text( '<- that way' )
secondLabel.center()

from time import sleep
while True:
    tabview.set_act( 1, lvgl.ANIM.ON )
    sleep( 1 ) 
    tabview.set_act( 0, lvgl.ANIM.OFF )
    sleep( 1 )
micropython lvgl tabview that is positioned on the left side

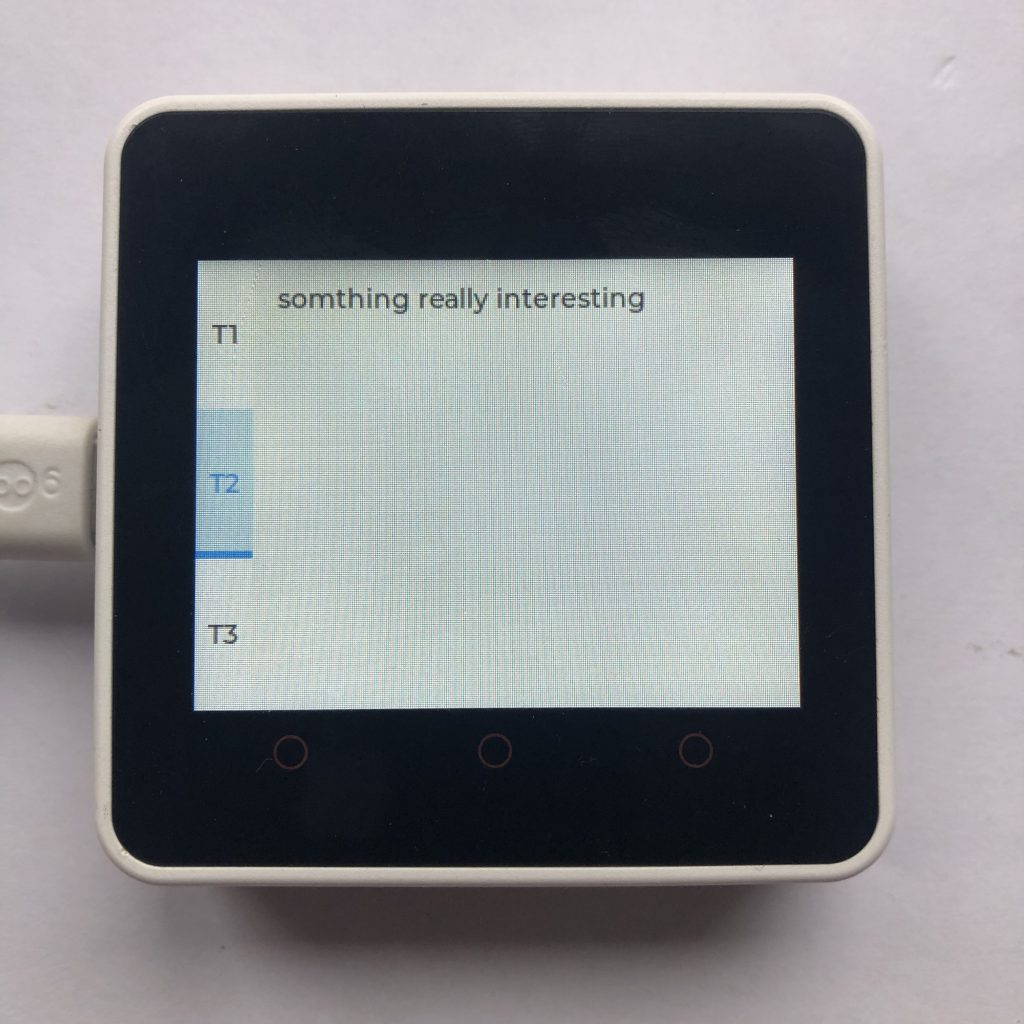
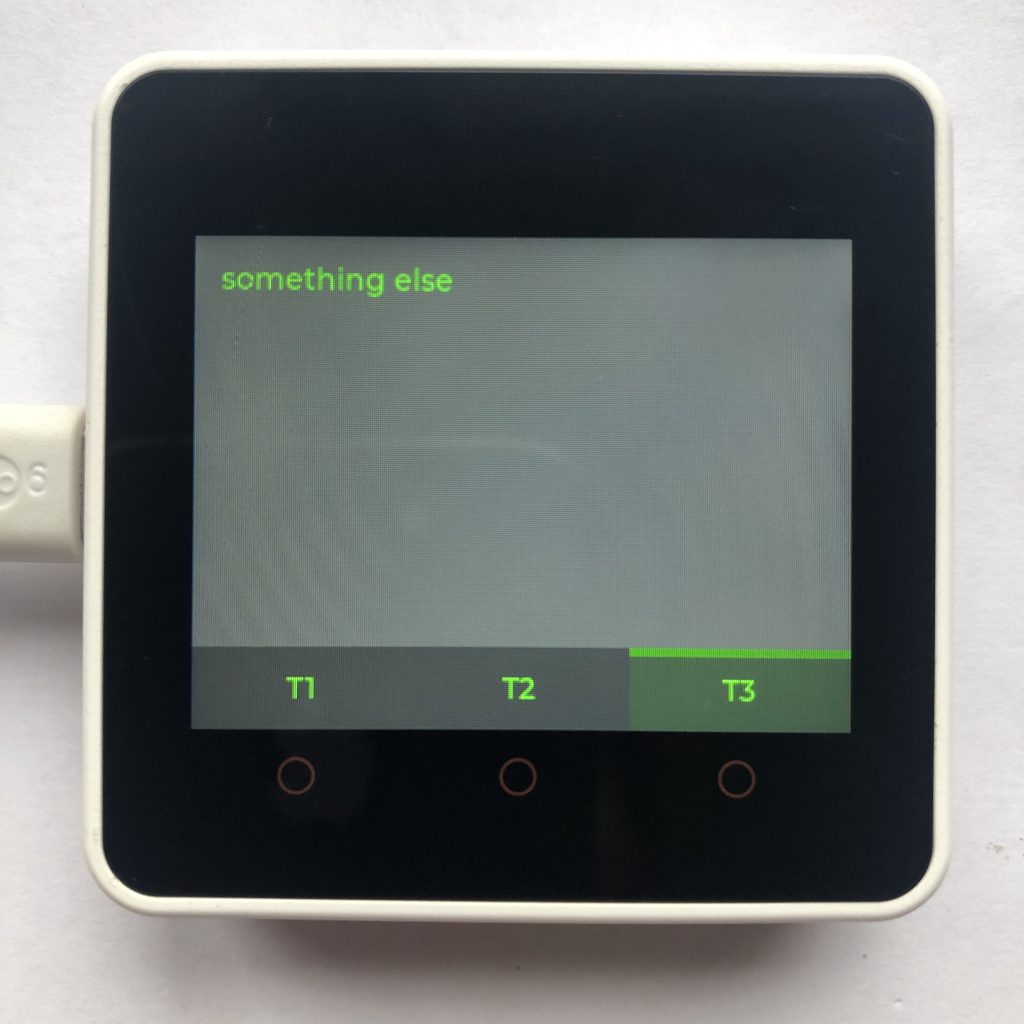
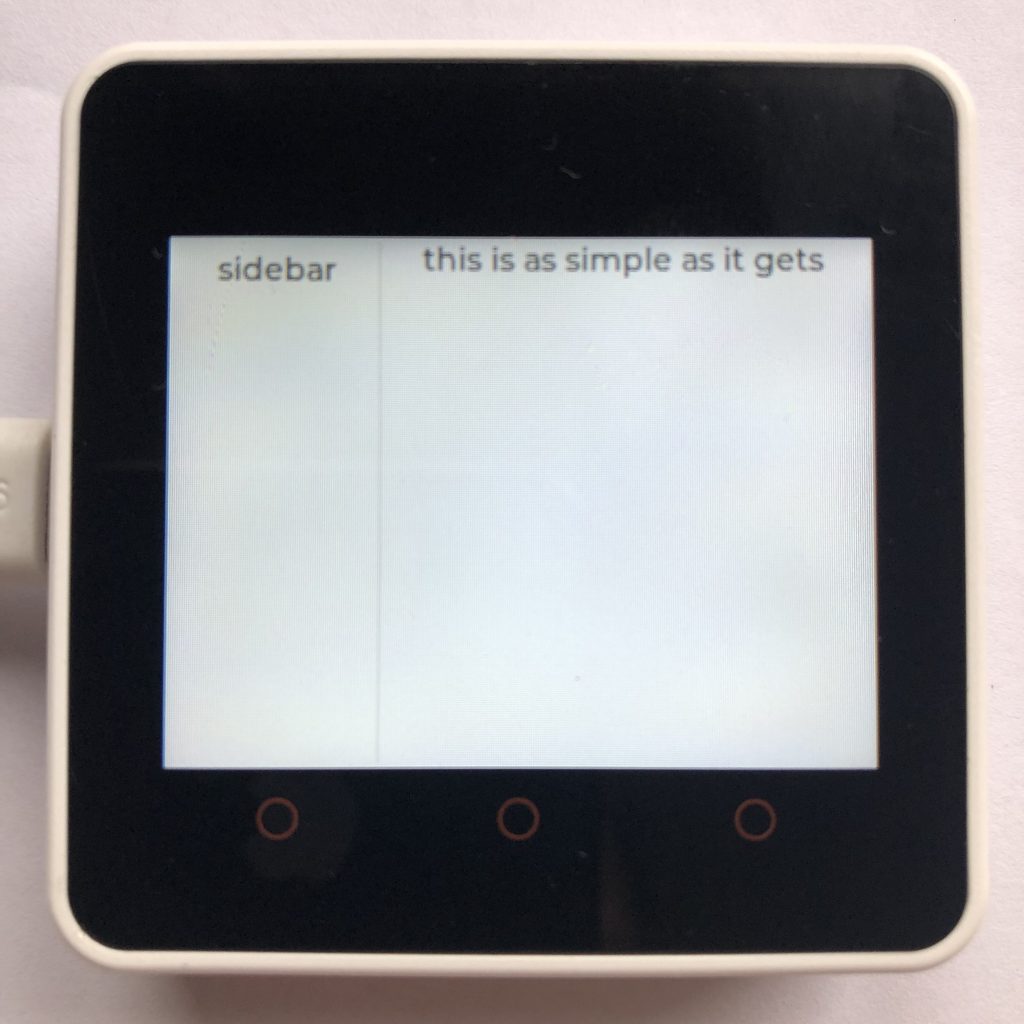
Changing The Tab Button’s Position

The tab buttons don’t always have to be on the top. You can put them all over the place.

import lvgl

tabview = lvgl.tabview( lvgl.scr_act(), lvgl.DIR.LEFT, 30 )
tabview.set_size( 320, 240 )
tabview.center()

firstTab = tabview.add_tab( 'T1' )
firstLabel = lvgl.label( firstTab )
firstLabel.set_text( 'hello this is the first tab' )
firstLabel.center()

secondTab = tabview.add_tab( 'T2' )
secondLabel = lvgl.label( secondTab )
secondLabel.set_text( 'somthing really interesting' )

thirdTab = tabview.add_tab( 'T3' )
thirdLabel = lvgl.label( thirdTab )
thirdLabel.set_text( 'something else' )
micropyhton lvgl tabview that does not scroll

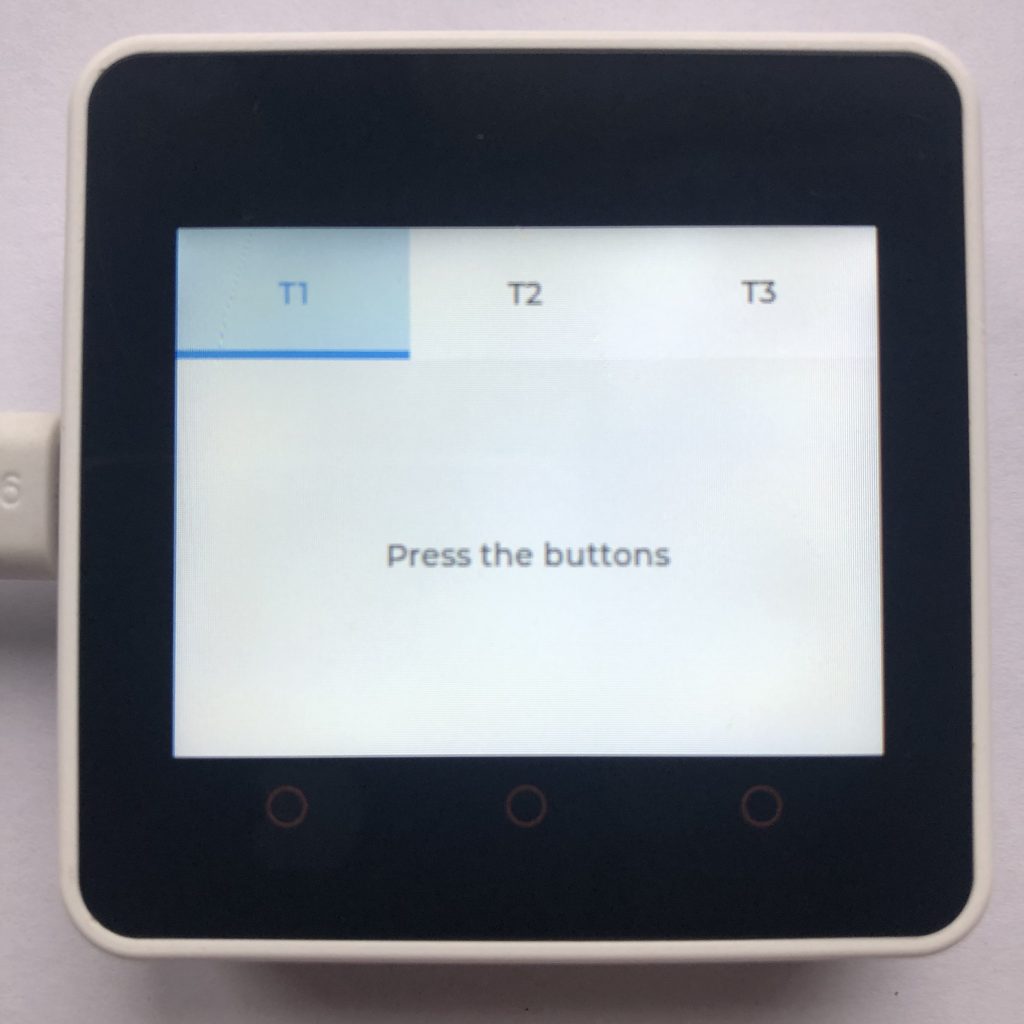
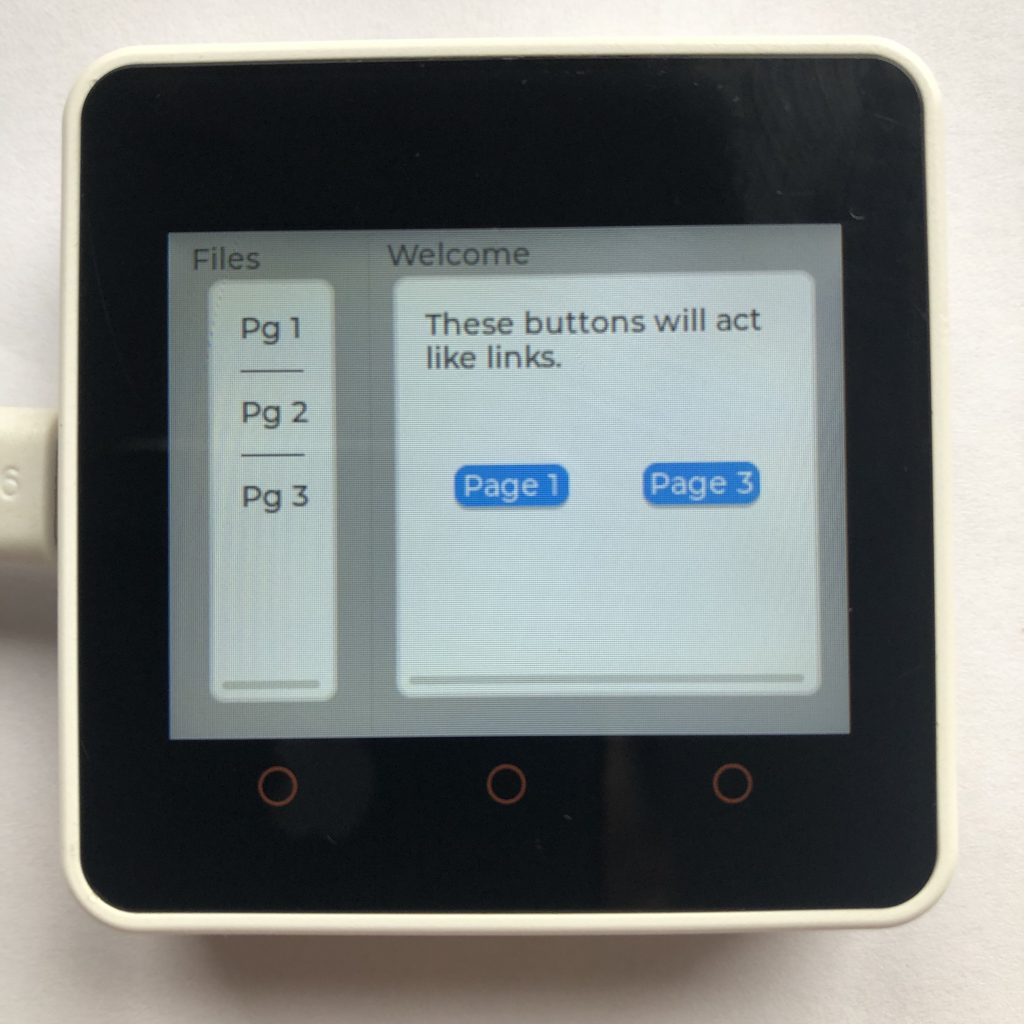
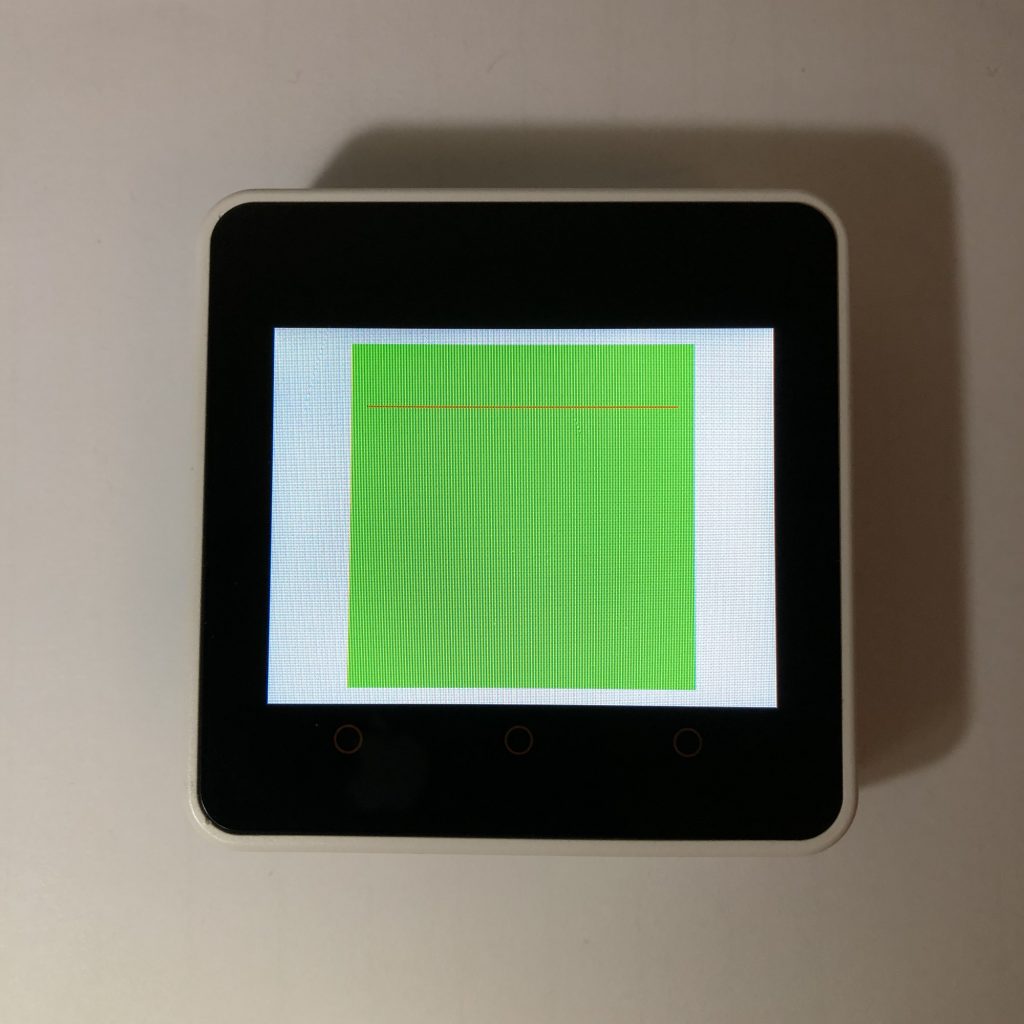
LVGL Tabview That Doesn’t Scroll

In this tabview, scrolling has been removed and it no longer plays an animation when changing screens.

import lvgl

def handler(data):
    anim = lvgl.anim_t.__cast__( data.get_param() )
    if anim:
        anim.time = 0

tabview = lvgl.tabview( lvgl.scr_act(), lvgl.DIR.TOP, 60 )
tabview.set_size( 320, 240 )
tabview.center()
cont = tabview.get_content()
cont.add_event_cb( handler, lvgl.EVENT.SCROLL_BEGIN, None )
cont.clear_flag( lvgl.obj.FLAG.SCROLLABLE )

firstTab = tabview.add_tab( 'T1' )
firstLabel = lvgl.label( firstTab )
firstLabel.set_text( 'Press the buttons' )
firstLabel.center()

secondTab = tabview.add_tab( 'T2' )
secondLabel = lvgl.label( secondTab )
secondLabel.set_text( 'swipping does not work' )

thirdTab = tabview.add_tab( 'T3' )
thirdLabel = lvgl.label( thirdTab )
thirdLabel.set_text( 'tab3 says nothing' )
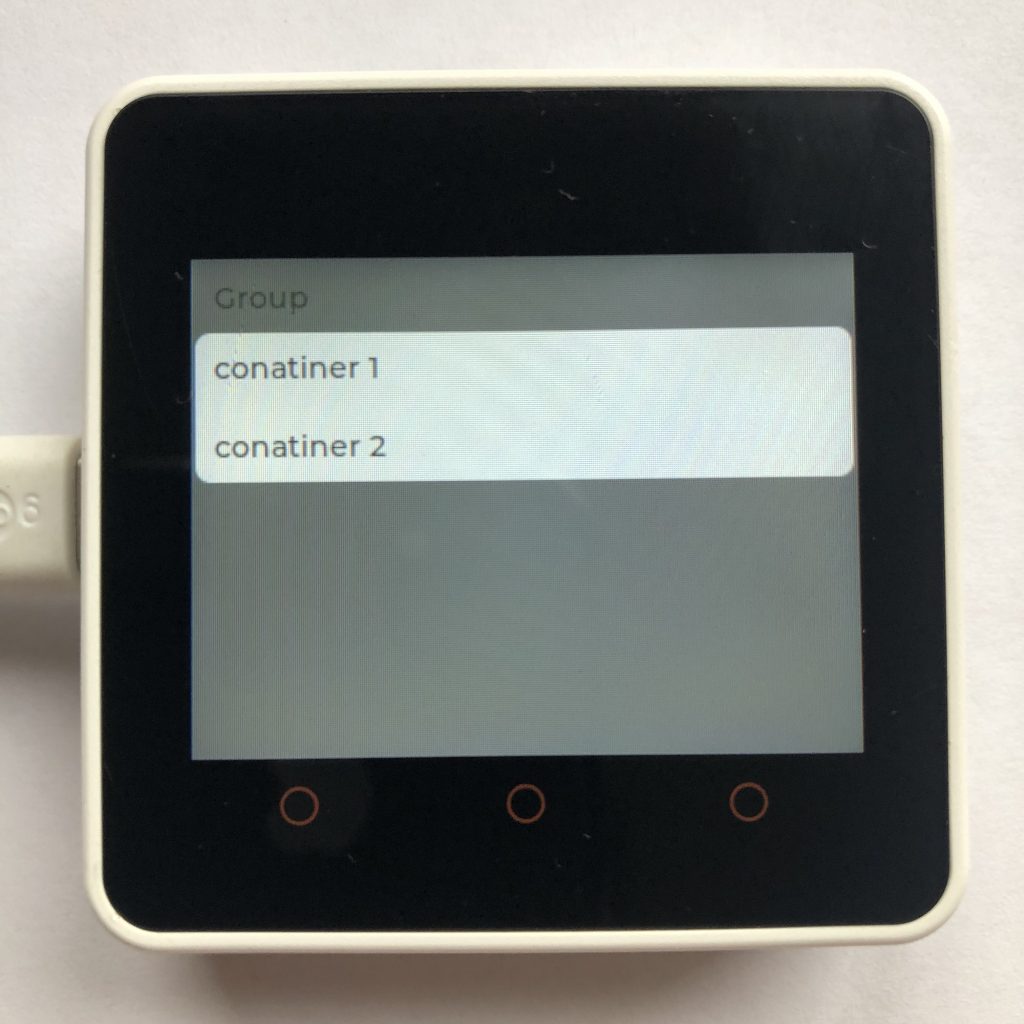
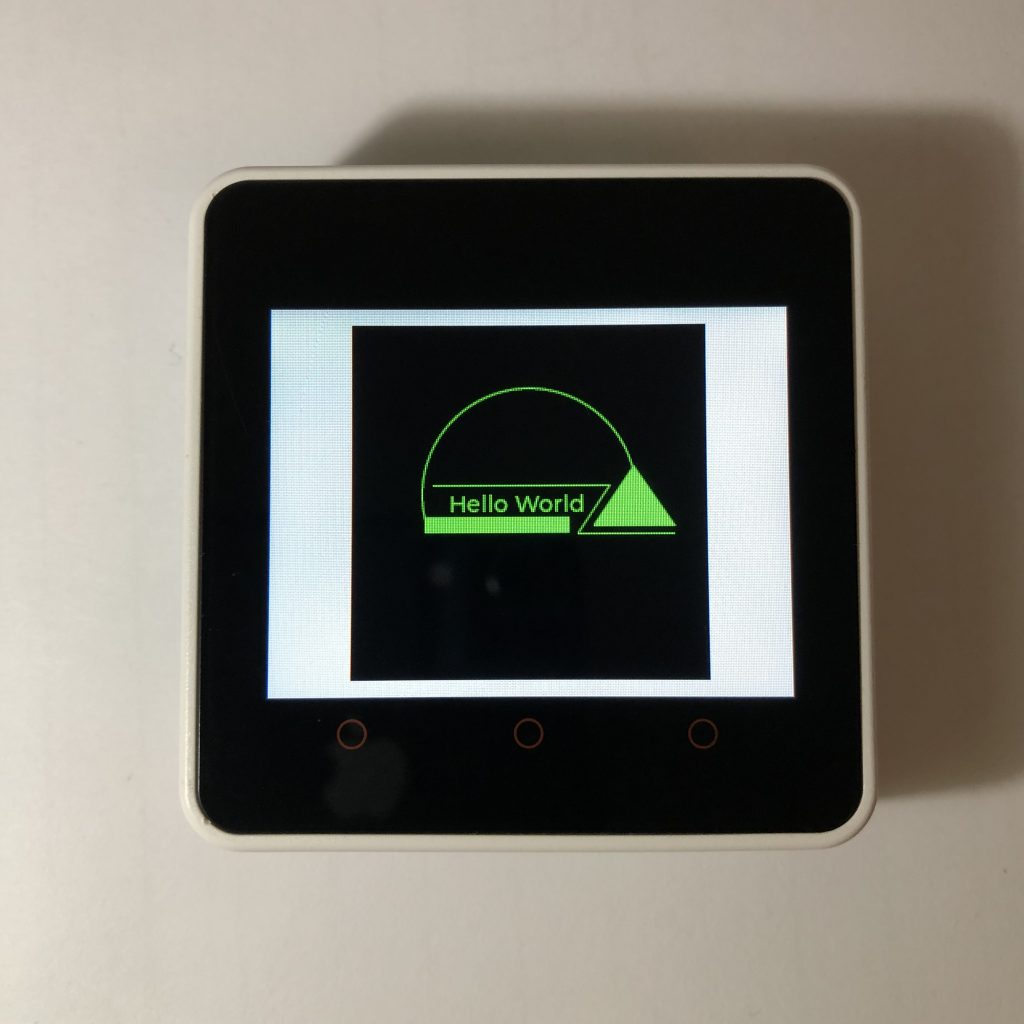
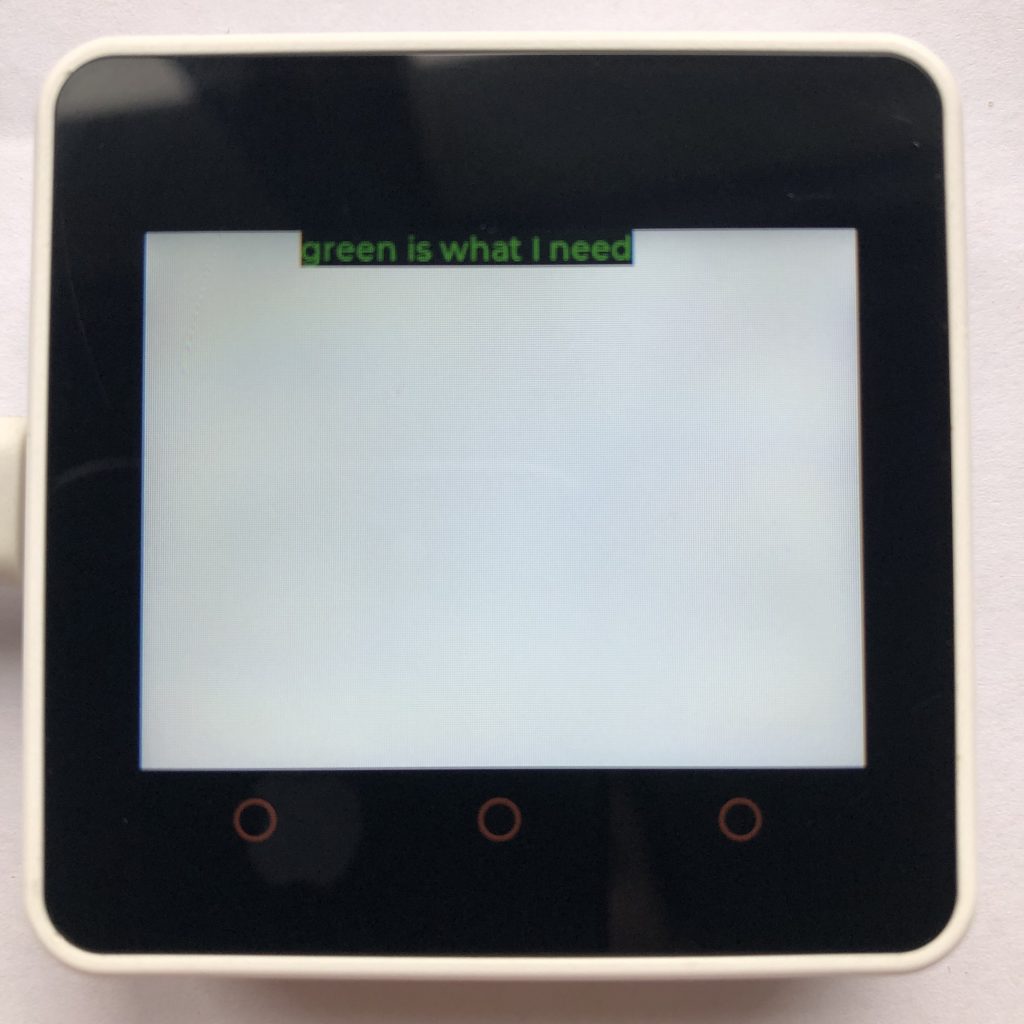
night styled micropython lvgl tabview

Styling Tabviews

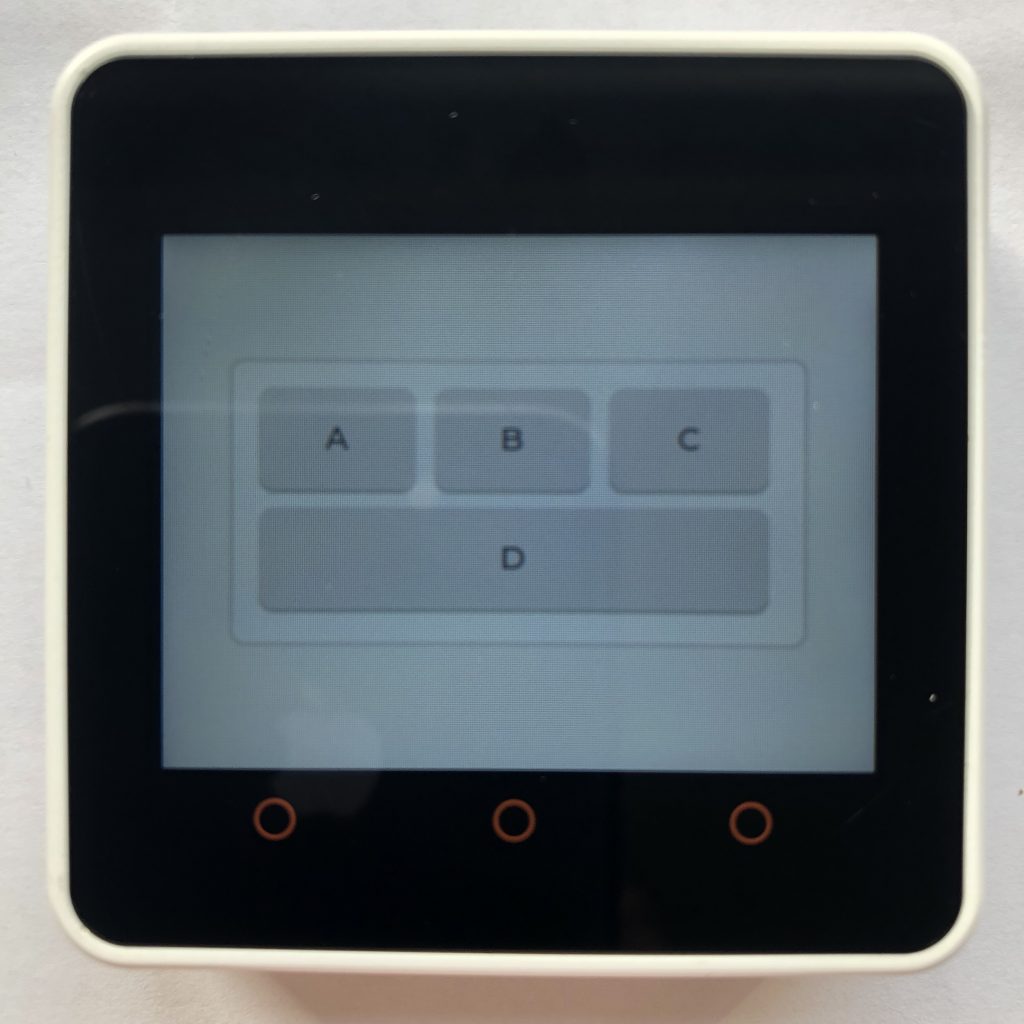
This example just shows how you can style tabviews and their different parts.

import lvgl

tabview = lvgl.tabview( lvgl.scr_act() ,lvgl.DIR.BOTTOM, 40 )
tabview.set_size( 320, 240 )
tabview.center()

firstTab = tabview.add_tab( 'T1' )
firstLabel = lvgl.label( firstTab )
firstLabel.set_text( 'hello this is the first tab' )
firstLabel.center()

secondTab = tabview.add_tab( 'T2' )
secondLabel = lvgl.label( secondTab )
secondLabel.set_text( 'somthing really interesting' )

thirdTab = tabview.add_tab( 'T3' )
thirdLabel = lvgl.label( thirdTab )
thirdLabel.set_text( 'something else' )

cont = tabview.get_content()
tabview.set_style_bg_color( lvgl.color_hex(0x404040), 0 )
cont.set_style_text_color( lvgl.color_hex(0x00FF00), 0 )

btn = tabview.get_tab_btns()
btn.set_style_bg_color( lvgl.color_hex(0x202020), 0)
btn.set_style_text_color( lvgl.color_hex(0x00ff00), 0)
btn.set_style_border_side( lvgl.BORDER_SIDE.TOP, lvgl.PART.ITEMS | lvgl.STATE.CHECKED )
btn.set_style_border_color( lvgl.color_hex(0x008000), lvgl.PART.ITEMS | lvgl.STATE.CHECKED )
btn.set_style_bg_color( lvgl.color_hex(0x006800), lvgl.PART.ITEMS | lvgl.STATE.CHECKED )
btn.set_style_text_color( lvgl.color_hex(0x00FF00), lvgl.PART.ITEMS | lvgl.STATE.CHECKED )

Conclusion of Tabview

Tabviews are great at displaying a lot of information in a small area of your screen. The examples on this page should have giving you a good start on how to create them.

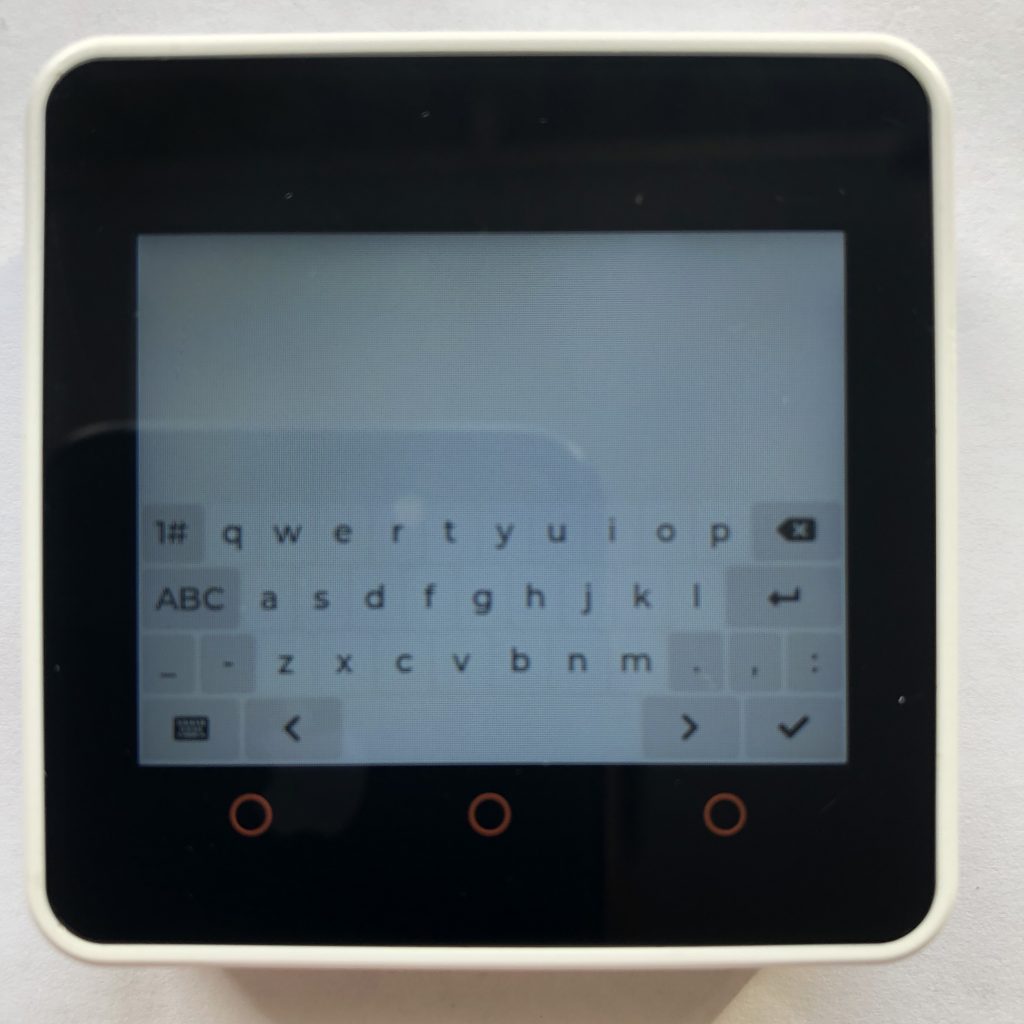
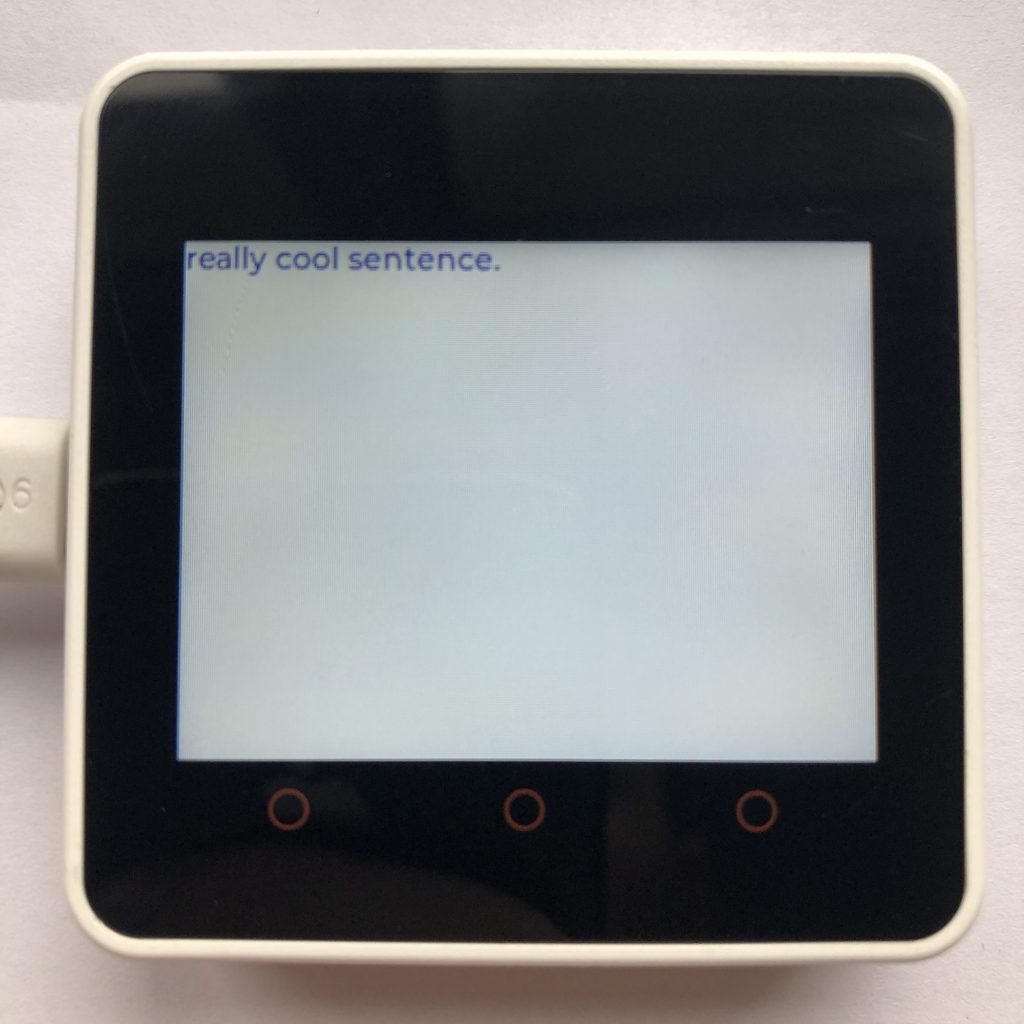
If you liked tabviews you might like micropython lvgl textarea examples.

Filed Under: Micropython

Micropython LVGL Chart Examples

November 14, 2022 by Baxter

What are LVGL charts?

Charts are how you display a lot of data. It could show the local temperature over the last week or the height a plane is flying. This post has examples on creating and modifying charts.

Getting a Screen to Work In Micropython

This is some simple code to get a ili9341 display to work with micropython lvgl. You will want to add it or your own screen code to the beginning of all the examples on this page.

Instead of putting it at the beginning of your code you could just put this code in the micropython boot file. It seems to work best there.

import lvgl

#this is the code that works for my screen:
#from ili9XXX import ili9341
#screen = ili9341(mosi=23, miso=38, clk=18, dc=15, cs=5, invert=True rot=0x10, width=320, height=240 )

# this is some generic code that might work better for you
from ili9XXX import ili9341
screen = ili9341(mosi=23, miso=38, clk=18, dc=15, cs=5,width=320, height=240)

#You will want some touch screen code
#here is what I use
from ft6x36 import ft6x36
touch = ft6x36()
micropython lvgl bar chart

Basic LVGL chart

This code creates a simple bar chart and fills it with a list of numbers.

import lvgl

chart = lvgl.chart( lvgl.scr_act() )
chart.set_size( 300, 200 )
chart.center()
chart.set_type( lvgl.chart.TYPE.BAR )

series = chart.add_series( lvgl.color_hex( 0x0000ff ), lvgl.chart.AXIS.PRIMARY_Y )

values = [ 0, 10, 20, 30, 40, 40, 10, 50, 80, 20 ]
chart.set_ext_y_array( series, values )
micropython lvgl line chart with cursor

Cursor on a Chart

In lvgl you can create a cursor to select a specific point on your chart.

import lvgl

chart = lvgl.chart( lvgl.scr_act() )
chart.set_size( 300, 200 )
chart.center()

cur = chart.add_cursor( lvgl.color_hex( 0x000000 ), lvgl.DIR.LEFT | lvgl.DIR.BOTTOM )

series = chart.add_series( lvgl.color_hex( 0x0000ff ), lvgl.chart.AXIS.PRIMARY_Y )

values = [ 50, 10, 80, 30, 40, 67, 100, 90, 22, 25 ]
chart.set_ext_y_array( series, values )

chart.set_cursor_point( cur, series, 5 )
micropython lvgl scatter plot

LVGL scatter chart

Scatter plots allow you to put points anywhere you want. This code generates random numbers that look like a diagonal bar.

import lvgl

chart = lvgl.chart( lvgl.scr_act() )
chart.set_size( 320, 240 )
chart.center()
chart.set_type( lvgl.chart.TYPE.SCATTER )
chart.set_style_line_width( 0, lvgl.PART.ITEMS )
chart.set_div_line_count( 0, 0 )
chart.set_point_count( 100 )

series = chart.add_series( lvgl.color_hex( 0xFF0000 ), lvgl.chart.AXIS.PRIMARY_Y )


from time import sleep
while True:
    #minipulate all the random numbers so they make a bar
    x_num = lvgl.rand( 0, 100 )
    y_num = lvgl.rand( max( 0, x_num - 30 ), min( x_num + 30, 100 ))
    chart.set_next_value2( series, x_num, y_num )
    sleep( 0.05 )
micropython lvgl chart that is zoomed in horizontally

Zooming in on a chart

LVGL charts allow you to zoom in the data. You can scroll around to see the data that has been zoomed out. This code only zooms in on the horizontal axis.

import lvgl

chart = lvgl.chart( lvgl.scr_act() )
chart.set_size( 300, 200 )
chart.center()
chart.set_point_count( 100 )
chart.set_zoom_x( 512 )


series = chart.add_series( lvgl.color_hex( 0x440055 ), lvgl.chart.AXIS.PRIMARY_Y )

for x in range( 100 ):
    chart.set_next_value( series, lvgl.rand( 0, 100 ))
micropython lvgl chart that automatically scrolls when new data is added

Scrolling data

This code shows how LVGL charts automatically scroll all the data left, when you add more data than a chart can hold.

import lvgl

chart = lvgl.chart( lvgl.scr_act() )
chart.set_size( 200, 200 )
chart.center()
chart.set_point_count( 100 )
chart.set_style_size( 0, 0, lvgl.PART.INDICATOR )
chart.set_axis_tick( lvgl.chart.AXIS.PRIMARY_Y, 10, 5, 11, 9, True, 35 )

series1 = chart.add_series( lvgl.color_hex( 0x005544 ), lvgl.chart.AXIS.PRIMARY_Y )


from time import sleep
while True:
    chart.set_next_value( series1, lvgl.rand( 0, 100 ))
    sleep( 0.05 )

Conclusion of charts

Micropython charts may not be the most exciting thing you can make, but they can be extremely useful if you need to show a lot of data in a small area.

If you liked charts you might like micropython lvgl tabview examples.

Filed Under: Micropython

Micropython LVGL Keyboard Examples

November 10, 2022 by Baxter

What are micropython lvgl keyboards?

Lvgl keyboards allow you to create a complete touchscreen keyboard with a few lines of code. This post will show you five things you can do with them.

Getting a Screen to Work In Micropython

This is some simple code to get a ili9341 display to work with micropython lvgl. You will want to add it or your own screen code to the beginning of all the examples on this page.

Instead of putting it at the beginning of your code you could just put this code in the micropython boot file. It seems to work best there.

import lvgl

#this is the code that works for my screen:
#from ili9XXX import ili9341
#screen = ili9341(mosi=23, miso=38, clk=18, dc=15, cs=5, invert=True rot=0x10, width=320, height=240 )

# this is some generic code that might work better for you
from ili9XXX import ili9341
screen = ili9341(mosi=23, miso=38, clk=18, dc=15, cs=5,width=320, height=240)

#You will want some touch screen code
#here is what I use
from ft6x36 import ft6x36
touch = ft6x36()
micropython lvgl keyboard

The basics of LVGL keyboards

This code will create a keyboard and print the buttons pressed on your shell screen.

import lvgl

#function to print key presses
def handler( data ):
    tar = data.get_target()
    btn = tar.get_selected_btn()
    value = tar.get_btn_text( btn )
    print( value )

#create keyboard and add the handler function
kyb = lvgl.keyboard( lvgl.scr_act() )
kyb.add_event_cb( handler, lvgl.EVENT.VALUE_CHANGED, None )
micropython lvgl number keyboard

Having code control LVGL keyboards

This code will create a keyboard and then every second will switch between the different keyboard modes.

import lvgl

kyb = lvgl.keyboard( lvgl.scr_act() )

from time import sleep
while True:
    kyb.set_mode( lvgl.keyboard.MODE.TEXT_LOWER )
    sleep(1)
    kyb.set_mode( lvgl.keyboard.MODE.TEXT_UPPER )
    sleep(1)
    kyb.set_mode( lvgl.keyboard.MODE.SPECIAL )
    sleep(1)
    kyb.set_mode( lvgl.keyboard.MODE.NUMBER )
    sleep(1)
micropython lvgl custom keyboard

Creating custom keyboards

This code will create a custom lvgl keyboard and print the name of the buttons pressed in your shell.

import lvgl

#list of button texts
customMap = [ '34', 'hi', '\n', 'welcome', '']
#list of button sizes and settings
customCtrl = [ 2 | lvgl.btnmatrix.CTRL.CHECKABLE, lvgl.btnmatrix.CTRL.POPOVER, 1]

#function to print keypresses
def handler( data ):
    tar = data.get_target()
    btn = tar.get_selected_btn()
    value = tar.get_btn_text( btn )
    print( value )


kyb = lvgl.keyboard( lvgl.scr_act() )
kyb.add_event_cb( handler, lvgl.EVENT.VALUE_CHANGED, None )
#add key map were the lower case one used to be
kyb.set_map( lvgl.keyboard.MODE.TEXT_LOWER, customMap, customCtrl )
micropython lvgl styled keyboard

Styling LVGL keyboards

This code creates a keyboard and styles it. As usual, it will print the pressed button to your shell.

import lvgl

#function to print keypresses
def handler( data ):
    tar = data.get_target()
    btn = tar.get_selected_btn()
    value = tar.get_btn_text( btn )
    print( value )

#create black background
kyb_style = lvgl.style_t()
kyb_style.init()
kyb_style.set_bg_color( lvgl.color_hex( 0x000000 ))

#create normal button color
btn_style = lvgl.style_t()
btn_style.init()
btn_style.set_bg_color( lvgl.color_hex( 0x303030 ))
btn_style.set_text_color( lvgl.color_hex( 0x00DF00 ))

#create control button color
ctrl_btn_style = lvgl.style_t()
ctrl_btn_style.init()
ctrl_btn_style.set_bg_color( lvgl.color_hex( 0x101010 ))
ctrl_btn_style.set_text_color( lvgl.color_hex( 0x00FF00 ))

#create and style keyboard
kyb = lvgl.keyboard( lvgl.scr_act() )
kyb.add_event_cb( handler, lvgl.EVENT.VALUE_CHANGED, None )
kyb.add_style( kyb_style, 0 )
kyb.add_style( btn_style, lvgl.PART.ITEMS | lvgl.STATE.DEFAULT )
kyb.add_style( ctrl_btn_style, lvgl.PART.ITEMS | lvgl.STATE.CHECKED )
micropython lvgl textarea and keyboard on bottom Upload

Complete lvgl keyboard example

This code will create a keyboard and textarea and connect them together. If you press the little keyboard button in the corner, the keyboard will disappear.

import lvgl

#the text area, its connect to the keyboard at the bottom
ta = lvgl.textarea( lvgl.scr_act() )
ta.set_size( 320, 100 )
ta.set_pos( 0, 0 )

#the button that makes the keyboard visable
btn = lvgl.btn( lvgl.scr_act() )

def visible( data ):
    kyb.clear_flag( lvgl.obj.FLAG.HIDDEN ) 
    btn.add_flag( lvgl.obj.FLAG.HIDDEN )

#the buttons text
label = lvgl.label( btn )
label.center()
label.set_style_text_color( lvgl.color_hex( 0x000000 ), 0 )
label.set_text( lvgl.SYMBOL.KEYBOARD )

btn.add_flag( lvgl.obj.FLAG.HIDDEN )
btn.set_style_bg_color( lvgl.color_hex( 0xCFCFCF ), 0 )
btn.add_event_cb( visible, lvgl.EVENT.CLICKED, None )
btn.set_size( 48, 31 )
btn.align( lvgl.ALIGN.BOTTOM_LEFT, 0, 0 )


#the keyboard
def handler( data ):
    event = data.get_code()
    key = data.get_target()
    if event == lvgl.EVENT.READY:
        print( ta.get_text() )
    if event == lvgl.EVENT.CANCEL:
        key.add_flag( lvgl.obj.FLAG.HIDDEN )
        btn.clear_flag( lvgl.obj.FLAG.HIDDEN )


kyb = lvgl.keyboard( lvgl.scr_act() )
kyb.add_event_cb( handler, lvgl.EVENT.ALL, None )
kyb.set_popovers( True )
#connect the textarea to keyboard
kyb.set_textarea( ta )

Summery of LVGL keyboards

Keyboards have a lot of uses and are highly customizable. Best of all, they are not to complicated to work with. They can be a great addition to your projects.

If you liked keyboards you might like micropython lvgl chart examples.

Filed Under: Micropython

Micropython LVGL Animation Examples

November 8, 2022 by Baxter

What are LVGL animations?

In code, if you want to change the size of some text or move a button across the screen, it will usually happen instantly. The button will teleport across the screen or the the label will suddenly be large.

LVGL animations allow you to make things look real. You can make a button slide across the screen or a label slowly grow bigger.

Getting a Screen to Work for These Examples

This is some simple code to get a ili9341 display to work with micropython lvgl. You will want to add it or your own screen code to the beginning of all the examples on this page.

Instead of putting it at the beginning of your code you could just put this code in the micropython boot file. It seems to work best there.

import lvgl

#this is the code that works for my screen:
#from ili9XXX import ili9341
#screen = ili9341(mosi=23, miso=38, clk=18, dc=15, cs=5, invert=True rot=0x10, width=320, height=240 )

#this is some generic code that might work better for you
from ili9XXX import ili9341
screen = ili9341(mosi=23, miso=38, clk=18, dc=15, cs=5,width=320, height=240)

#You will probably want some touch screen code
#here is what I use
from ft6x36 import ft6x36
touch = ft6x36()
micropython lvgl label that says hi

Creating an LVGL animation

This animation will move a label from 0x to 200x in 4 seconds (4000 milliseconds). This is the foundation of animations.

import lvgl

label = lvgl.label( lvgl.scr_act() )
label.set_text( 'hi' )

animation = lvgl.anim_t()
animation.init()
animation.set_var( label )
animation.set_time( 4000 )
animation.set_values( 0, 200 )

animation.set_custom_exec_cb( lambda not_used, value : label.set_x( value ))

animation.start() 
micropython lvgl label that says hi

Animation controls

Animations have a lot of settings you can modify. These are the most important ones.

import lvgl

label = lvgl.label( lvgl.scr_act() )
label.set_text( 'hi' )

animation = lvgl.anim_t()
animation.init()
animation.set_var( label )
animation.set_values( 0, 100 )
animation.set_time( 1000 )

animation.set_custom_exec_cb( lambda not_used, value : label.set_x( value ))

#wait half a second before starting animation
animation.set_delay( 500 )

#play animation backward for 1 second after first play
animation.set_playback_time( 1000 )

#repeat animation infinitely 
animation.set_repeat_count( lvgl.ANIM_REPEAT.INFINITE )
animation.set_repeat_delay( 500 )

animation.start()
three micropython lvgl labels that say hello 1,hello 2,helllo 3

Using speed instead of time

If you wanted to, LVGL allows you to set the speed of an animations instead of the time of an animation. Sometimes this will simplify your code.

import lvgl

#create the slow short label
label1 = lvgl.label( lvgl.scr_act() )
label1.set_text( 'hello 1' )
label1.align( lvgl.ALIGN.CENTER, 0, -50 )

anim1 = lvgl.anim_t()
anim1.init()
anim1.set_var( label1 )
anim1.set_time( lvgl.anim_speed_to_time( 20, 0, 100 ))
anim1.set_values( 0, 100 )
anim1.set_repeat_count( lvgl.ANIM_REPEAT.INFINITE )
anim1.set_repeat_delay( 2000 )
anim1.set_custom_exec_cb( lambda not_used, value : label1.set_x( value ))


#create the fast long label
label2 = lvgl.label( lvgl.scr_act() )
label2.set_text('hello 2')
label2.align(lvgl.ALIGN.CENTER,-100,0)

anim2 = lvgl.anim_t()
anim2.init()
anim2.set_var( label2 )
anim2.set_time( lvgl.anim_speed_to_time( 40, -100, 100 ))
anim2.set_values( -100, 100 )
anim2.set_custom_exec_cb( lambda not_used, value : label2.set_x( value ))
anim2.set_repeat_count( lvgl.ANIM_REPEAT.INFINITE )
anim2.set_repeat_delay( 2000 )


#Create the fast short label
label3 = lvgl.label( lvgl.scr_act() )
label3.set_text( 'hello 3' )
label3.align( lvgl.ALIGN.CENTER, -100, 50 )

anim3 = lvgl.anim_t()
anim3.init()
anim3.set_var( label3 )
anim3.set_time( lvgl.anim_speed_to_time( 40, -100, 0 ))
anim3.set_values( -100, 0)
anim3.set_custom_exec_cb( lambda not_used, value : label3.set_x( value ))
anim3.set_repeat_count( lvgl.ANIM_REPEAT.INFINITE )
anim3.set_repeat_delay( lvgl.anim_speed_to_time( 40, -100, 0) + 2000 )


anim1.start()
anim2.start()
anim3.start()
Four micropython lvgl labels that say hello 1, hello 2, hello 3,hello 4

LVGL animation paths

Paths will make you animations look nicer. They modify your animation’s speed, like starting slow then speeding up.

This code shows three unique paths you can use.

import lvgl

#normal animation
label1 = lvgl.label( lvgl.scr_act() )
label1.set_text( 'hello 1' )
label1.align( lvgl.ALIGN.CENTER, -70, -60 )

anim1 = lvgl.anim_t()
anim1.init()
anim1.set_var( label1 )
anim1.set_time( 1000 )
anim1.set_values( -70, 20 )
anim1.set_repeat_count( lvgl.ANIM_REPEAT.INFINITE )
anim1.set_repeat_delay( 2000 )
anim1.set_custom_exec_cb( lambda not_used, value : label1.set_x( value ))


#this animation bounces the label when it ends
label2 = lvgl.label( lvgl.scr_act() )
label2.set_text( 'hello 2' )
label2.align( lvgl.ALIGN.CENTER, 30, -60 )

anim2 = lvgl.anim_t()
anim2.init()
anim2.set_var( label2 )
anim2.set_time( 1000 )
anim2.set_values( 30, 120 )
anim2.set_custom_exec_cb( lambda not_used, value : label2.set_x( value ))
anim2.set_repeat_count( lvgl.ANIM_REPEAT.INFINITE )
anim2.set_repeat_delay( 2000 )
anim2.set_path_cb( lvgl.anim_t.path_bounce )


#this animation goes past the end point then comes back
label3 = lvgl.label( lvgl.scr_act() )
label3.set_text( 'hello 3' )
label3.align( lvgl.ALIGN.CENTER, -70, 60 )

anim3 = lvgl.anim_t()
anim3.init()
anim3.set_var( label3 )
anim3.set_time( 1000 )
anim3.set_values( -70, 20 )
anim3.set_custom_exec_cb( lambda not_used, value : label3.set_x( value ))
anim3.set_repeat_count( lvgl.ANIM_REPEAT.INFINITE )
anim3.set_repeat_delay( 2000 )
anim3.set_path_cb( lvgl.anim_t.path_overshoot )


#this animation slowly starts and then slowly ends
label4 = lvgl.label( lvgl.scr_act() )
label4.set_text( 'hello 4' )
label4.align( lvgl.ALIGN.CENTER, 30, 60 )

anim4 = lvgl.anim_t()
anim4.init()
anim4.set_var( label4 )
anim4.set_time( 1000 )
anim4.set_values( 30, 120 )
anim4.set_custom_exec_cb( lambda not_used, value : label4.set_x( value ))
anim4.set_repeat_count( lvgl.ANIM_REPEAT.INFINITE )
anim4.set_repeat_delay( 2000 )
anim4.set_path_cb( lvgl.anim_t.path_ease_in_out )


anim1.start()
anim2.start()
anim3.start()
anim4.start()
micropython lvgl blue button

LVGL animation timelines

Timelines allow you to connect multiple animations together so controlling them is easier.

import lvgl

button = lvgl.btn( lvgl.scr_act() )
button.set_size( 50, 20 )
button.center()

anim1 = lvgl.anim_t()
anim1.init()
anim1.set_var( button )
anim1.set_time( 1000 )
anim1.set_values( -100, 100 )
anim1.set_custom_exec_cb( lambda not_used, value : button.set_x( value ))

anim2 = lvgl.anim_t()
anim2.init()
anim2.set_var( button )
anim2.set_time( 150 )
anim2.set_values( 100, 30 )
anim2.set_custom_exec_cb( lambda not_used, value : button.set_x( value ))

anim3 = lvgl.anim_t()
anim3.init()
anim3.set_var( button )
anim3.set_time( 2000 )
anim3.set_values( 30, -100 )
anim3.set_custom_exec_cb( lambda not_used, value : button.set_x( value ))

time = lvgl.anim_timeline_create()

lvgl.anim_timeline_add( time, 0, anim1 )
lvgl.anim_timeline_add( time, 1000, anim2 )
lvgl.anim_timeline_add( time, 1150, anim3 )

lvgl.anim_timeline_start( time )

Summery of Micropython LVGL animations

Animations are how you make your projects look nicer. They aren’t required for your project to work, but once you have got your project working they can take it to the next level.

If you liked animations you might also like micropython lvgl keyboard examples.

Filed Under: Micropython

LVGL Micropython Menu Examples

November 4, 2022 by Baxter

Micropython LVGL Menu Demo with pages and sidebar

What This Tutorial Will Teach You…

If you want to create a system that has pages that you can move around in, like a browser or file system, then menus are what you want.

This post is a tutorial on how to create menus and edit their pages.

Getting a Screen to Work In Micropython

This is some simple code to get a ili9341 display to work with micropython lvgl. You will want to add it or your own screen code to the beginning of all the examples on this page.

Instead of putting it at the beginning of your code you could just put this code in the micropython boot file. It seems to work best there.

import lvgl

#this is the code that works for my screen:
#from ili9XXX import ili9341
#screen = ili9341(mosi=23, miso=38, clk=18, dc=15, cs=5, invert=True rot=0x10, width=320, height=240 )

# this is some generic code that might work better for you
from ili9XXX import ili9341
screen = ili9341(mosi=23, miso=38, clk=18, dc=15, cs=5,width=320, height=240)

#You will want some touch screen code
#here is what I use
from ft6x36 import ft6x36
touch = ft6x36()
LVGL Micropython simple menu

Simple Menu

This code creates a menu with a page and a sidebar. It shows the basics of creating menus.

import lvgl

Menu = lvgl.menu( lvgl.scr_act() )
Menu.set_size( 320, 240 )

#create the main page
Home_Page = lvgl.menu_page( Menu, None )
label = lvgl.label( Home_Page )
label.set_text( 'this is as simple as it gets' )

#create a sidebar
Side_Page = lvgl.menu_page( Menu, None )
label2 = lvgl.label( Side_Page )
label2.set_text( 'sidebar' )

#make them visable
Menu.set_page( Home_Page )
Menu.set_sidebar_page( Side_Page )
LVGL Micropython Menu Formatting  example

Menu Sections, Containers, and Separators

Menus have some functions for formatting parts of the screen. They are Sections, Containers, and Separators.

They seem to use the Flexbox layout which is a powerful tool, but can be tricky to use.

import lvgl

Menu = lvgl.menu( lvgl.scr_act() )
Menu.set_size( 320, 240 )
Menu.set_style_bg_color( lvgl.color_hex( 0x505050 ), 0 )

#create the page
Home_Page = lvgl.menu_page( Menu, None )

#create some normal text
cont = lvgl.menu_cont( Home_Page )
title = lvgl.label( cont )
title.set_text( 'Group' )

#create a section
section = lvgl.menu_section( Home_Page )

#create some text in the section
container1 = lvgl.menu_cont( section )
label1 = lvgl.label( container1 )
label1.set_text( 'conatiner 1' )

lvgl.menu_separator( section )

container2 = lvgl.menu_cont( section )
label2 = lvgl.label( container2 )
label2.set_text( 'conatiner 2' )

Menu.set_page( Home_Page )
Micropyhton LVGL Menu with click me text button at top

Changing Pages

The whole point of a menu is to show multiple pages. Here is the best way to change which page you show.

import lvgl

Menu = lvgl.menu( lvgl.scr_act() )
Menu.set_size( 320, 240 )

#create the main page
Main_Page = lvgl.menu_page( Menu, None )
label = lvgl.label( Main_Page )
label.set_text( 'CLick Me' )
label.set_size( 100, 50 )

#create another page
Other_Page = lvgl.menu_page( Menu, None )
label2 = lvgl.label( Other_Page )
label2.set_text( 'You found page two' )

#if text clicked load Other_Page
Menu.set_load_page_event( label, Other_Page )

#make Main_Page visable
Menu.set_page( Main_Page )
LVGL micropython Menu with blue button on it

Loading Pages

Another way you can change the current page is to set it manually with the .set_page() function. This gets a little more complicated but gives you more choices.

import lvgl

Menu = lvgl.menu( lvgl.scr_act() )
Menu.set_size( 320, 240 )

#create destination page
Des_Page = lvgl.menu_page( Menu, None )
label2 = lvgl.label( Des_Page )
label2.set_text( 'you found page two' )

#create the main page
Main_Page = lvgl.menu_page( Menu, None )
btn = lvgl.btn( Main_Page )
btn.set_size( 100, 100 )

def handler( data ):
        Menu.set_page( Des_Page )
        
btn.add_event_cb( handler, lvgl.EVENT.PRESSED, None )

#make Home_Page visable
Menu.set_page( Main_Page )
LVGL micropyhton demo menu with pages and sidebar

Simple Menu System

This is a simple menu system to give you an idea of what menus can do, but if you build one, I would suggest putting more into the design than I did.

import lvgl

Menu = lvgl.menu( lvgl.scr_act() )
Menu.set_size( 320, 240 )
Menu.set_style_bg_color( lvgl.color_hex( 0xA0A0A0 ), 0 )

#Main page
Main_pg = lvgl.menu_page( Menu, 'Welcome' )

#Main page content
section = lvgl.obj( Main_pg )
section.set_size( 200, 200 )

intro = lvgl.label( section )
intro.set_width( 172 )
intro.set_long_mode( lvgl.label.LONG.WRAP )
intro.set_flex_grow( 1 )
intro.set_text( 'These buttons will act like links.' )

link1 = lvgl.btn( section )
link1.set_size( 55, 20 )
link1.align( lvgl.ALIGN.CENTER, -45, 0 )
link1_label = lvgl.label( link1 )
link1_label.set_text( 'Page 1' )
link1_label.center()

link2 = lvgl.btn( section )
link2.set_size( 55, 20 )
link2.align( lvgl.ALIGN.CENTER, 45, 0)
link2_label = lvgl.label( link2 )
link2_label.set_text( 'Page 3' )
link2_label.center()

#Main page side bar
Main_Sidebar = lvgl.menu_page( Menu, 'Files' )
Sidebar_section = lvgl.obj( Main_Sidebar )
Sidebar_section.set_size( 60, 200 )

Page_link1 = lvgl.label( Sidebar_section )
Page_link1.set_text( 'Pg 1' )

seperator = lvgl.line( Sidebar_section )
pt = [{'x':0,'y': 28},{'x': 30, 'y': 28}]
seperator.set_points( pt, 2 )

Page_link2 = lvgl.label( Sidebar_section )
Page_link2.set_text( 'Pg 2' )
Page_link2.set_y( 40 )

seperator = lvgl.line(Sidebar_section)
pt = [{'x':0,'y': 68},{'x': 30, 'y': 68}]
seperator.set_points( pt,2 )

Page_link3 = lvgl.label( Sidebar_section )
Page_link3.set_text( 'Pg 3' )
Page_link3.set_y( 80 )
#End of main page

#Page 1
Page1 = lvgl.menu_page( Menu, None )
Page1_label = lvgl.label( Page1 )
Page1_label.set_text( 'This is page 1' )

#page2
Page2 = lvgl.menu_page( Menu, None )
Page2_label = lvgl.label( Page2 )
Page2_label.set_text( 'This is page 2' )

#page3
Page3 = lvgl.menu_page( Menu, None )
Page3_label = lvgl.label( Page3 )
Page3_label.set_text( 'This is page 3' )

#setup all the links
Menu.set_load_page_event( link1, Page1 )
Menu.set_load_page_event( link2, Page3 )
Menu.set_load_page_event( Page_link1, Page1 )
Menu.set_load_page_event( Page_link2, Page2 )
Menu.set_load_page_event( Page_link3, Page3 )

#start Main Page
Menu.set_page( Main_pg )
Menu.set_sidebar_page( Main_Sidebar )

In Conclusion

You should now have a idea of how to create menus in lvgl and some of the things you can do with them.

If you liked menus then micropython lvgl animation examples might interest you.

Filed Under: Micropython

Micropython LVGL Canvas Examples

October 20, 2022 by Baxter

What Are Canvases?

Canvas allow you to draw on your screen. You can control individual pixels, draw shapes, write text, and do much more.

Getting the Screen to Work In Micropython

This is some simple code to get a ili9341 display to work with micropython lvgl. You will want to add it or your own screen code to the beginning of all the examples on this page.

Instead of putting it at the beginning you could just put the code in the micropython boot file. It seems to work best there.

import lvgl

#this is the code that works for my screen:
#from ili9XXX import ili9341
#screen = ili9341(mosi=23, miso=38, clk=18, dc=15, cs=5, invert=True rot=0x10, width=320, height=240 )

# this is some generic code that might work better for you
from ili9XXX import ili9341
screen = ili9341(mosi=23, miso=38, clk=18, dc=15, cs=5,width=320, height=240)

#You will probably want some touch screen code
#here is what I use
from ft6x36 import ft6x36
touch = ft6x36()
lvgl canvas with red line on it

Getting a canvas to work

This code will create a canvas and put a little line on it. This is a great place to start with canvases.

import lvgl

width = 220
height = 220
size_of_color = 4

buffer = bytearray(width*height*size_of_color)

canvas = lvgl.canvas(lvgl.scr_act())
canvas.set_buffer(buffer,width,height,lvgl.img.CF.TRUE_COLOR)
canvas.center()

canvas.fill_bg(lvgl.color_hex(0x00ff00), 255)
for x in range(200):
    canvas.set_px_color(x+10,40,lvgl.color_hex(0xff0000))
lvgl canvas with green shapes on it and the text ''Hello World"

Canvas shapes

The whole point of canvases is to draw things. These are the main draw routes you will want to know.

import lvgl

width = 220
height = 220
size_of_color = 4

buffer = bytearray(width*height*size_of_color)

canvas = lvgl.canvas(lvgl.scr_act())
canvas.set_buffer(buffer,width,height,lvgl.img.CF.TRUE_COLOR)
canvas.center()


#the rectangle
rect = lvgl.draw_rect_dsc_t()
rect.init()
rect.bg_color = lvgl.color_hex(0x00ff00)

canvas.draw_rect(45,120,90,10,rect)


#the arc
arc = lvgl.draw_arc_dsc_t()
arc.init()
arc.color = lvgl.color_hex(0x00ff00)

canvas.draw_arc(110,106,67,160,0,arc)


#the text
label = lvgl.draw_label_dsc_t()
label.init()
label.color = lvgl.color_hex(0x00ff00)

canvas.draw_text(60,104,100,label,'Hello World')


#the line
line = lvgl.draw_line_dsc_t()
line.init()
line.color = lvgl.color_hex(0x00ff00)

points = [
    {'x':50, 'y':100},
    {'x':160, 'y':100},
    {'x':140, 'y':130},
    {'x':200, 'y':130}
    ]

canvas.draw_line(points,4,line)


#the polygon aka triangle
#polygons use the rectangle draw function 
ply = lvgl.draw_rect_dsc_t()
ply.init()
ply.bg_color = lvgl.color_hex(0x00ff00)

points = [
    {'x':150, 'y':125},
    {'x':200, 'y':125},
    {'x':175, 'y':88}
    ]

canvas.draw_polygon(points,3,ply)
lvgl canvas with blue box in upper-right corner

Making things move

Canvases allow you to make things move. This code moves a box around the screen.

import lvgl

width = 220
height = 220
size_of_color = 4

buffer = bytearray(width*height*size_of_color)

canvas = lvgl.canvas(lvgl.scr_act())
canvas.set_buffer(buffer,width,height,lvgl.img.CF.TRUE_COLOR)
canvas.center()


draw_style = lvgl.draw_rect_dsc_t()
draw_style.init()
draw_style.bg_color = lvgl.color_hex(0x0000ff)

draw_style_black = lvgl.draw_rect_dsc_t()
draw_style_black.init()
draw_style_black.bg_color = lvgl.color_hex(0x000000)


old_x = 50

def move(x):
    global old_x
    canvas.draw_rect(old_x,20,40,20,draw_style_black)
    canvas.draw_rect(x,20,40,20,draw_style)
    old_x = x
    
import time
while True:
    for x in range(100):
        move(x+50)
        time.sleep(0.1)
lvgl canvas with red box that is rotated 45 degrees

Rotating a canvas

Canvases can be used to edit images. This code takes a picture of the canvas then rotates that picture on the canvas.

import lvgl

width = 220
height = 220
size_of_color = 4

buffer = bytearray(width*height*size_of_color)

canvas = lvgl.canvas(lvgl.scr_act())
canvas.set_buffer(buffer,width,height,lvgl.img.CF.TRUE_COLOR)
canvas.center()

rect = lvgl.draw_rect_dsc_t()
rect.init()
rect.bg_color = lvgl.color_hex(0xFF0000)
rect.radius = 15

canvas.draw_rect(60,85,100,50,rect)

temp = lvgl.img_dsc_t()
temp.header.w = 220
temp.header.h = 220
temp.data_size = len(buffer)
temp.header.cf = lvgl.img.CF.TRUE_COLOR
temp.data = buffer[:]

import time
time.sleep(2)

canvas.transform(temp,450,256,0,0,110,110,True)
lvgl canvas with red box that is half blurred

Blurring a canvas

Blurring is another effect that canvases help you do. This code blurs half of a rectangle.

import lvgl

width = 220
height = 220
size_of_color = 4

buffer = bytearray(width*height*size_of_color)

canvas = lvgl.canvas(lvgl.scr_act())
canvas.set_buffer(buffer,width,height,lvgl.img.CF.TRUE_COLOR)
canvas.center()

rect = lvgl.draw_rect_dsc_t()
rect.init()
rect.bg_color = lvgl.color_hex(0xFF0000)
rect.radius = 15

canvas.draw_rect(60,85,100,50,rect)
area = lvgl.area_t()
area.set_width(100)
area.set_height(150)
area.move(10,35)


canvas.blur_hor(area,20)
canvas.blur_ver(area,20)

What you have learned

This post should give you some good practice with micropython canvases. They can be hard to work with, but in the end, they are extremely useful.

If you liked canvases you might like micropython lvgl menus.

Filed Under: Micropython

Micropython LVGL Meter Examples

October 10, 2022 by Baxter

What you will learn

When creating a GUI, meters are extremely useful. LVGL meters take a bit of practice to work with, so this page contains some examples of the things you will want to know.

Getting the Screen to Work In Micropython

This is some simple code to get a ili9341 display to work with micropython lvgl. You will want to add it or your own screen code to the beginning of all the examples on this page.

Instead of putting it at the beginning you could just put the code in the micropython boot file. It seems to work best there.

import lvgl

#this is the code that works for my screen:
#from ili9XXX import ili9341
#screen = ili9341(mosi=23, miso=38, clk=18, dc=15, cs=5, invert=True rot=0x10, width=320, height=240 )

# this is some generic code that might work better for you
from ili9XXX import ili9341
screen = ili9341(mosi=23, miso=38, clk=18, dc=15, cs=5,width=320, height=240)

#You will probably want some touch screen code
#here is what I use
from ft6x36 import ft6x36
touch = ft6x36()
LVGL meter pointing at 80

Simple LVGL Meters

This is a simple example on creating and using meters. It will randomly move the hand around.

import lvgl

meter = lvgl.meter(lvgl.scr_act())
meter.set_size(200,200)
scale = meter.add_scale()
meter.set_scale_ticks(scale,51,2,10,lvgl.color_black())
meter.set_scale_major_ticks(scale,5,4,15,lvgl.color_black(),10)
meter.center()

arm = lvgl.meter_indicator_t()
arm = meter.add_needle_line(scale,2,lvgl.color_hex(0x000000),0)

import time
import random

while True:
    time.sleep(0.5)
    number = random.randint(0,100)
    meter.set_indicator_value(arm,number)
LVGL face clock made from meter

Meter Clock

If you want to make a old style clock, meters are the perfect way to do it. Here is a simple clock I made.

import lvgl

meter = lvgl.meter(lvgl.scr_act())
meter.set_size(240,240)
meter.center()

#minute and second scale
min_scale = meter.add_scale()
meter.set_scale_ticks(min_scale,60,2,8,lvgl.color_black())
meter.set_scale_range(min_scale,1,60,354,270)


#hour scale
hour_scale = meter.add_scale()
meter.set_scale_ticks(hour_scale,12,2,10,lvgl.color_black())
meter.set_scale_major_ticks(hour_scale,1,5,8,lvgl.color_black(),12)
meter.set_scale_range(hour_scale,1,12,330,300)

sec_ind = lvgl.meter_indicator_t()
sec_ind = meter.add_needle_line(min_scale,2,lvgl.color_hex(0x000000),-14)

min_ind = lvgl.meter_indicator_t()
min_ind = meter.add_needle_line(min_scale,2,lvgl.color_hex(0x000000),-20)

hour_ind = lvgl.meter_indicator_t()
hour_ind = meter.add_needle_line(hour_scale,4,lvgl.color_hex(0x000000),-70)

import time
hour = 3
minute = 20
sec = 1
while True:
    time.sleep(1)
    sec += 1
    if sec >= 61:
        sec = 1
        minute += 1
        if minute >= 61:
            minute = 1
            hour += 1
            if hour >= 13:
                hour = 1
    meter.set_indicator_value(sec_ind,sec)
    meter.set_indicator_value(min_ind,minute)
    meter.set_indicator_value(hour_ind,hour)
LVGL meter with blue shaded area

Large Fill Meter

This meter shades the numbers you choose. It would be great if you where creating timer.

import lvgl

meter = lvgl.meter(lvgl.scr_act())
meter.set_size(240,240)
meter.center()

scale = meter.add_scale()
meter.set_scale_ticks(scale,101,2,8,lvgl.color_black())
meter.set_scale_major_ticks(scale,10,4,15,lvgl.color_black(),10)

ind = lvgl.meter_indicator_t()
ind = meter.add_arc(scale,120,lvgl.color_hex(0x0077ff),10)


import time
while True:
    for x in range(101):
        meter.set_indicator_end_value(ind, x)
        time.sleep(0.1)
    for x in range(100,-1,-1):
        meter.set_indicator_end_value(ind, x)
        time.sleep(0.1)
LVGL meter with multicolored bar

Color Changing Meter

This meter has a bar that changes color as it moves forward. This would make a good speedometer.

import lvgl

meter = lvgl.meter(lvgl.scr_act())
meter.set_size(240,240)
meter.center()

scale = meter.add_scale()
meter.set_scale_ticks(scale,101,2,8,lvgl.color_black())
meter.set_scale_major_ticks(scale,10,2,12,lvgl.color_black(),10)

green = lvgl.meter_indicator_t()
green = meter.add_arc(scale,12,lvgl.color_hex(0x00FF00),0)
yellow = lvgl.meter_indicator_t()
yellow = meter.add_arc(scale,12,lvgl.color_hex(0xF7FF47),0)
red = lvgl.meter_indicator_t()
red = meter.add_arc(scale,12,lvgl.color_hex(0xFF0000),0)

meter.set_indicator_start_value(green, 0)
meter.set_indicator_end_value(green, 0)

meter.set_indicator_start_value(yellow, 50)
meter.set_indicator_end_value(yellow, 50)

meter.set_indicator_start_value(red, 80)
meter.set_indicator_end_value(red, 80)


def write_pos(pos):
    if pos > 80:
        meter.set_indicator_end_value(green, 50)
        meter.set_indicator_end_value(yellow, 80)
        meter.set_indicator_end_value(red, pos)
    elif pos < 50:
        meter.set_indicator_end_value(green, pos)
        meter.set_indicator_end_value(yellow, 50)
        meter.set_indicator_end_value(red, 80)    
    else:
        meter.set_indicator_end_value(green, 50)
        meter.set_indicator_end_value(yellow, pos)
        meter.set_indicator_end_value(red, 80)
        

import time
while True:
    for x in range(101):
        write_pos(x)
        time.sleep(0.1)
    for x in range(100,-1,-1):
        write_pos(x)
        time.sleep(0.1)
LVGL meter with green tick line

Tick Line Changing

Meters allow you to change the tick lines to point to a number. This can make some nice dials, but from my experience, they are really slow and bog down your microcontroller.

import lvgl

meter = lvgl.meter(lvgl.scr_act())
meter.set_size(240,240)
meter.center()

scale = meter.add_scale()
meter.set_scale_ticks(scale,61,2,8,lvgl.color_black())
meter.set_scale_major_ticks(scale,10,4,12,lvgl.color_black(),10)


lines = lvgl.meter_indicator_t()
lines  = meter.add_scale_lines(scale,lvgl.color_hex(0x00ff00),lvgl.color_hex(0x00ff00),False, 4)

import time
while True:
    for x in range(99):
        meter.set_indicator_start_value(lines, x)
        meter.set_indicator_end_value(lines, x+1)
        time.sleep(0.1)
    for x in range(99,-1,-1):
        meter.set_indicator_start_value(lines, x)
        meter.set_indicator_end_value(lines, x+1)
        time.sleep(0.1)

In conclusion

Meters are a simple way to make your project look much nicer, but they can take a little work to use.

If you want a more custom way to show data on your screen, lvgl canvas examples could be helpful.

Filed Under: Micropython

Micropython LVGL Event Examples

October 7, 2022 by Baxter

What Are LVGL Events?

Events are how lvgl controls action. If you click a button, it will call an event to tell you a button was pressed. This page has five examples on events and how they work.

Getting the Screen to Work

This is some simple code to get a ili9341 display to work with micropython lvgl. You will want to add it or your own screen code to the beginning of all the examples on this page.

Instead of putting it at the beginning you could just put the code in the micropython boot file. It seems to work best there.

import lvgl

#this is the code that works for my screen:
#from ili9XXX import ili9341
#screen = ili9341(mosi=23, miso=38, clk=18, dc=15, cs=5, invert=True rot=0x10, width=320, height=240 )

# this is some generic code that might work better for you
from ili9XXX import ili9341
screen = ili9341(mosi=23, miso=38, clk=18, dc=15, cs=5,width=320, height=240)

#You will want some touch screen code
#here is what I use
from ft6x36 import ft6x36
touch = ft6x36()
screen with lvgl button that says "click me"

Buttons and Events

This is about as simple as it gets. If you hit the button, it prints “button clicked” on your computer.

import lvgl

button = lvgl.btn( lvgl.scr_act() )
button.set_size( 70, 30 )
button.center()

label = lvgl.label( button )
label.set_text( 'click me' )
label.center()

def handler(data):
    event_type = data.get_code()
    if event_type == lvgl.EVENT.CLICKED:
        print( 'button clicked' )
    

button.add_event_cb( handler, lvgl.EVENT.ALL, None )
lvgl label and slider

Sliders and Events

This example shows you how to use events to get the position of a slider and display it on your screen.

import lvgl

label = lvgl.label( lvgl.scr_act() )
label.set_text( '0' )
label.center()
label.set_x( -90 )


def handler( data ):
    the_slider = data.get_target()
    the_value = the_slider.get_value()
    label.set_text( str ( the_value ) )
    print(the_value)

 
slider = lvgl.slider( lvgl.scr_act() )
slider.center()
slider.set_width( 100 )
slider.add_event_cb( handler, lvgl.EVENT.VALUE_CHANGED, None )
lvgl button matrix

Button Matrixs and Micropython Events

Button matrixs allow you to create a lot of buttons quickly, but they are a little more complicated to work with. Here is the rough idea:

import lvgl

buttonMap = ['A','B','C','\n',
             'D']

def handler(data):
    target = data.get_target()
    btn = target.get_selected_btn()
    label = target.get_btn_text(btn)
    print(label,'pressed')

matrix = lvgl.btnmatrix(lvgl.scr_act())
matrix.set_map(buttonMap)
matrix.set_btn_width(5,3)
matrix.center()
matrix.add_event_cb(handler,lvgl.EVENT.VALUE_CHANGED,None)
lvgl keyboard

Keyboards and Events

Keyboards are a special type of button matrix. They are automatically formatted and setup with the alphabet, symbols, and numbers. You don’t have to create all those buttons.

import lvgl

def handler(data):
    target = data.get_target()
    btn = target.get_selected_btn()
    label = target.get_btn_text(btn)
    print(btn,label,'pressed')


kyb = lvgl.keyboard(lvgl.scr_act())
kyb.add_event_cb(handler,lvgl.EVENT.VALUE_CHANGED,None)
two lvgl buttons

Event Bubbling

Event bubbling allows a parent object to collect the events of its children. If setup completely, you could run your entire program with only one handler function.

import lvgl


#event bubbling allows a parent object to collect all the events of its children
def handler( data ):
    obj = data.get_target()
    if type( obj ) == type( lvgl.btn() ):
        print( 'button pressed' )


obj = lvgl.obj( lvgl.scr_act() )
obj.set_size( 250, 240 )
obj.center()
obj.add_event_cb( handler, lvgl.EVENT.CLICKED, None )

leftButton = lvgl.btn( ob j)
#each button has to enable event bubbling
leftButton.add_flag( lvgl.obj.FLAG.EVENT_BUBBLE )
leftButton.set_size( 80, 40 )
leftButton.center()
leftButton.set_pos( -50, 0 )

leftLabel = lvgl.label( leftButton )
leftLabel.center()
leftLabel.set_text( 'left' )


rightButton = lvgl.btn( obj )
rightButton.add_flag( lvgl.obj.FLAG.EVENT_BUBBLE )
rightButton.set_size( 80, 40 )
rightButton.center()
rightButton.set_pos( 50, 0 )

rightLabel = lvgl.label( rightButton )
rightLabel.center()
rightLabel.set_text( 'right' )

What You Learned

This page has show you how to work with buttons, sliders, and matrixs. Using these should give you some nice inputs for your projects.

If you like lvgl events you might also like lvgl meters.

Filed Under: Micropython

Micropython LVGL Examples

October 5, 2022 by Baxter

What Examples Are Given…

This page has six examples on how to use micropython lvgl. The first one is code to get some screens to work. The rest are examples on label color and lvgl inheritance.

Getting the Screen to Work

This is some simple code to get a ili9341 display to work with micropython lvgl. You will want to add it or your own screen code to the beginning of all the other examples on this page.

Instead of putting it at the beginning you could just put the code in the micropython boot file. It seems to work best there.

import lvgl

#this is the code that works for my screen:
#from ili9XXX import ili9341
#screen = ili9341(mosi=23, miso=38, clk=18, dc=15, cs=5, invert=True rot=0x10, width=320, height=240 )

# this is some generic code that might work better for you
from ili9XXX import ili9341
screen = ili9341(mosi=23, miso=38, clk=18, dc=15, cs=5,width=320, height=240)

#You will probably want some touch screen code
#here is what I use
from ft6x36 import ft6x36
touch = ft6x36()
Blue LVGL label that says "really cool sentence"

Changing Text Color

This code uses styles to change a label’s text color. If you want a better explanation here is a page on LVGL labels

import lvgl
label = lvgl.label(lvgl.scr_act())
label.set_text("really cool sentence.")

blueStyle = lvgl.style_t()
blueStyle.init()
blueStyle.set_text_color(lvgl.color_hex(0x00009c))

label.add_style(blueStyle,0)
Green LVGL label with black background that says "green is what i need"

Highlighting Text

An example on changing the background color in lvgl.

import lvgl 

highlight = lvgl.style_t()
highlight.init()


highlight.set_bg_opa(255)
#opacity (opa) is how visable the background is, 255 is completely visable and 0 is transparent
highlight.set_bg_color(lvgl.color_hex(0x000000))
highlight.set_text_color(lvgl.color_hex(0x009A00))

importantText = lvgl.label(lvgl.scr_act())
importantText.add_style(highlight, 0)
importantText.set_text("green is what I need")
importantText.set_pos(70,0)
3 examples of LVGL recoloring

Coloring Sections of Text

Recoloring allows you to change the color of a small part of text.

import lvgl
# recoloring
text = lvgl.label(lvgl.scr_act())
text.set_recolor(True)  
text.set_text('I am #ff00ff text#. #00ff00 What are # you?')

text.center()
text.set_y(-60)

# recoloring works only on one line
otherText = lvgl.label(lvgl.scr_act())
otherText.set_recolor(True)  
otherText.set_text('I am #ff00ff text. \n # #00ff00 What are # you?')

otherText.center()

# but you can recolor both lines individually 
lastText = lvgl.label(lvgl.scr_act())
lastText.set_recolor(True)  
lastText.set_text('I am #ff00ff text. # \n #00ff00 What are # you?')

lastText.center()
lastText.set_y(60)
example of  LVGL position inheritance

LVGL Posistion Inheritance

Lvgl uses inheritance, and it can make your program do weird things. So, it’s good to get familiar with it.

import lvgl


labelOne = lvgl.label(lvgl.scr_act())
labelOne.set_text('hi')
labelOne.set_x(20)
labelOne.set_y(20)
#first label with normal position x = 20 and y = 20 


#second label inherits from first label which has x=20,y=20

labelTwo =  lvgl.label(labelOne)
labelTwo.set_text('hi')
labelTwo.set_x(30)
labelTwo.set_y(30)
#labelTwo's actual positon is x=20+30,y=20+30 or x=50,y=50


#previous label's position was 50,50
#labelThree's position is 50+40,50+40
labelThree =  lvgl.label(labelTwo)
labelThree.set_text('hi')
labelThree.set_x(40)
labelThree.set_y(40)

#previous label's position was 90,90
#labelThree's position is 90+50,90+50
labelFour =  lvgl.label(labelThree)
labelFour.set_text('hi')
labelFour.set_x(50)
labelFour.set_y(50)
example of LVGL style inheritance

LVGL Style Inheritance

In lvgl objects can also inherit styles too. Here is what that looks like.

import lvgl


redStyle = lvgl.style_t()
redStyle.init()
redStyle.set_text_color(lvgl.color_hex(0xf50000))


labelOne = lvgl.label(lvgl.scr_act())
labelOne.set_text('hello')
labelOne.set_x(10)
labelOne.set_y(5)
labelOne.add_style(redStyle,0)


#because labelTwo inherits from labelOne it has the same style as labelOne
labelTwo =  lvgl.label(labelOne)
labelTwo.set_text('hi')
labelTwo.set_x(50)

Wrapping Up

These examples should give you some practice with micropython lvgl and hopefully demystify coloring and inheritance for you.

Filed Under: Micropython

Micropython LVGL Label Examples

September 15, 2022 by Baxter

LVGL label that says hello world!

How to work with LVGL

To use this code you will need a micropython firmware that has the lvgl module installed. Lv micropython is the best place to get started if you don’t have one.

There is some example code at the end of this page showing how all of this works together. If the part on styles seems confusing, the example might help. Here is what this post will show you how to do.

What are LVGL labels

Labels are how you put text on your screen. Labels have some simple methods to set their position and text, but if you want full control you will need to use styles unfortunately.

How labels work

To create a label use lvgl.label(). This will return a label that is inside of the object you give it. lvgl.scr_act() is the screen object so lvgl.label( lvgl.scr_act() ) will put a label on the screen. You can put a label in most other lvgl objects like buttons, windows, lists or even another label.

Position

To set the position use .set_x() and .set_y(). The numbers you give these functions are how many pixel you want to skip before the label appears. To make your code more consise you can use .set_pos(). It takes both the x and y values like this YourLabel.set_pos( YourX, YourY ).

More on Position

The label’s position is based off of its parents. If you set x to 50 pixels and the label’s parent’s x is set to 25 pixels, the label’s position on the screen will be 50+25 or 75 pixels. If a label’s parent is the screen, then its position will be exactly the number you put in. In our example, that would be 50 pixels. If your text seems to be in the completely wrong place, this might be your problem, but most of the time you don’t need to worry about this.

Text

To set a label’s text you use .set_text() and put the text you want in the parentheses. The default font seems to work with only English text, but lvgl does allow you to change fonts, if you want to use another language.

Changing the Text Color of Labels

If you want to change the color of a label, you have to go through styles. This will take three steps.

Creating the Style

To create a style, use lvgl.style_t(). This returns a empty style. To use it you will first need to initialize it with .init(). If you create a style called BigStyle and wanted to initialize it use BigStyle.init().

Setting the Color

Set the color with .set_text_color(). To tell lvgl the color you want use lvgl.color_hex() and give the color you want in hexadecimal. To bring this all together if you had a style called BrightStyle and wanted it green. You would use BrightStyle.set_text_color( lvgl.color_hex(0x00FF00) )

Connecting the Style and Label

The last thing to do is hook the label and style together. This is how its done YourLabel.add_style( YourStyle ,0) . The zero is part of another complex style feature. Ignore it for now. That is how you set text color in lvgl. With all that work, it’s almost not worth it to change the color.

Here is a some simple style code with all the things explained above and what it looks like on my label.

customStyle = lvgl.style_t()
customStyle.init()
customStyle.set_text_color(
   lvgl.color_hex(0x00FFFF))
myLabel.add_style( customStyle ,0)
LVGL label that says hello world!

Example Code

Examples are a great way to to explain code. So this is a simple program to display text on your screen, set its position, and change its color. You will probably need to change the screen setup code for it to work with your screen.

import lvgl

# put your screen setup code here:
from ili9XXX import ili9341
screen = ili9341(mosi=23, miso=38, clk=18, dc=15, cs=5,width=320, height=240) 

#You don't need but will probably want some touch screen code
#here is what I use
from ft6x36 import ft6x36
touch = ft6x36()


label = lvgl.label(lvgl.scr_act())
label.set_text('hello world!')
label.set_x(50)
label.set_y(50)

myStyle = lvgl.style_t()
myStyle.init()
myStyle.set_text_color(
   lvgl.color_hex(0x00FF00))

label.add_style(myStyle,0)

What you have learned

In conclusion, this is how you create labels, position them, and change their color. This is most of what you will need to do with them.

If you want to learn more about lvgl, micropython LVGL events might interest you.

Filed Under: Micropython

Small LEGO Sail Boat With Mounted Cannon

April 23, 2018 by Baxter

This is my small sail boat. It was designed to carry small loads of cargo during the night under sail so a patrol boat can not find it. It also has a cannon to destroy unarmed cargo ships and to attack pirates.

THE DESIGN

The design is simple. I made a red triangle and then put white “1 by 6” bricks across it like this.

Then I built up the body and put on it a sail that turns.

Next, I put a rudder and a steering wheel. And last, but not least, a cannon and radar station.


Filed Under: Lego's

My LEGO War And Cargo Ship

April 23, 2018 by Baxter

This is my LEGO war ship. It has two cannons, radio, satellite, rockets, and a new weapon that is on the back of the ship that uses radio and satellite to blow up planes.

THE BODY

The body of this boat is made of tiles that are connected by smaller tiles. Then I used white bricks to make it taller. Then I built a tower and accessories every captian on a war ship needs.


THE CARGO

This ship is designed to hold a lot of cargo. Here is a tip, try to use every square inch of room on your boat. Here is what I did to use the room. There are three places found I can put my cargo. One is in the front, one is in the back, and one is in the middle. The middle cargo is in the tower shown above. The front cargo is two crates stacked on top of each other and then built into the front of the boat.

The back one is my favorite. It is built under the new weapon. It carries tow ropes and signal rockets.

THE WEAPONS

This ship has lots of weapons. Tip, make your weapons have a story.  WEAPON TYPE 1 cargo rockets- this ship holds two super rockets that are only used if the ship is going to be sunk. WEAPON TYPE 2 forward rockets- the ship is equipped with forward rockets. These are small rockets that when the ship joins a battle, it fires from a long distance. WEAPON TYPE 3 cannons-this ship has two remote control cannons. WEAPON TYPE 4 the new weapon- this weapon uses radio and satellite to make bombs and missiles explode on planes.

Filed Under: LEGO tips, Legos

LEGO Technic RC (Remote Control) Drag Racer

April 4, 2018 by Baxter


This is my LEGO Technic drag racer. It is probably the smallest LEGO RC set I have ever built. If you are trying to build a LEGO RC car this is a simple one. One tip on building a small drag racer is to put the steering system in the back. The reason I found this helpful is because the back of a drag racer is usually bigger than the front so there is more room and usually the steering system is a lot bigger than the engine. Anyways, this is how I made my engine.

This is how I built my steering system.

This picture is up side down. I hope this helps you.


Filed Under: LEGO Technic, LEGO tips, Lego's

LEGO Technic RC (Remote Control) War Robot ( TORNADO MODEL: B)

March 28, 2018 by Baxter

This blog is about tornado model B’s weapon. This blog is not to help you build the body,it is to help you build the second and most dangerous weapon this robot can hold besides a saw. If you want tips on how to build the body go to my other blog on tornado model A.

THE WEAPON

This weapon very easy to make and I am sure you can figure out how to build it. I will explain how you can use it. It works by using a row of hooks that grab the other vehicle and rip parts off of it. If the truck doesn’t have any thing to grip on to, you can ram him. This weapon will devastate lightly armored robots and will be a good weapon in an armored robot. I hope this weapon helps you win robot fights.


Filed Under: LEGO Technic, LEGO tips, LEGO war robots, Legos

LEGO Technic RC (Remote Control) War Robot (TORNADO MODEL: A )

March 14, 2018 by Baxter

This robot is the first version of this type of robot. I will introduce the second version later. The reason there are two versions is because there are two  different ways you can make it. The first is simple and very fast, the second will be a little slower, but very strong. You may wonder why you would want the second. The reason why people like the second is because it is stronger than the first and it is still faster than most treaded robots.

THE WHEELS

The  wheels, as you see, are very important. I made mine by bending the treads backwards. Then  you put a bar through the holes in the treads.

THE BODY

The body consists of two motors, receiver, and the batteries. Then I put them together with a few pieces. To make this a true war robot, it needs a weapon. For my weapone I use the stabilizers. When the thing twirls it becomes a tornado.

(NOTE : if you do not use stabilizers, don’t gear it to go slower as it will just go in circles.


Filed Under: LEGO Technic, LEGO tips, LEGO war robots, Legos

LEGO Technic RC Climbing Truck Tips

March 8, 2018 by Baxter

Lately, I have been working on mountain trucks. So I thought I would write a blog about them. Here are some tips. This is the first RC (remote control) truck I have built that actually works.

THE STEERING

This truck you are looking at, actually doesn’t steer great. The reason for this is that I put the return to center on the motor not the wheels. (NOTE : The return to center is a rubber band or spring that makes the wheel return to the center.) Basically, put a rubber band on the bottom of your car like this and it should drive forward and turn with ease.

THE ENGINE

Most trucks that climb mountains have strong engines and are geared down. (NOTE : A geared down engine uses gears to make an engine go slower, but stronger.) So if you want your truck to climb, gear the engine down like this.

The gear on the left is connected to the engine and the other gear is connected to the axle. Here are two more things that might help you. Make the gear on the left smaller and the gear on the right bigger this will make it even stronger. And this last tip is not about the engine really but it is useful. For a climbing truck, the battery pack needs to be on the bottom of the car. Whatever you do, don’t put it on the back as it will tip the car over. I hope this has helped you.

Filed Under: LEGO Technic, LEGO tips, Legos

LEGO TECHNIC Stunt Bike

February 9, 2018 by Baxter

LEGO Technic stunt bike (42048)

This is my LEGO stunt bike. Here are some of the cool things about it. One, it comes with three gears. Two, it has a pull back engine that is really fast and strong. If you want to know how hard it is to build, it is six on a scale of one to ten. Another thing, that is cool is that it comes with a ramp.

On a scale of one to ten, how fast is it? It is a ten. I don’t now if LEGO’S can go much faster. Over all, it is a pretty fast, very strong, and is easy to build. It has good traction on hard floors as it doesn’t slip. It can hit things with a lot of force like a battering ram.

Filed Under: LEGO Technic, Legos

How to Build a LEGO Excavator

February 2, 2018 by Baxter


TIPS ON HOW TO BUILD AN EXCAVATOR

I just built an excavator. Here is how I did it. Here are some tips on how to build a LEGO excavator.

THE CAB

The cab needs to be pretty strong so it does not fall apart. One thing you could watch out for is that if the arm is fully extended it will tip the cab over or rip it out of its’ base.

Reinforce the base and put weights on the back to keep it up right. (NOTE: I don’t have weights on my excavator because its’ bucket is to small to hold any thing that will knock it over.) One more thing is that I thought was useful is that my base has connectors on both sides so it is extra strong.

THE TRACKS

All good excavators need tracks. I used LEGO TECHNIC tracks, (this is the set mine are from) but if you don’t have tracks you can use a line of wheels. The tracks are connected by a pin that goes through the bottom part of the truck in a piece like this.

THE BUCKET AND ARM

The arm is made of LEGO TECHNIC pieces that are connected and have the ability to bend. Then you put this piece in there.
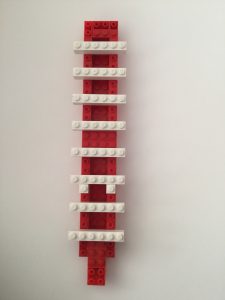
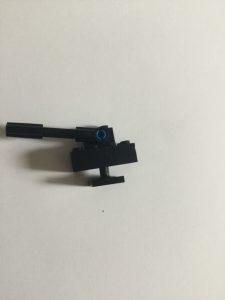
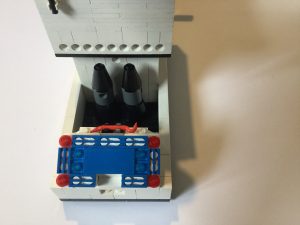
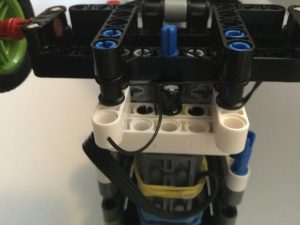
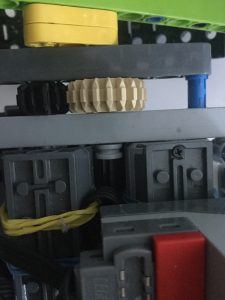
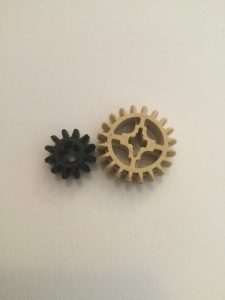
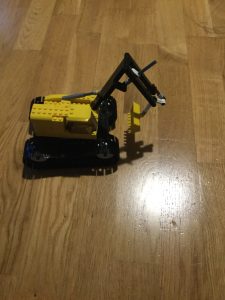
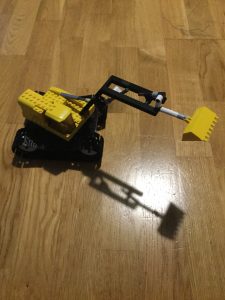
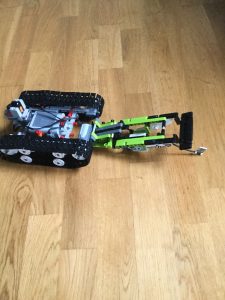
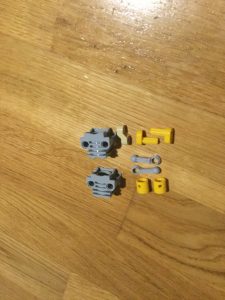
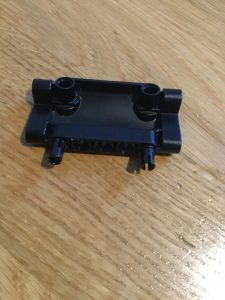
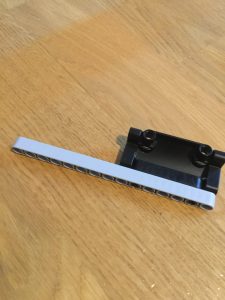
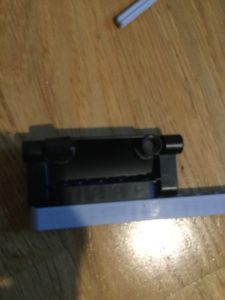
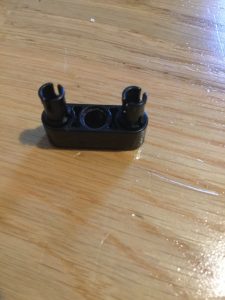
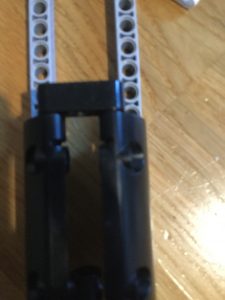
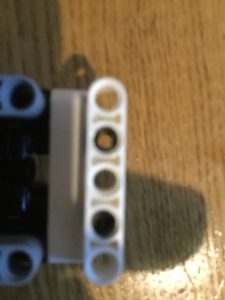
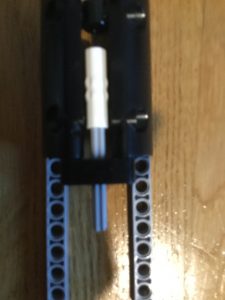
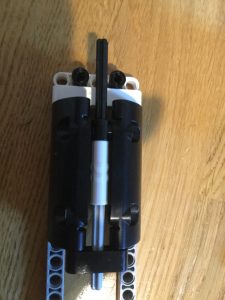
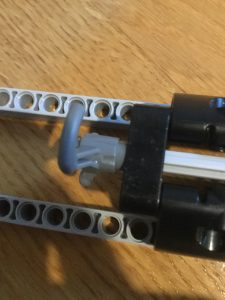
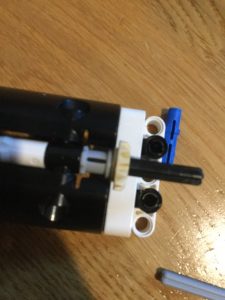
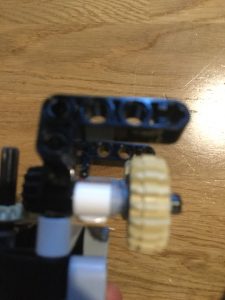
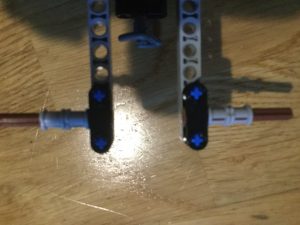
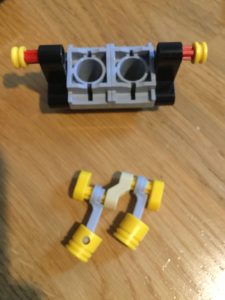
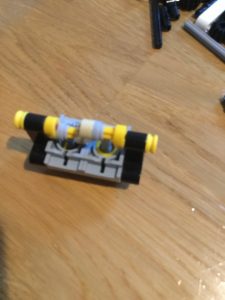
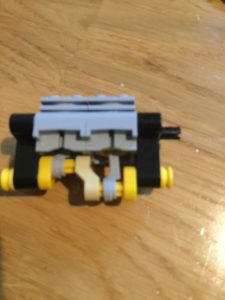
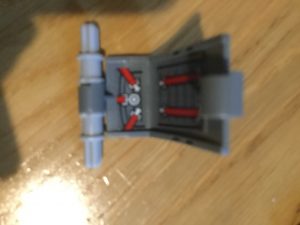
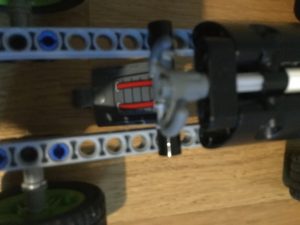
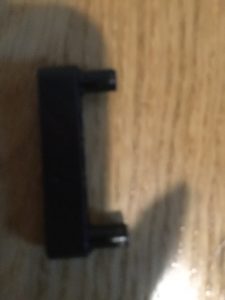
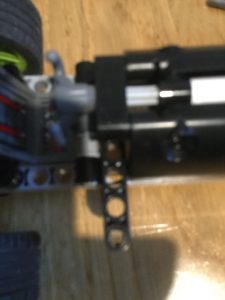
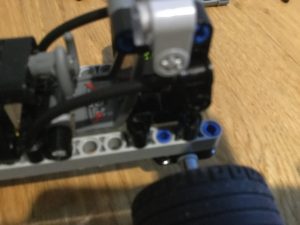
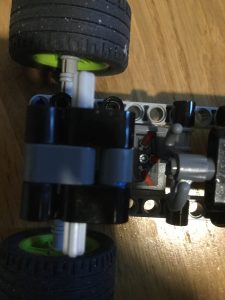
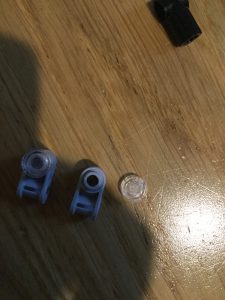
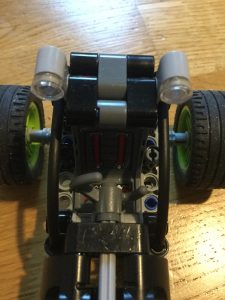
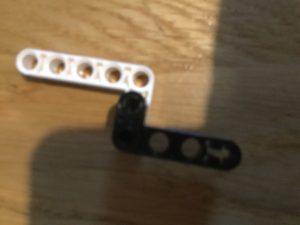
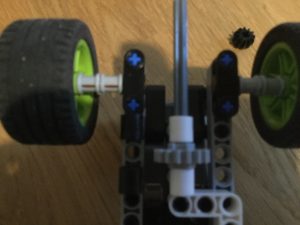
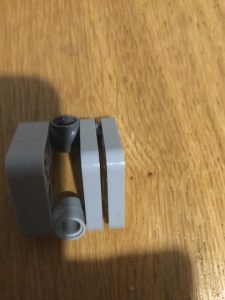
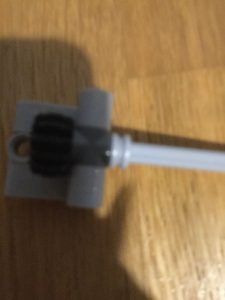
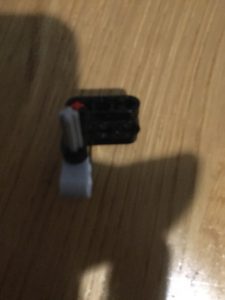
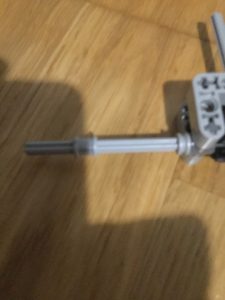
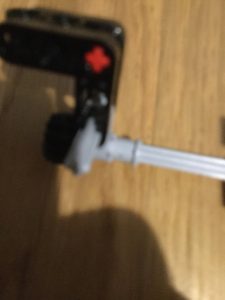
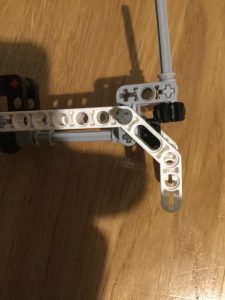
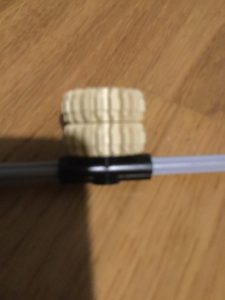
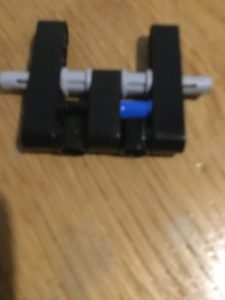
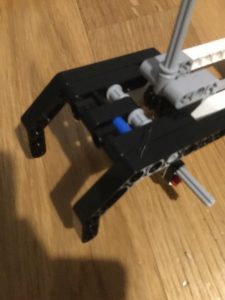
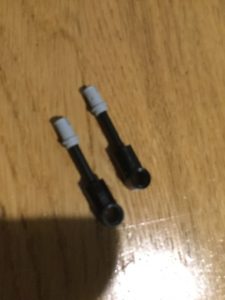
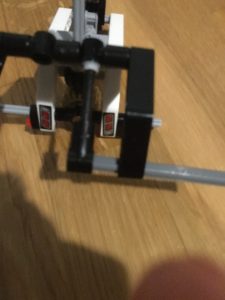
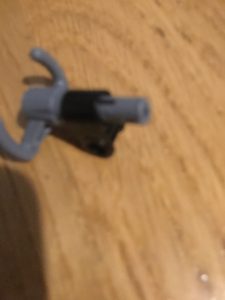
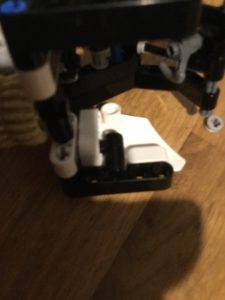
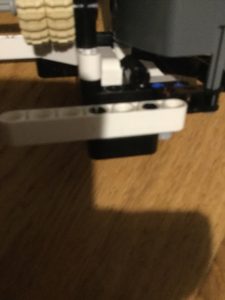
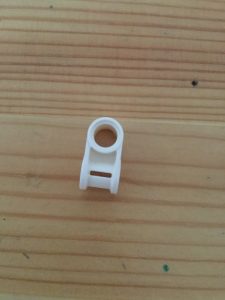
Connect it like this, so it can move but very slowly. These pieces are very important, because they make the arm stay up so it can lift things that are heavy.

The bucket I use is from a LEGO mining set (click here to see it). It has a LEGO adapter, so it can be put into the rest of the system. I hope this helps you if you build an excavator.

Filed Under: LEGO Technic, Legos, LEGOS-build your own

big LEGO OFF-ROAD COMMAND CENTER

January 26, 2018 by Baxter


OFF-ROAD COMMAND CENTER (4205) click here to see

I have had this set for a long time. Because of that, I am missing a few pieces. One of the more important pieces I lost was the bad guy and his oar.

 A few things to note:

The front compartment has doors on both sides of the truck and it’s separated in the middle. One side holds a phone and the other side holds a box of tools.

The back of the truck holds a control room with lots of controls. The side of it comes up so you can access the compartment.

The middle compartment has an antenna on the top of it that is collapsible. This truck is an off road truck so its’ tires are big and it runs smoothly. It has a hookup spot so that you can build the trailer and hook it up.

The trailer is very fun to build and has some nice pieces. It looks nice and it has places for the boat to hold on to so the boat won’t  slip off.

The boat has a propeller in the back that moves and a second seat for the burglar, so you can tow him back to land. One last thing, the boat really floats in water.

Final thoughts

I think I have had this set for three years and it still works. My mom pitched my maps a long time ago. So when I wanted to build it again, I did this. I looked up pictures of LEGO truck sets and I found a picture of the box and found the number on the box and went to the LEGO website. I put it in under the instructions and clicked the set and then downloaded the instructions and there I had it. I was able to build it again.


Filed Under: LEGO Technic, Legos

Stuff you can build with LEGO technic

January 22, 2018 by Baxter


The LEGO helicopter

This is a helicopter I built. I have pictures as instructions on how to build it down at the bottom of this page. My helicopter has a lot of cool features. Here are some of them. One- it has a gear on the back so you can turn both propeller blades at the same time. Two- it has a cockpit which has a door that goes up and down and lets you put LEGO men in it. It takes six gears to make the propeller system and I added a seventh gear so you have a better grip on the twirling knob. Another thing is that it is geared up so when you turn the knob on the back, the propellers turn faster than you’re turning the knob. On a scale of one to ten, how hard is it to build? It is a six. Hope you enjoy this helicopter.


The LEGO drag racer

I built a LEGO drag racer that you push and steer. What I mean is that it has a gear on the back and when you turn the gear the front wheels turn. (NOTE: You can also turn the steering wheel and the steering system works but it works  opposite so when you turn it it goes the other direction.) It drives pretty fast and is very easy to steer. An important thing to know, is that it takes 4 gears if you want just the steering wheel to work, 7 gears if you want the back system to work, and 8 gears if you want the back handle to be a gear. You can put any other item on the back that you can get a hold of. It’s your choice. (NOTE: One thing you might want to know is that I put an engine on the bottom of the car but it is not necessary to have it.) If you want to build this car just use the pictures as instructions below.


LEGO drag racer

The tires on the side are not necessary they just are there to hold up the car.


LEGO helicopter


Filed Under: LEGO Technic, Legos

LEGO Track Racer: My Favorite Set

January 22, 2018 by Baxter

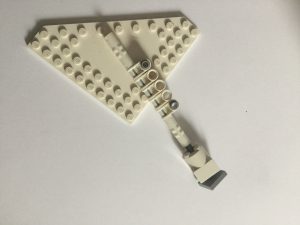
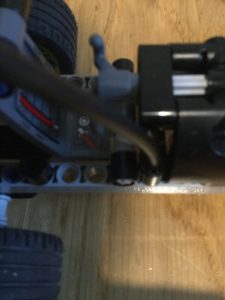
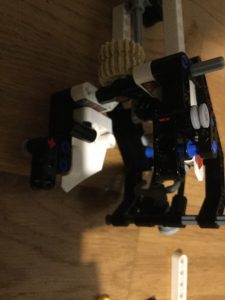
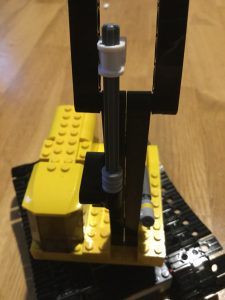
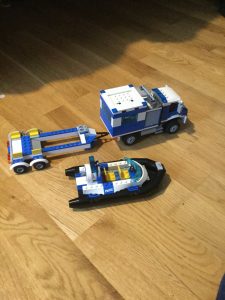
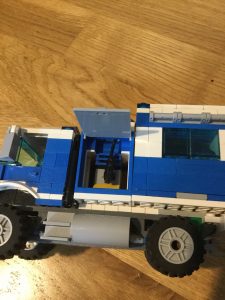
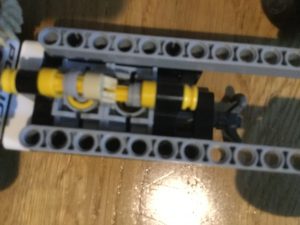
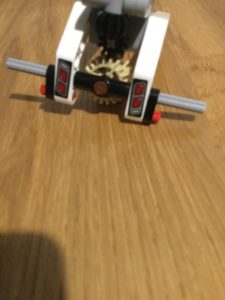
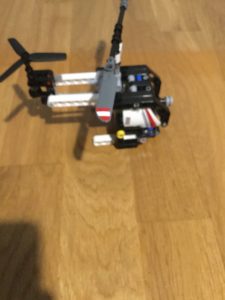
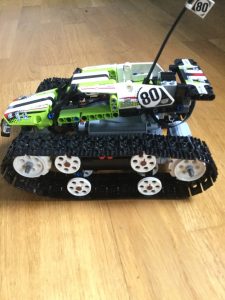
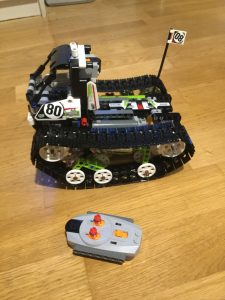
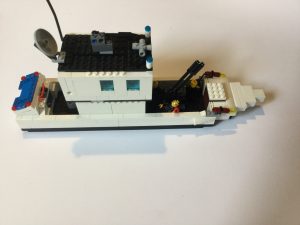
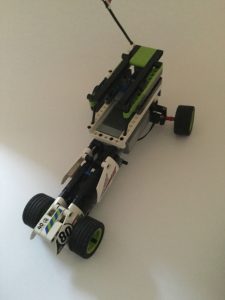
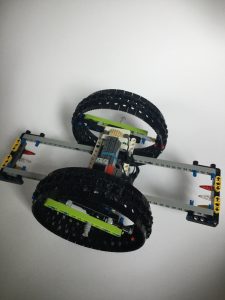
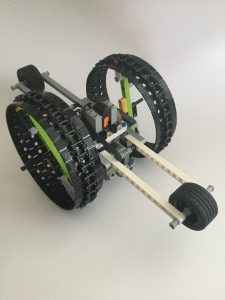
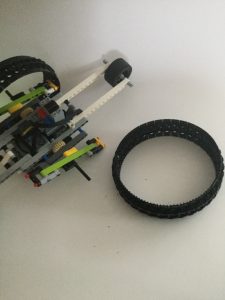
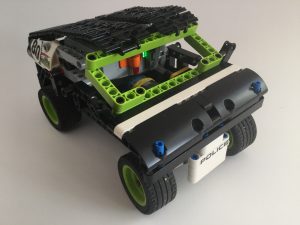
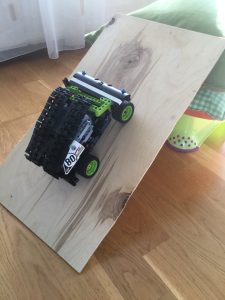
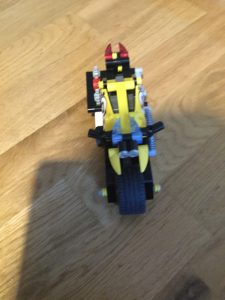
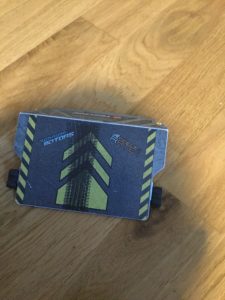
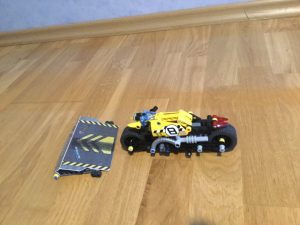
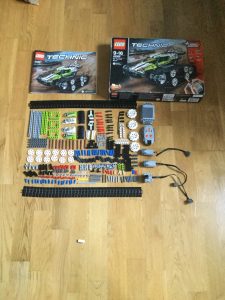
Information about LEGO Track Racer set (42056) click here to see

Noteworthy Pieces: two medium motors, battery pack, receiver, and remote
Does it come with batteries: No
How long do the batteries last: 3 days (NOTE: My batteries are rechargeable meaning they don’t last as long as normal batteries.)
How fast does it go: A little slower than you walk
How easy is it to build on a scale of one to ten: 5
How long does it take to build the LEGO tracked racer: 30-45 minutes
How long does it take to build the LEGO Off-Road Truck: 30-45 minutes
How many batteries does it take to run fully: six AA and three AAA
How far is the range of the remote: 3 meters (15 feet)

The LEGO Track Racer (42056)

The LEGO Track Racer is one of the best deals out there because it has two motors and a remote controlled (RC) system.I like the motors the best. It has allowed me to build lots of cool things.For example, I built a tram and a bulldozer. A cool feature that I like is its’ top can move up so you can start the motor and see inside. So you know, the second map is not inside the box.

One thing to note, is that the motor system has the traditional LEGO brick as a connector so you can hook up more than one motor to the same spot at the same time. I use rechargeable batteries. This allows me to charge them at night so they have a full charge for the next day. (NOTE: rechargeable batteries do not last as long as normal batteries)

The LEGO Off-Road Truck (42056)

The LEGO Off-Road Truck is a bit bigger than the tracked racer and is good for climbing things that are not too high or it flips over. Its’ treads are at a angle at the front so it can get a better grip on an object but this slant sometimes
makes it jump into the air. When you stop the back end goes up.

It can do tricks because of its’ easiness to drive. It is unique to build because it has lots of thing the directions say to do and then later on you see why they made you do it. One thing that is cool is that it looks like a semi so if you have other sets you can build a trailer and put it on the back of the truck.

One more thing to note is the map for building this model is on the LEGO website so you have to build it by using the computer.Overall, the LEGO Off-Road Truck is pretty good and will cover most terrains except snow. Its’ bottom drags on it and carries snow with it.

Information about set (42065)

This LEGO set is very fun to build because it has a lot of adapters so you can hold the set to gather in a screwy way. My favorite build is the Off-Road Truck because it can climb things that are pretty big.

One thing I did that was fun was I built a lot of bridges in my room and tested them by driving it on them. As I said earlier, it takes about a half hour to an hour to build both sets. But you can only build one at a time, meaning when you want the other build you have to take it apart and build the next one.

The over all driving of the set is very good. It has a decent speed and can turn in any direction. It is a very good set if you want it to do exact turns. Its’ motors are pretty strong so it will climb most things that have a blanket over them. This set is my favorite set I have because I can build lots of machines.

Filed Under: LEGO Technic, Legos

LEGO Technic Ultralight Helicopter (My Favorite Christmas Present)

January 6, 2018 by Baxter

I got a brand new Lego Technic set. Here is the LEGO Technic set I got (available here on Amazon.com).

The exact set: LEGO Technic Ultralight Helicopter (42057)

This is a Two in One set.

The additional build is called The Experimental Aircraft.

Age Range: 8-14

Noteworthy Pieces: an engine, two pistons, propellers, eight gears, steering system, two building maps, two small wheels, and one big wheel.

How easy it is to build on a 1-10 scale? 4

How long does it take to build the Ultra Helicopter: 15 to 25 min.

How long does it take to build the Experimental Aircraft:10 to 20 min

Facts about the Ultra Helicopter (42057)

This helicopter has several cool features. It has a gear on the bottom so when you turn it the propellers twirl.

These are the 8 gears that I really like building with.

It also has two small engines that when put together it looks like one big engine. The steering system is on the front right side of the helicopter so when you push it back and forth it moves the back wing.

These are the collapsible engine and pistons.

The stick is on the outside of the helicopter, but it’s not very realistic compared to a real helicopter.

The pre-made steering wheel is very nice.

(Note: it’s not really a steering wheel, it’s more like a steering system in a plane)

This set comes with a pre-made seat so you can make a spot for a LEGO man. I can put a LEGO man in the cockpit and the steering wheel holds him by one of his arms. They both don’t fit.

A top view of completed helicopter.

Facts about the Experimental Aircraft (42057)

The cool thing about this set is that it comes with the second map right in the box. In most of the sets that I have gotten in the past the second map is on the LEGO website.

The Experimental Aircraft looks a lot like a car that has a fan in back.

Though this one doesn’t have a gear on the bottom the engine is connected to the propeller. It does roll on the ground a little bit better than the helicopter.

I prefer the Helicopter though because it is a lot easier to play with.

The Experimental Aircraft is very cool and I want to modify it so that when you push it forward it turns the propeller at the same time..

This is the steering system pieces.

Basic Information

This helicopter set has good instructions and strong pieces. As a matter of fact the instructions list 86 very specific and easy to follow steps in order to build it.

The gears allow you to build a lot of other neat stuff later on like submarines, helicopters and fan propelled tricycles.

It also has a lot of pieces so after you finish building the helicopter you could take it apart and build a lot of other cool things.

If this is one of your first LEGO Technic sets to build it might take you a little bit longer.

On the whole, LEGO Technic sets are a lot different then LEGO City and other LEGO sets.

One thing that is cool is that when you’re building it you don’t know what part you’re building until you’re done. It’s like you’re building something and every thing you do doesn’t make sense until it’s all built.

One of my favorite parts is learning how they designed the set and learning from it so I can use the same techniques in all kinds of funky ways. My favorite part of this set is that it comes with gears.

This is the gear on the bottom of the helicopter.

It is important to note this is a 2 in 1 set.

This means while you can build both the Ultra Helicopter and the Experimental Aircraft you can only do one at a time. You have to take apart the first one you build if you want to build the second one. In other words, there are only pieces to build one at a time.

I did not find that to be a problem.

I love building with my LEGO’s and take stuff apart and rebuild on a daily basis.

Filed Under: LEGO Technic

« Previous Page

Recent Posts

  • How to Shorten Your Micropython LVGL Code
  • FreeRTOS Mutex Example
  • FreeRTOS Task Notification Example
  • FreeRTOS Queue Example
  • FreeRTOS Semaphore Example

Categories

  • Arduino
  • ESP32 Web Page
  • FreeRTOS
  • LEGO Technic
  • LEGO tips
  • LEGO war robots
  • Lego's
  • Legos
  • LEGOS-build your own
  • Micropython

Copyright © 2025 · Minimum Pro Theme on Genesis Framework · WordPress · Log in