Baxter Builds

FreeRTOS Mutex Example

May 19, 2023 by Baxter

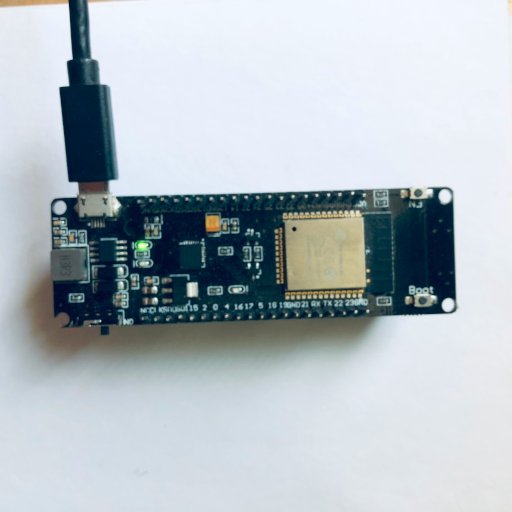
the esp32 that I run the code on

Mutexes can be one of the harder parts of FreeRTOS to learn. They are slower than semaphores, but don’t seem to do anything special. I am sure you have probably looked up what the difference is and heard about things like Priority inversion and Priority inheritance.

But it is always nice when working through computer theory, to have a simple example that really shows what you are trying to learn, so I have created the following code that shows the basics of how and why you use a mutex in FreeRTOS.

Here is the code

#define LED 16

SemaphoreHandle_t GuardSerial;


void low_priority(void* args) {
  while (true) {
    xSemaphoreTake(GuardSerial, portMAX_DELAY);
    for (int i = 0; i < 200 ; i++) {
      Serial.print("L-");
    }
    Serial.println();
    xSemaphoreGive(GuardSerial);
    delay(500);
  }
}


void medium_priority(void* args) {
  pinMode(LED, OUTPUT);
  while (true) {
    for (int i = 0; i < 10000 ; i++) {
      int k = sin(random(0, 1));
      k += random(0, 20);
      k -= random(0, 10);
      k -= cos(random(0, 1));
      k *= tan(random(0, 1));
      //just waist some time
    }
    digitalWrite(LED, !digitalRead(LED));
    delay(100);
  }
}

void high_priority(void* args) {
  while (true) {
    xSemaphoreTake(GuardSerial, portMAX_DELAY);
    Serial.print("*******high_priority task testing mutexes*******\n");
    xSemaphoreGive(GuardSerial);
    delay(500);
  }
}


void setup() {
  Serial.begin(9600);

  // GuardSerial = xSemaphoreCreateBinary();
  GuardSerial = xSemaphoreCreateMutex();

  xTaskCreate(low_priority, "LOW", 2048, NULL, 1, NULL);

  xTaskCreate(medium_priority, "MID1", 2048, NULL, 2, NULL);
  xTaskCreate(medium_priority, "MID2", 2048, NULL, 2, NULL);
  xTaskCreate(medium_priority, "MID3", 2048, NULL, 2, NULL);
  xTaskCreate(medium_priority, "MID4", 2048, NULL, 2, NULL);

  xTaskCreate(high_priority, "HIGH", 2048, NULL, 3, NULL);
}

void loop() {
}

Understanding this Code

Now that you have seen this example, lets go through each section and see how it works.

The LED

Part of this example is going to use an LED, so to start, we need to define which pin it is connected to.

#define LED 16

Mutex vs Semaphore

A mutex is just a binary semaphore with some added safety measures. Because of this, they are slightly slower than semaphores, but much more reliable (more on this later).

To be able to access a mutex, we will need to create a handler for it, and because mutexes are related to semaphores, we will use the standard semaphore handler like this.

SemaphoreHandle_t GuardSerial;

The Low Priority Task

This example uses three tasks, so lets start working on the first task. We will begin it like most task functions with an infinite loop and a delay.

void low_priority(void* args) {
  while (true) {

    delay(500);
  }
}

Then we will add in some code that prints “L-” 200 times to the Serial port.

void low_priority(void* args) {
  while (true) {
    for (int i = 0; i < 200 ; i++) {
      Serial.print("L-");
    }
    Serial.println();
    delay(500);
  }
}

For this example, we are using mutexes to guard the Serial port, so before we use the Serial port to print “L-” 200 times, we need to get permission from the mutex with the xSemaphoreTake() function.

That function requires two arguments the first one is the semaphore or mutex we want permission from and the second one is the maximum time we should wait for permission before giving up. portMAX_DELAY = forever

void low_priority(void* args) {
  while (true) {
    xSemaphoreTake(GuardSerial, portMAX_DELAY);
    for (int i = 0; i < 200 ; i++) {
      Serial.print("L-");
    }
    Serial.println();
    delay(500);
  }
}

And when we are done with the Serial port we need to release it, so the other tasks can use it with the xSemaphoreGive() function.

void low_priority(void* args) {
  while (true) {
    xSemaphoreTake(GuardSerial, portMAX_DELAY);
    for (int i = 0; i < 200 ; i++) {
      Serial.print("L-");
    }
    Serial.println();
    xSemaphoreGive(GuardSerial);
    delay(500);
  }
}

The Middle Task

This next task doesn’t actually use mutexes, instead its only job is to waist computer power and blink an LED. Later, we will use it to show why mutexes are better than binary semaphores.

void medium_priority(void* args) {
  pinMode(LED, OUTPUT);
  while (true) {
    for (int i = 0; i < 10000 ; i++) {
      int k = sin(random(0, 1));
      k += random(0, 20);
      k -= random(0, 10);
      k -= cos(random(0, 1));
      k *= tan(random(0, 1));
      //just waist some time
    }
    digitalWrite(LED, !digitalRead(LED));
    delay(100);
  }
}

The High Priority Task

This last task is the simplest of the bunch. All it does is get permission from the mutex, send data through the Serial port, release the mutex, and finally wait a while before doing it all over again.

void high_priority(void* args) {
  while (true) {
    xSemaphoreTake(GuardSerial, portMAX_DELAY);
    Serial.print("*******high_priority task testing mutexes*******\n");
    xSemaphoreGive(GuardSerial);
    delay(500);
  }
}

Wrapping it all Together

Up to this point, we have only created some task functions, now we need to turn them into real tasks. We will do all of this and a few other things in the setup() function. Here is what it starts out like.

void setup() {
  Serial.begin(9600);


}

The first thing we will do is create a new mutex and then update the semaphore handler we created earlier to hold it.

void setup() {
  Serial.begin(9600);

  // GuardSerial = xSemaphoreCreateBinary();
  GuardSerial = xSemaphoreCreateMutex();

}

Above you may have noticed that one line of code is commented out. If you uncommit it and commit out the line that comes after it, the program will use a binary semaphore instead of a mutex.

The next thing we will do is create the low priority task, and if you were wondering, we will create it with a priority of one.

void setup() {
  Serial.begin(9600);

  // GuardSerial = xSemaphoreCreateBinary();
  GuardSerial = xSemaphoreCreateMutex();

  xTaskCreate(low_priority, "LOW", 2048, NULL, 1, NULL);

}

After that, we will create four medium priority tasks. We need four of them to just make sure the computer is always running at least one on each core.

void setup() {
  Serial.begin(9600);

  // GuardSerial = xSemaphoreCreateBinary();
  GuardSerial = xSemaphoreCreateMutex();

  xTaskCreate(low_priority, "LOW", 2048, NULL, 1, NULL);

  xTaskCreate(medium_priority, "MID1", 2048, NULL, 2, NULL);
  xTaskCreate(medium_priority, "MID2", 2048, NULL, 2, NULL);
  xTaskCreate(medium_priority, "MID3", 2048, NULL, 2, NULL);
  xTaskCreate(medium_priority, "MID4", 2048, NULL, 2, NULL);
}

And lastly we will create the high priority task.

void setup() {
  Serial.begin(9600);

  // GuardSerial = xSemaphoreCreateBinary();
  GuardSerial = xSemaphoreCreateMutex();

  xTaskCreate(low_priority, "LOW", 2048, NULL, 1, NULL);

  xTaskCreate(medium_priority, "MID1", 2048, NULL, 2, NULL);
  xTaskCreate(medium_priority, "MID2", 2048, NULL, 2, NULL);
  xTaskCreate(medium_priority, "MID3", 2048, NULL, 2, NULL);
  xTaskCreate(medium_priority, "MID4", 2048, NULL, 2, NULL);

  xTaskCreate(high_priority, "HIGH", 2048, NULL, 3, NULL);
}

Why Use Mutexes

When we started, I said I would show you how and why to use a mutex. We have seen the how, now lets look at the why.

In this example at line 48, there is some code that is commented out.

// GuardSerial = xSemaphoreCreateBinary();
GuardSerial = xSemaphoreCreateMutex();

If you uncommit the first line and commit out the second line, the example will use a binary semaphore instead of a mutex.

Try running it, if you do you will see something a little strange happening, or more accurately you will see nothing happening in the Serial Monitor, but the led will keep blinking.

What this means is that the low and high priority tasks have been halted, and only the medium priority task is running which is not what we want. The high priority task should always be run first, and that is what mutexes are for, they guarantee that your high priority tasks get run as soon as possible.

Mutexes can do a lot but not every thing. There are still a few things that semaphores are better at, and if you want to learn a little more about them, you might like to see a semaphore example.
Filed Under: Arduino, FreeRTOS

FreeRTOS Task Notification Example

May 9, 2023 by Baxter

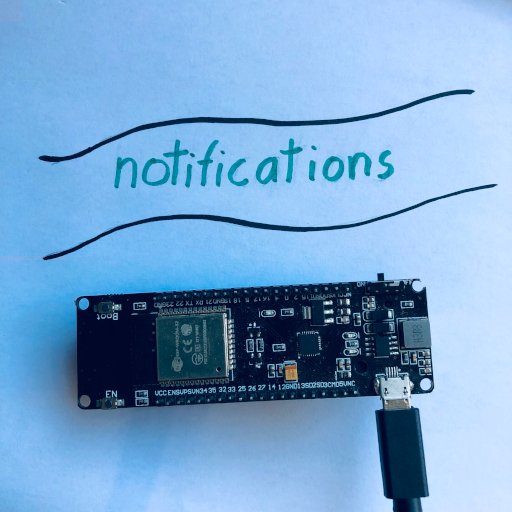
the esp32 board I use with "notifications" written above it

FreeRTOS has many conventional tools like semaphores and queues available to it, but it also has an extremely powerful unconventional tool as well, notifications.

Notifications were designed as a low level way to synchronize tasks. because of that, they are very fast and allow you to synchronize tasks in a lot of different ways.

There are two interfaces that you can use with notifications, so below I have prepared two simple examples about how to use each.

Here is the first example

TaskHandle_t address = NULL;


void send(void* arg){
 while(true){
  xTaskNotifyGive(address);
  delay(800);
 }
}

void receive(void* arg){
  while(true){
    ulTaskNotifyTake(true,portMAX_DELAY);
    Serial.println("GOT MESSAGE");
  }
}


void setup() {
  Serial.begin(115200);

  xTaskCreate(receive,"RECEIVE",2048,NULL,1,&address);
  xTaskCreate(send,"SEND",2048,NULL,1,NULL);
}


void loop() {
}

How It Works

This example uses the simpler interface which I prefer, so we will start with it. Why don’t we quickly go through it and see how it works.

The Address

One of the big differences between Notifications and Semaphores, Mutexes, etc. is that when you send a notification you have to tell it the address of the task you are sending it to.

This address is actually the handler of the task, so for now we need to create a variable to hold that address like this.

TaskHandle_t address = NULL;

Of course, we can’t actually set the address until we create the task, so we will have to wait for now.

The Sender Function

Next, we are going to create a function for the task that sends the notifications, and we will start it with an infinite loop and a delay.

void send(void* arg){
 while(true){

  delay(800);
 }
}

The actual line of code that send the notification is also pretty simple.

void send(void* arg){
 while(true){
  xTaskNotifyGive(address);
  delay(800);
 }
}

Receiving Notifications

The receiver task also starts out pretty simple.

void receive(void* arg){
  while(true){
 
  }
}

Then, we use the xTaskNotifyTake() function to halt the task until it receives a notification. This function takes two arguments, ClearCount and TicksToWait.

TicksToWait is pretty standard, Its just the maximum amount of time the function should wait for a notification, but ClearCount is a little more interesting.

First of all, here is what this command looks like when we add it in. I have also added a Serial.println() function to tell the user when it receives a notification.

void receive(void* arg){
  while(true){
    ulTaskNotifyTake(true,portMAX_DELAY);
    Serial.println("GOT MESSAGE");
  }
}

Now back to ClearCount, above you can see that I set it to true. Here is a quick table that shows you what ClearCount does.

FalseMakes the notification act like a counting semaphore, allows you to GIVE multiple times in a row and then TAKE the same number of GIVES.
TrueMakes the notification act like a binary semaphore, allows you to GIVE multiple times in a row and then TAKE only once

Order Matters

The last thing we need to do is turn those functions into tasks, and we will also need to update the address variable.

The order in which you create the tasks is extremly important. When I was making this code I made the mistake of creating the sender first, but the program kept crashing.

The reason the order matters is that, when you create the sender task it will immediately run, and if the receiver does not exist yet, when it tries to send a notification the whole computer will crash, so you have to create the receiver first.

void setup() {
  Serial.begin(115200);

  xTaskCreate(receive,"RECEIVE",2048,NULL,1,&address);
  xTaskCreate(send,"SEND",2048,NULL,1,NULL);
}

The Second Example

Besides the simple mechanisms above, notifications also have a slightly more complex way to send a message that also has a 32-bit number sent with it, so here is the next example.

TaskHandle_t receiver = NULL;


void send(void* arg){
 while(true){
  unsigned int val = random(0,10);
  Serial.printf("Sending Number: %i \n",val);
  xTaskNotify(receiver,val,eSetValueWithOverwrite);
  delay(800);
 }
}

void receive(void* arg){
  while(true){
    uint32_t msg = 0;
    xTaskNotifyWait(0,0,&msg,portMAX_DELAY);
    Serial.printf("Got Number: %i \n",msg);
  }
}


void setup() {
  Serial.begin(115200);

  xTaskCreate(receive,"RECEIVE",2048,NULL,1,&receiver);
  xTaskCreate(send,"SEND",2048,NULL,1,NULL);
}


void loop() {
}

Because this example is so similar to the last, I will just explain the two areas that have changed.

Sending

The sending code has changed as follows.

unsigned int val = random(0,10);
Serial.printf("Sending Number: %i \n",val);
xTaskNotify(receiver,val,eSetValueWithOverwrite);

This example uses the xTaskNotify() function. The main advantage of using this function is that not only can you send a notification, but you can also directly manipulate the 32-bit number that is sent with it.

Of course to send a number, we first need to create one. For this example, we will just randomly generate one.

unsigned int val = random(0,10);

And then,it sends it with this.

xTaskNotify(receiver,val,eSetValueWithOverwrite);

If you look at the code above you will see eSetValueWithOverwrite, this controls what the notification does with the value. Besides overwrite, there are four other options which you can learn about at the notification documentation.

Receiving

Here is where we changed the receiving code.

uint32_t msg = 0;
xTaskNotifyWait(0,0,&msg,portMAX_DELAY);
Serial.printf("Got Number: %i \n",msg);

The first thing we do is create a variable to hold the incoming value from the notification.

uint32_t msg = 0;

Then, we use the xTaskNotifyWait() function. This function takes four arguments the first two are a bit complicated, so I will let the documentation explain them to you, but you can set them to zero if you don’t care about them.

The last two arguments are really easy, you just pass it the variable we made, so it can set it to the correct value, and after that you pass it the maximum time it should wait for a notification. portMAX_DELAY = forever

Serial.printf("Got Number: %i \n",msg);

The Downside to Notifications

While Notifications are extremely powerful and are a great tool to have around when working with microcontrollers, they have one main downside, complexity.

Admittedly, it’s not that hard to create a single notification, but because you have to store the address of your tasks and then determine which address to use later, It can be very hard to manage a large number of notifications.

If you are interested in some of FreeRTOS’s other powerful protocols, you might like to see how a mutex works.

Filed Under: Arduino, FreeRTOS

FreeRTOS Queue Example

May 4, 2023 by Baxter

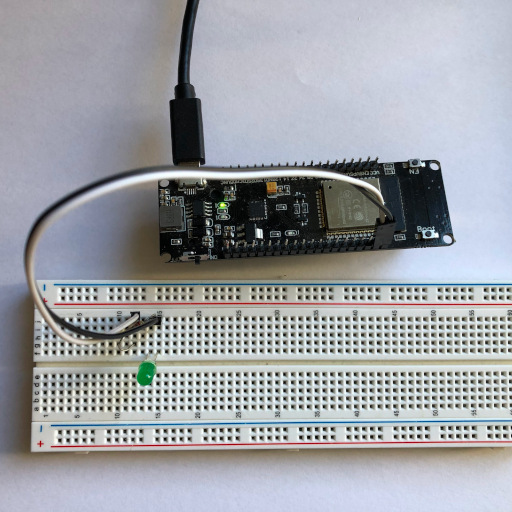
ESP32 with LED connected to it, running the Morse code example

One of the big problems of creating multitasking programs is keeping all of the tasks in sync which is why there are so many systems in place to help with that.

Today, I am going to show you a simple FreeRTOS example about one of those systems called a queue. Queues are normally used when you have a lot of tasks that need to send a lot of data, but to make this example very clear, we will stick with a simple two task program that sends a single number between the tasks.

Here is the code

QueueHandle_t connection;

void sender_task(void* arg) {
  while (true) {
    int num = random(0, 10);
    xQueueSend(connection, &num, portMAX_DELAY);
    Serial.printf("Sent: %i \n", num);
    delay(500);
  }
}

void receiver_task(void* arg) {
  while (true) {
    int num;
    xQueueReceive(connection, &num, portMAX_DELAY);
    Serial.printf("Recived: %i \n", num);
  }
}


void setup() {
  Serial.begin(115200);
  connection = xQueueCreate(10, sizeof(int));

  xTaskCreate(sender_task, "SEND", 2048, NULL, 1, NULL);
  xTaskCreate(receiver_task, "RECEIVE", 2048, NULL, 1, NULL);
}


void loop() {
}

How It Works?

Now that you have seen the code, let’s look through the interesting sections of it to see how queues work.

Queue Handlers

Obviously if we create a queue, we want to use it, but in FreeRTOS instead of directly accessing and using a queue, you need to go through a queue handler, so the first thing, we are going to do, is create one like this.

QueueHandle_t connection;

The First Task

The whole point of a queue is to allow two or more tasks to send information to each other, so we need to create some tasks. Lets start with the one that writes information to the queue.

void sender_task(void* arg) {
  while (true) {
 

  }
}

Next, we will need to create some data to send. When you create a queue, you tell it what size of data it should expect. We haven’t done this yet, but when we do we will set it to the size of integers, so lets create a random integer.

void sender_task(void* arg) {
  while (true) {
    int num = random(0, 10);

  }
}

When we actually want to send data to the queue, we use the xQueueSend() function. It takes three arguments: the queue handler, a pointer to the data to send, and the maximum time to wait, if the queue is full.

void sender_task(void* arg) {
  while (true) {
    int num = random(0, 10);
    xQueueSend(connection, &num, portMAX_DELAY);
    Serial.printf("Sent: %i \n", num);
    delay(500);
  }
}

Reading the Queue

Now we are going to create the task function that receives data from the queue. It starts like most task functions with an infinite loop.

void receiver_task(void* arg) {
  while (true) {

  }
}

Our queue is setup to hold integers, so to read them we need to create a blank integer.

void receiver_task(void* arg) {
  while (true) {
    int num;

  }
}

And then we use the xQueueReceive() function to get the data. It is almost exactly like the xQueueSend() function, the only difference is that when you call this function instead of sending num it actually sets num equal to what ever is in the queue.

void receiver_task(void* arg) {
  while (true) {
    int num;
    xQueueReceive(connection, &num, portMAX_DELAY);
    Serial.printf("Recived: %i \n", num);
  }
}

Creating the Queue

It is kind of surprising, but up to this point, we have not even created the queue yet. To create it, we will need to use xQueueCreate() in the setup function.

void setup() {
  Serial.begin(115200);
  connection = xQueueCreate(10, sizeof(int));
}

That function takes two arguments: the first is the maximum amount of data it should hold and the second is how big each piece of data should be.

The last little thing to take notice of is that we set our queue handler equal to the return value of xQueueCreate().

To finish up, we will need to start each of the tasks.

void setup() {
  Serial.begin(115200);
  connection = xQueueCreate(10, sizeof(int));

  xTaskCreate(sender_task, "SEND", 2048, NULL, 1, NULL);
  xTaskCreate(receiver_task, "RECEIVE", 2048, NULL, 1, NULL);
}

Bonus

While this example is very good at explaining the basics of queues, it is not that interesting, so as a little bonus here is a slightly more complex example that uses one task to retrieve some text and another to send the text out of an LED by Morse code.

I will let you try to figure this one out on your own.

#define LED_PIN 23
#define MORSE_SPEED 100

#define MESSAGE "Hello there"


QueueHandle_t connection;


void process(void* arg) {
  while (true) {
    char text[] = MESSAGE;
    int len = strlen(text);
    for (int i = 0; i < len; i++) {
      xQueueSend(connection, &text[i], portMAX_DELAY);
      Serial.printf("Sent: %c \n", text[i]);
    }
    delay(30000);
  }
}


void dot() {
  digitalWrite(LED_PIN, true);
  delay(MORSE_SPEED);
  digitalWrite(LED_PIN, false);
  delay(MORSE_SPEED);
}
void dash() {
  digitalWrite(LED_PIN, true);
  delay(MORSE_SPEED * 3);
  digitalWrite(LED_PIN, false);
  delay(MORSE_SPEED);
}
void end_letter() {
  digitalWrite(LED_PIN, false);
  delay(MORSE_SPEED * 2);
}
void space() {
  digitalWrite(LED_PIN, false);
  delay(MORSE_SPEED * 4);
}


void  blink_led(void* arg) {
  while (true) {
    char c;
    xQueueReceive(connection, &c, portMAX_DELAY);
    c = toupper(c);

    switch (c) {
      case 'A':
        dot();
        dash();
        end_letter();
        break;
      case 'B':
        dash();
        dot();
        dot();
        dot();
        end_letter();
        break;
      case 'C':
        dash();
        dot();
        dash();
        dot();
        end_letter();
        break;
      case 'D':
        dash();
        dot();
        dot();
        end_letter();
        break;
      case 'E':
        dot();
        end_letter();
        break;
      case 'F':
        dot();
        dot();
        dash();
        dot();
        end_letter();
        break;
      case 'G':
        dash();
        dash();
        dot();
        end_letter();
        break;
      case 'H':
        dot();
        dot();
        dot();
        dot();
        end_letter();
        break;
      case 'I':
        dot();
        dot();
        end_letter();
        break;
      case 'J':
        dot();
        dash();
        dash();
        dash();
        end_letter();
        break;
      case 'K':
        dash();
        dot();
        dash();
        end_letter();
        break;
      case 'L':
        dot();
        dash();
        dot();
        dot();
        end_letter();
        break;
      case 'M':
        dash();
        dash();
        end_letter();
        break;
      case 'N':
        dash();
        dot();
        end_letter();
        break;
      case 'O':
        dash();
        dash();
        dash();
        end_letter();
        break;
      case 'P':
        dot();
        dash();
        dash();
        dot();
        end_letter();
        break;
      case 'Q':
        dash();
        dash();
        dot();
        dash();
        end_letter();
        break;
      case 'R':
        dot();
        dash();
        dot();
        end_letter();
        break;
      case 'S':
        dot();
        dot();
        dot();
        end_letter();
        break;
      case 'T':
        dash();
        end_letter();
        break;
      case 'U':
        dot();
        dot();
        dash();
        end_letter();
        break;
      case 'V':
        dot();
        dot();
        dot();
        dash();
        break;
      case 'W':
        dot();
        dash();
        dash();
        end_letter();
        break;
      case 'X':
        dash();
        dot();
        dot();
        dash();
        end_letter();
        break;
      case 'Y':
        dash();
        dot();
        dash();
        dash();
        end_letter();
        break;
      case 'Z':
        dash();
        dash();
        dot();
        dot();
        end_letter();
        break;
      case ' ':
        space();
        break;
    }
  }
}


void setup() {
  Serial.begin(115200);
  pinMode(LED_PIN, OUTPUT);
  connection = xQueueCreate(20, sizeof(char));

  xTaskCreate(process, "PROCESS", 2048, NULL, 1, NULL);
  xTaskCreate(blink_led, "BLINK", 2048, NULL, 1, NULL);
}

void loop() {
}

I you are looking for some more cool examples about FreeRTOS, you might like to see how FreeRTOS Semaphores work.

Filed Under: FreeRTOS, Micropython

FreeRTOS Semaphore Example

May 2, 2023 by Baxter

an ESP32(the board I am using) I with some text above it

Examples are one of the best tools for learning a new library, and FreeRTOS is no exception, so to help you along in your journey of learning FreeRTOS and in particular FreeRTOS Semaphores here is a quick example.

It works by taking two lists of numbers and adding them together. It does this three times the first time with one task doing all the work, the second with two, and the third with five, and to keep all of those tasks in sync, we will use a counting semaphore.

Here is the code

int A[7] = {1, 2, 3, 4, 5, 6, 7};
int B[7] = {4, 7, 3, 8, 2, 2, 9};


SemaphoreHandle_t data_left;


void process(void* arg) {
  while (xSemaphoreTake(data_left, portMAX_DELAY)) {
    unsigned int count = uxSemaphoreGetCount(data_left);
    Serial.printf("%i: %i + %i = %i \n", count, A[count], B[count], A[count] + B[count]);
    delay(500);
  }
  vTaskDelete(NULL);
}


void setup() {
  Serial.begin(115200);
  unsigned int time = millis();

  data_left = xSemaphoreCreateCounting(7, 7);


  Serial.println("Using One Thread");
  xTaskCreate(process, "P-ONE", 2048, NULL, 1, NULL);


  while (uxSemaphoreGetCount(data_left) != 0) delay(100);
  Serial.printf("Time: %i\n", millis() - time);
  time = millis();

  vSemaphoreDelete(data_left);
  data_left = xSemaphoreCreateCounting(7, 7);

  Serial.println("Using Two Threads");
   xTaskCreate(process, "P-TWO", 2048, NULL, 1, NULL);

  while (uxSemaphoreGetCount(data_left) != 0) delay(100);
  Serial.printf("Time: %i\n", millis() - time);
  time = millis();
  
  vSemaphoreDelete(data_left);
  data_left = xSemaphoreCreateCounting(7, 7);

  Serial.println("Using Five Threads");
  xTaskCreate(process, "P-THREE", 2048, NULL, 1, NULL);
  xTaskCreate(process, "P-FOUR", 2048, NULL, 1, NULL);
  xTaskCreate(process, "P-FIVE", 2048, NULL, 1, NULL);


  while (uxSemaphoreGetCount(data_left) != 0) delay(100);
  Serial.printf("Time: %i\n", millis() - time);

}

void loop() {

}

How This Code Works

Now, that you have seen the example code, why don’t we look through the interesting sections of it and see what they do and how they work.

The Numbers

The first thing the program does is create two lists with 7 numbers in each. These will be the numbers we will add together later.

int A[7] = {1, 2, 3, 4, 5, 6, 7};
int B[7] = {4, 7, 3, 8, 2, 2, 9};

Creating The Semaphore Handler

You don’t actually access semaphores directly, instead you have to go through a semaphore handler, so the next thing, we will do, is create one.

SemaphoreHandle_t data_left;

The Task Function

We will start out with a basic task function that we will call process.

void process(void* arg) {


  vTaskDelete(NULL);
}

Next, we are going to add an infinite loop that checks, if there is any data left to process.

void process(void* arg) {
  while (xSemaphoreTake(data_left, portMAX_DELAY)) {

  }
  vTaskDelete(NULL);
}

If there is data to process, we will find the position of the data, process it(aka. add the two numbers together), print the result to Serial, and then delay for 500 milliseconds.

void process(void* arg) {
  while (xSemaphoreTake(data_left, portMAX_DELAY)) {
    unsigned int count = uxSemaphoreGetCount(data_left);
    Serial.printf("%i: %i + %i = %i \n", count, A[count], B[count], A[count] + B[count]);
    delay(500);
  }
  vTaskDelete(NULL);
}

Running The Task

This last bit of code is all run in side of the setup function.

void setup() {
  Serial.begin(115200);
  
}

We are going to time how long it takes to process the data, so we will begin by recording the starting time in a variable.

void setup() {
  Serial.begin(115200);
  unsigned int time = millis();

}

Then, we will create a new semaphore and put it in the semaphore handler we made earlier. This semaphore is a counting semaphores which means when we create it, we need to give it a max value and starting value.

Because we have 7 pairs of numbers to add, we will set the max value to 7 and the starting value to 7 as well.

void setup() {
  Serial.begin(115200);
  unsigned int time = millis();

  data_left = xSemaphoreCreateCounting(7, 7);

}

Then, we will setup our task function. At this point, everything is done for the first test.

void setup() {
  Serial.begin(115200);
  unsigned int time = millis();

  data_left = xSemaphoreCreateCounting(7, 7);


  Serial.println("Using One Thread");
  xTaskCreate(process, "P-ONE", 2048, NULL, 1, NULL);
}

Next, we will tell the setup function to wait until all the numbers have been processed, and then print how long it took.

void setup() {
  Serial.begin(115200);
  unsigned int time = millis();

  data_left = xSemaphoreCreateCounting(7, 7);


  Serial.println("Using One Thread");
  xTaskCreate(process, "P-ONE", 2048, NULL, 1, NULL);

  while (uxSemaphoreGetCount(data_left) != 0) delay(100);
  Serial.printf("Time: %i\n", millis() - time);
}

The next test will use two tasks. We already have one task running in the background, so now all we need to do is create another one, reset the data, and of course we will need to time everything.

void setup() {
  Serial.begin(115200);
  unsigned int time = millis();

  data_left = xSemaphoreCreateCounting(7, 7);


  Serial.println("Using One Thread");
  xTaskCreate(process, "P-ONE", 2048, NULL, 1, NULL);

  while (uxSemaphoreGetCount(data_left) != 0) delay(100);
  Serial.printf("Time: %i\n", millis() - time);


  time = millis();

  vSemaphoreDelete(data_left);
  data_left = xSemaphoreCreateCounting(7, 7);

  Serial.println("Using Two Threads");
  xTaskCreate(process, "P-TWO", 2048, NULL, 1, NULL);

  while (uxSemaphoreGetCount(data_left) != 0) delay(100);
  Serial.printf("Time: %i\n", millis() - time);
}

The third test is just like the last two, except now there are 5 tasks running.

void setup() {
  Serial.begin(115200);
  unsigned int time = millis();

  data_left = xSemaphoreCreateCounting(7, 7);


  Serial.println("Using One Thread");
  xTaskCreate(process, "P-ONE", 2048, NULL, 1, NULL);

  while (uxSemaphoreGetCount(data_left) != 0) delay(100);
  Serial.printf("Time: %i\n", millis() - time);


  time = millis();

  vSemaphoreDelete(data_left);
  data_left = xSemaphoreCreateCounting(7, 7);

  Serial.println("Using Two Threads");
   xTaskCreate(process, "P-TWO", 2048, NULL, 1, NULL);

  while (uxSemaphoreGetCount(data_left) != 0) delay(100);
  Serial.printf("Time: %i\n", millis() - time);


  time = millis();
  
  vSemaphoreDelete(data_left);
  data_left = xSemaphoreCreateCounting(7, 7);

  Serial.println("Using Five Threads");
  xTaskCreate(process, "P-THREE", 2048, NULL, 1, NULL);
  xTaskCreate(process, "P-FOUR", 2048, NULL, 1, NULL);
  xTaskCreate(process, "P-FIVE", 2048, NULL, 1, NULL);

  while (uxSemaphoreGetCount(data_left) != 0) delay(100);
  Serial.printf("Time: %i\n", millis() - time);

}

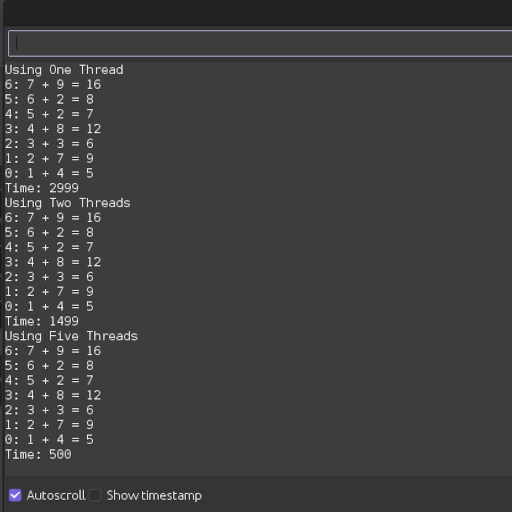
This is what you should see in the Serial Monitor when you run the code.

A Little Misleading

If you look at the results from the test, you will see that it takes 3 seconds for the test with one task, 1.5 seconds for the test with two tasks, and 0.5 seconds for the test with five tasks.

Because of this you might be led to think, that the more tasks the better, but because we have the delay(500); in the process() function, the results you are seeing are greatly exaggerated.

In reality, because the ESP32 is a two core microcontroller, it should hit maximum performance while using two tasks.

I you are looking for some more cool examples about FreeRTOS, you might like to see how FreeRTOS Queues work.

Filed Under: Arduino, FreeRTOS

A Simple ESP32 FreeRTOS Example

April 28, 2023 by Baxter

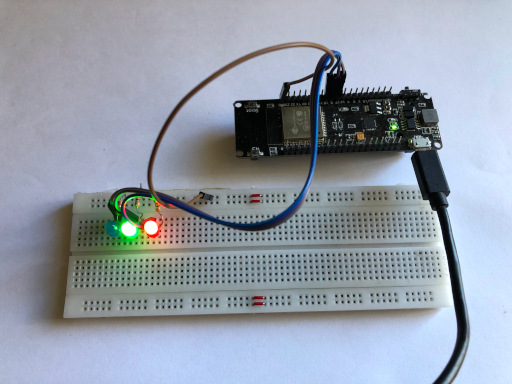
Three LEDs being blinked by an ESP32

FreeRTOS is a really useful library, but learning how to use it is a bit hard, so I have created this simple example that uses FreeRTOS to blink three LEDs at different frequencies. The main focus of this example is how to use task functions and pass arguments to them.

The Parts

This project is mostly about the code, but here are the parts I used.

  1. 3 LEDs
  2. 3 resistors (220 ohm)
  3. 4 wires
  4. a breadboard
  5. an ESP32

Wiring up LEDs is pretty much the first thing you’re taught when learning electronics, so I will not waist your time with something you already now. I will say that I connected my LEDs to pins 17,18, and 5 of my ESP32, if you are trying to follow along exactly.

The Example Code

Here it is

struct blinkStruct {
  int pin;
  unsigned int time;
};


void blinkLED(void* arg) {
  blinkStruct data = *(blinkStruct*)arg;
  pinMode(data.pin, OUTPUT);
  while (true) {
   digitalWrite(data.pin, HIGH);
   delay(data.time);
   digitalWrite(data.pin, LOW);
   delay(data.time);
  }
  vTaskDelete(NULL);
}


void setup() {
  static blinkStruct LEDone;
  LEDone.pin = 17;
  LEDone.time = 1000;

  static blinkStruct LEDtwo;
  LEDtwo.pin = 18;
  LEDtwo.time = 300;

  static blinkStruct LEDthree;
  LEDthree.pin = 5;
  LEDthree.time = 1500;


  // blink led one
  xTaskCreate(blinkLED,"LED ONE",2048,(void*) &LEDone,1,NULL);

  // blink led two
  xTaskCreate(blinkLED,"LED TWO",2048, (void*) &LEDtwo,1, NULL);

  // blink led three
  xTaskCreate(blinkLED,"LED THREE",2048, (void*) &LEDthree,1, NULL);

}

void loop() {
}

How It Works

Now that you have seen all the code, let’s step through each section, so you can understand exactly what each part does. 

The Struct

In C++, structs are a way to create a custom variable. For this example, we will need to create one that can store data for each blinking LED.

struct blinkStruct {
  int pin;
  unsigned int time;
};

This struct has two internal variables pin and time. They are pretty self explanatory, pin is the gpio pin your LED is connected to, and time is how quickly the LED should blink.

The FreeRTOS Task

Next, we are going to need to create a task function. This function will be in charge of blinking one LED.

void blinkLED(void* arg) {
  // some more code coming

  vTaskDelete(null);
}

The last thing any task function should do is call vTaskDelete(null);. Doing this deletes the task, so your computer can keep running.

Later when we call this function, we are going to pass some data to it, but that data will be stored in a void pointer(void* ), so we need to use type casting to turn it into useful data.

void blinkLED(void* arg) {
  blinkStruct data = *(blinkStruct*)arg;

  vTaskDelete(null);
}

Inside our function, we now have a variable called data, and it has two internal properties: pin and time. The next thing we will need to do is set the mode of that pin to OUTPUT.

void blinkLED(void* arg) {
  blinkStruct data = *(blinkStruct*)arg;
  pinMode(data.pin, OUTPUT);

  vTaskDelete(NULL);
}

Then, we will simply create an infinite loop, that will turn the LED on, then wait a bit, then turn it off and wait, etc.

void blinkLED(void* arg) {
  blinkStruct data = *(blinkStruct*)arg;
  pinMode(data.pin, OUTPUT);
  while (true) {
   digitalWrite(data.pin, HIGH);
   delay(data.time);
   digitalWrite(data.pin, LOW);
   delay(data.time);
  }
  vTaskDelete(NULL);
}

The Setup

This last little bit of code is going to go in the setup funciton.

void setup() {

}

We will start by creating a blinkStruct variable. Because we will use it with a task, this variable should never be deleted, so you need to make it a global or static or dynamic etc. variable. Just do something that forces the computer to not delete it.

void setup() {
  static blinkStruct LEDone;

}

Then, we will tell the computer what pin the first LED is connected to, in my case it’s pin 17, and we will tell it to blink that LED once every 1000 milliseconds(1 second) .

void setup() {
  static blinkStruct LEDone;
  LEDone.pin = 17;
  LEDone.time = 1000;
}

Now, we will just repeat that process for the remaining two LEDs.

void setup() {
  static blinkStruct LEDone;
  LEDone.pin = 17;
  LEDone.time = 1000;

  static blinkStruct LEDtwo;
  LEDtwo.pin = 18;
  LEDtwo.time = 300;

  static blinkStruct LEDthree;
  LEDthree.pin = 5;
  LEDthree.time = 1500;
}

We have several variables and a function to blink a LED, now we just need to combine them together using the xTaskCreate() function.

void setup() {
  static blinkStruct LEDone;
  LEDone.pin = 17;
  LEDone.time = 1000;

  static blinkStruct LEDtwo;
  LEDtwo.pin = 18;
  LEDtwo.time = 300;

  static blinkStruct LEDthree;
  LEDthree.pin = 5;
  LEDthree.time = 1500;


  // blink led one
  xTaskCreate(blinkLED,"LED ONE",2048,(void*) &LEDone,1,NULL);
}

And we will do the same thing for the last two LEDs.

void setup() {
  static blinkStruct LEDone;
  LEDone.pin = 17;
  LEDone.time = 1000;

  static blinkStruct LEDtwo;
  LEDtwo.pin = 18;
  LEDtwo.time = 300;

  static blinkStruct LEDthree;
  LEDthree.pin = 5;
  LEDthree.time = 1500;


  // blink led one
  xTaskCreate(blinkLED,"LED ONE",2048,(void*) &LEDone,1,NULL);

  // blink led two
  xTaskCreate(blinkLED,"LED TWO",2048, (void*) &LEDtwo,1, NULL);

  // blink led three
  xTaskCreate(blinkLED,"LED THREE",2048, (void*) &LEDthree,1, NULL);

}

What Next?

Experimenting with code is a great way to learn, so once you get this code running, you could add some extra LEDs to the code or change the timing of the ones that are already there or if you really wanted to change it, you could rewrite the blinkLED() function to flash the LEDs in a different pattern.

If you are interested in learning more about FreeRTOS, you might like to see a FreeRTOS Semaphore Example.

Filed Under: Arduino, FreeRTOS

Recent Posts

  • How to Shorten Your Micropython LVGL Code
  • FreeRTOS Mutex Example
  • FreeRTOS Task Notification Example
  • FreeRTOS Queue Example
  • FreeRTOS Semaphore Example

Categories

  • Arduino
  • ESP32 Web Page
  • FreeRTOS
  • LEGO Technic
  • LEGO tips
  • LEGO war robots
  • Lego's
  • Legos
  • LEGOS-build your own
  • Micropython

Copyright © 2025 · Minimum Pro Theme on Genesis Framework · WordPress · Log in