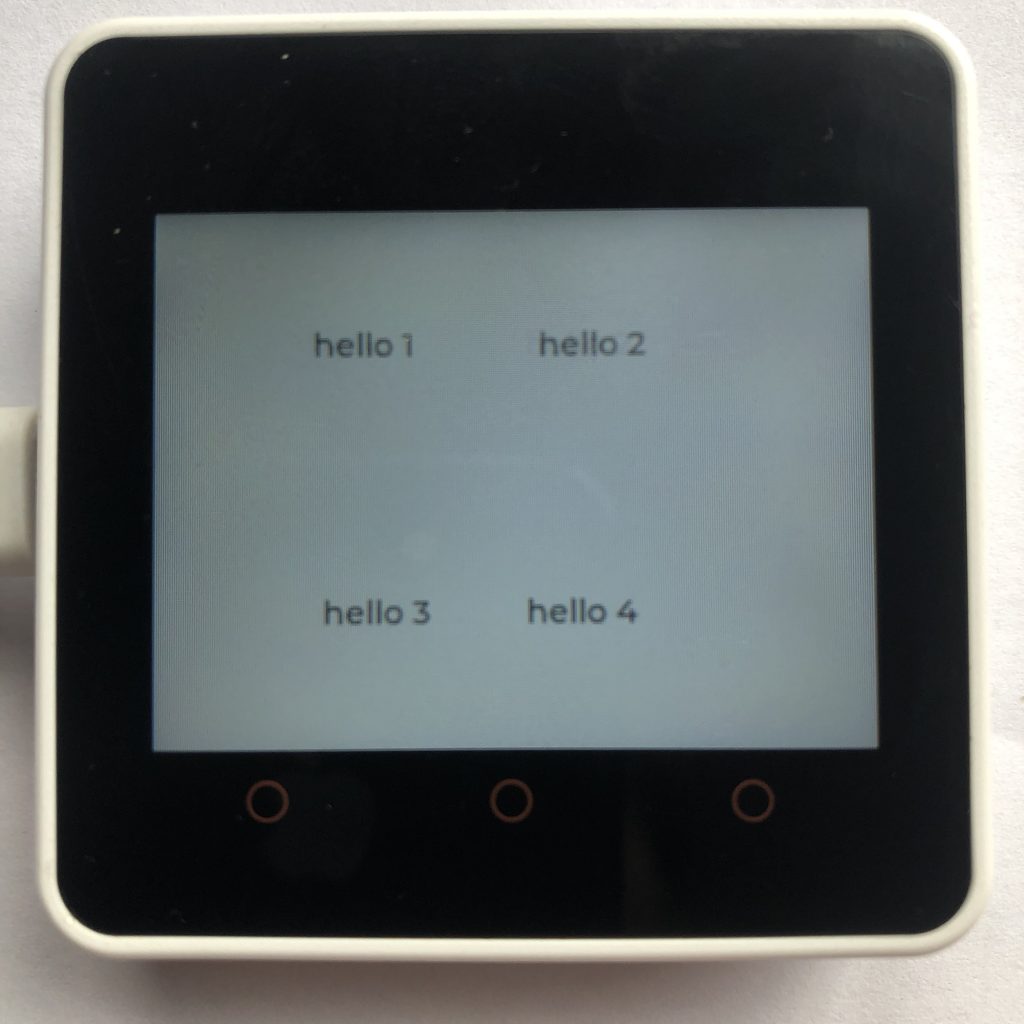
Baxter Builds

How to Shorten Your Micropython LVGL Code

August 5, 2023 by Baxter

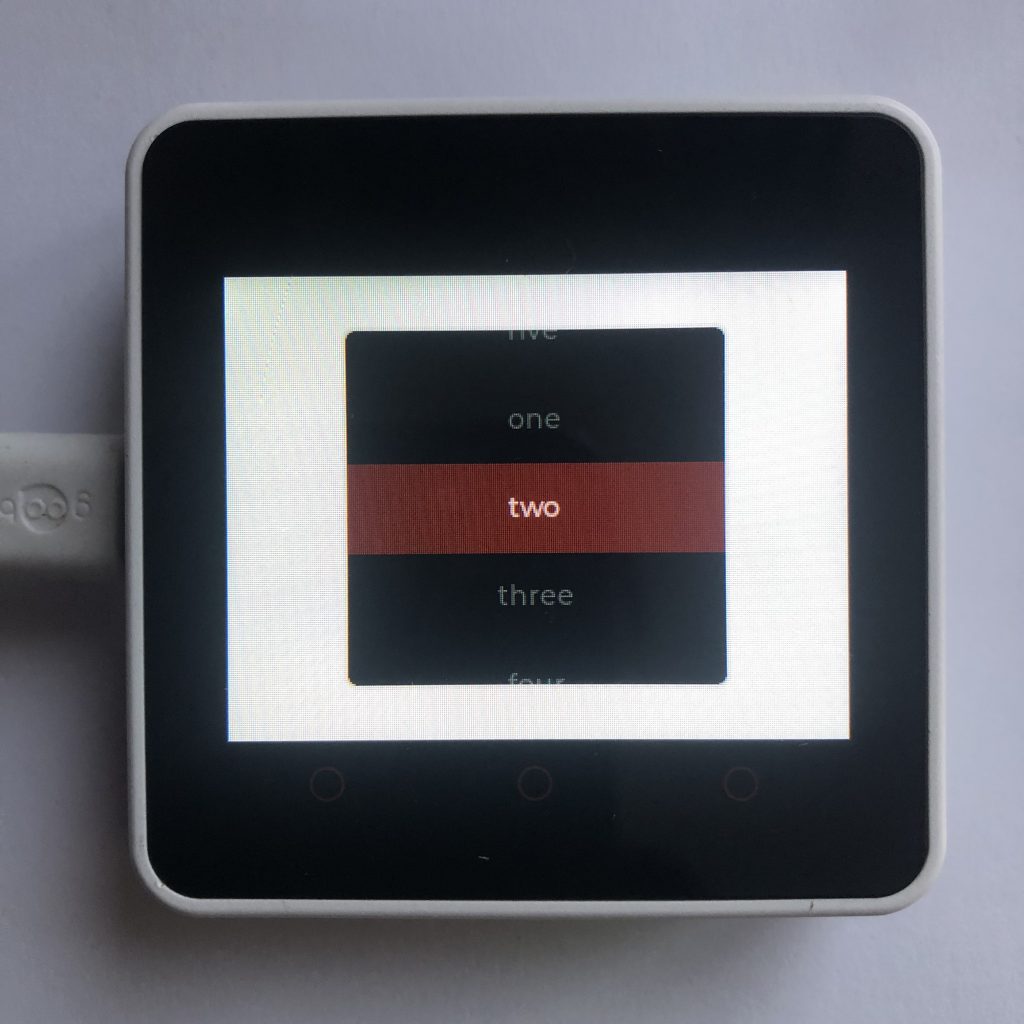
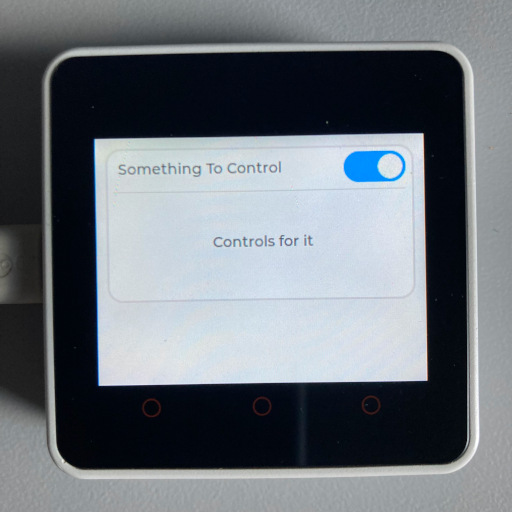
A custom LVGL widget

Often when you are working on a project, you will find that parts of the code pretty much repeat over and over, and life would be so much easier, if you could just combine all that code into one neat little package.

Normally this is not that hard, you just use a function, but when you start mixing in LVGL widgets it can be hard to keep in control of everything and simplify at the same time. That is why today I will show you an example on how to simplify your LVGL code.

Setting Up a Micropython Screen

Obviously, if you are creating a program that uses LVGL, you have to have access to a screen.

Because there are so many different screens out there, I can’t add support for all of them, so to make this example work, you will need to add your screen’s setup code to the beginning of this example.

There is a little more information on this process at How to get a LVGL Micropython Screen to Work if you aren’t familiar on how it’s done.

here is the example code.

import lvgl

def Dropdown(name,final_size,scr):
    container = lvgl.obj(scr)
    container.set_size(300,40)
    container.set_pos(5,5)
    container.set_style_radius(15,0)
    container.set_style_pad_all(0,0)
    container.set_scrollbar_mode(lvgl.SCROLLBAR_MODE.OFF)

    label1 = lvgl.label(container)
    label1.set_text(name)
    label1.set_pos(10,10)

    sw1 = lvgl.switch(container)
    sw1.set_size(60,30)
    sw1.set_pos(230,4)

    line = lvgl.line(container)
    line.set_pos(0,40)
    points = [{"x":5,"y":0},{"x":290,"y":0}]
    line.set_points(points,2)
    line.set_style_line_color(lvgl.color_hex(0xDDDDDD),0)


    down = lvgl.anim_t()
    down.init()
    down.set_var(container)
    down.set_time(300)
    down.set_values(40,final_size)

    down.set_custom_exec_cb(lambda not_used,value : container.set_height( value))

    up = lvgl.anim_t()
    up.init()
    up.set_var(container)
    up.set_time( 300 )
    up.set_values( final_size, 40 )

    up.set_custom_exec_cb( lambda not_used, value : container.set_height( value ))
    
    sandbox = lvgl.obj(container)
    sandbox.set_pos(5,35)
    sandbox.add_flag(lvgl.obj.FLAG.HIDDEN)
    sandbox.set_size(290,final_size-40)
    sandbox.set_style_border_side(lvgl.BORDER_SIDE.NONE,0)


    def switch_clicked(data): 
        switch = data.get_target()
        state = switch.has_state(lvgl.STATE.CHECKED)
        print(state)
        if state:
            down.start()
            sandbox.clear_flag(lvgl.obj.FLAG.HIDDEN)
            line.clear_flag(lvgl.obj.FLAG.HIDDEN)
        else:
            up.start()
            sandbox.add_flag(lvgl.obj.FLAG.HIDDEN)
            line.add_flag(lvgl.obj.FLAG.HIDDEN)
                 
    sw1.add_event_cb(switch_clicked,lvgl.EVENT.CLICKED,None)   
    return (container,sandbox)


Container,Sandbox = Dropdown("Something To Control",150,lvgl.scr_act())
Container.set_pos(10,10)


Some_Text = lvgl.label(Sandbox)
Some_Text.set_text("Controls for it")
Some_Text.center()

Understanding This LVGL Code

Ok, now that you have seen all the code, let’s step through each section, so you can understand the basic tricks to making you code simpler.

Using a Function

As mentioned before, Functions are a great start to making code smaller, so our example code begins by creating one. We will call this function Dropdown and make it take three arguments.

def Dropdown(name,final_size,scr):

A Container

The next big trick is to create a LVGL object. Later when we start creating more LVGL objects, we will always put them inside of this first object.

This will dramatically simplify group actions, like if you want to move every object 10 pixels to the left, all you have to do is move the container 10 pixels, and everything inside of it will move ten pixels as well.

    container = lvgl.obj(scr)

After that, we will set some settings like the size of the the container, it’s position, and how rounded the corners should be.

    container.set_size(300,40)
    container.set_pos(5,5)
    container.set_style_radius(15,0)

LVGL’s default padding is just a little to much for the size of my screen, so I removed it like this.

    container.set_style_pad_all(0,0)

Next we can remove the scrollbar. Because we will use animations later, there will be a small amount of time where the content is to large for our container. LVGL by default will try to add a scrollbar when that happens, which totally ruins how everything looks for a few seconds.

    container.set_scrollbar_mode(lvgl.SCROLLBAR_MODE.OFF)

Some Content

After that we will add a little content inside of our main object. This is all pretty standard stuff, so I will not bore you with the details.

    label1 = lvgl.label(container)
    label1.set_text(name)
    label1.set_pos(10,10)

    sw1 = lvgl.switch(container)
    sw1.set_size(60,30)
    sw1.set_pos(230,4)

    line = lvgl.line(container)
    line.set_pos(0,40)
    points = [{"x":5,"y":0},{"x":290,"y":0}]
    line.set_points(points,2)
    line.set_style_line_color(lvgl.color_hex(0xDDDDDD),0)

Animations

We are going to use animations to smoothly change the size of are custom widget. Animations are complex and really out of the scope of this post, so I will not explain them here. If you are not very familiar with animations, you might be interested in seeing some simple Animation Examples.

    down = lvgl.anim_t()
    down.init()
    down.set_var(container)
    down.set_time(300)
    down.set_values(40,final_size)

    down.set_custom_exec_cb(lambda not_used,value : container.set_height( value))

    up = lvgl.anim_t()
    up.init()
    up.set_var(container)
    up.set_time( 300 )
    up.set_values( final_size, 40 )
import lvgl
    up.set_custom_exec_cb( lambda not_used, value : container.set_height( value ))

Another Container

Next we are going to create another container. We will use it later as a sandbox, just a little area were you can add anything you want to it.

    sandbox = lvgl.obj(container)
    sandbox.set_pos(5,35)
    sandbox.add_flag(lvgl.obj.FLAG.HIDDEN)
    sandbox.set_size(290,final_size-40)
    sandbox.set_style_border_side(lvgl.BORDER_SIDE.NONE,0)

Creating Some Action

Up to this point, we have created a bunch of basic widgets. Now what we are going to do is add an event handler. We kind of skipped over it, but earlier we created a switch, what we want to happen now is when ever that switch is turned on the hole container get larger and an extra section pops out.

Whenever we need to respond to some action in LVGL, we use handlers, so lets create one.

    def switch_clicked(data): 

The first thing we do in this handler function, will be to check if the switch is on or off.

        switch = data.get_target()
        state = switch.has_state(lvgl.STATE.CHECKED)

Then we will print that answer to the terminal.

        print(state)

After that, we will create an if statement to respond to the current state.

        if state:
            down.start()
            sandbox.clear_flag(lvgl.obj.FLAG.HIDDEN)
            line.clear_flag(lvgl.obj.FLAG.HIDDEN)
        else:
            up.start()
            sandbox.add_flag(lvgl.obj.FLAG.HIDDEN)
            line.add_flag(lvgl.obj.FLAG.HIDDEN)

While the if statement is pretty simple, the code inside of it is less so. Here is what it does.

First if the switch has been turned on, it will start the down animation we created earlier. All that animations does is change the height of our sandbox container to 150px.

            down.start()

Then, it makes all of the stuff inside that container not hidden aka visible.

            sandbox.clear_flag(lvgl.obj.FLAG.HIDDEN)
            line.clear_flag(lvgl.obj.FLAG.HIDDEN)

And if the Switch was turned off, it does the opposite. It shrinks the container to 40 pixels tall and hides the stuff inside of the container.

            up.start()
            sandbox.add_flag(lvgl.obj.FLAG.HIDDEN)
            line.add_flag(lvgl.obj.FLAG.HIDDEN)

Convenience

This last line of code is really short, but also really important.

return (container,sandbox)

What it does is return both the main container and the smaller one inside it. Take note of the parenthesizes and coma, they condense multiple items into one item, so we can use it as the return value of our function.

Passing the main container is useful, because it easily allows us to move everything around the screen, and passing the second container is useful ,because it allows us to quickly edit what we want.

Using Our Function

Now that we have created our function lets use it. Because this function returns multiple variables when it ends, we will use a trick called unpacking to get all of them available as quickly as possible.

Container,Sandbox = Dropdown("Something To Control",150,lvgl.scr_act())

Now we have two variables: Container and Sandbox. We will start out by moving the Container, when we move it, everything we have created will move with it as well.

Container.set_pos(10,10)

We made the Sandbox variable to be a little area that will occasionally pop out. If we create something inside of it, when Sandbox appears so will what ever we created.

Lets create a basic label and center it inside of our Sandbox.

Some_Text = lvgl.label(Sandbox)
Some_Text.set_text("Controls for it")
Some_Text.center()

What Next?

This example creates a relatively unique widget, so I would suggest first of all just running the code and seeing what it creates. Then start playing around with it. While this example is a bit long, that is mostly because I went a bit overboard with the animations and styles. The basic principles here are actually very simple.

  1. First, you put your code inside of a function.
  2. Second, you create an LVGL object, which all further objects are put inside of.
  3. Third, you return all important LVGL objects from the function using tuples and unpacking.

If you found this tutorial interesting you might like to see a complete LVGL Timer App Example.
Filed Under: Micropython

FreeRTOS Queue Example

May 4, 2023 by Baxter

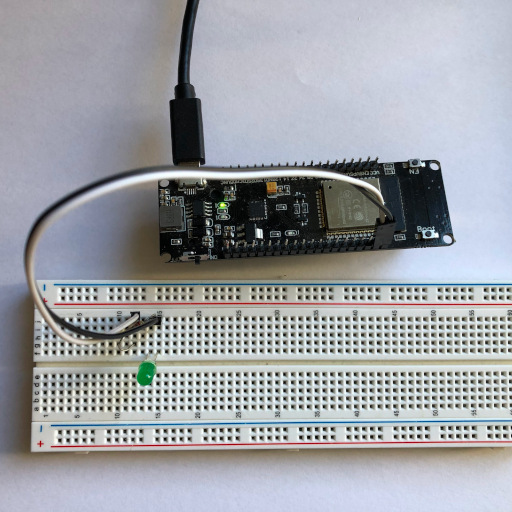
ESP32 with LED connected to it, running the Morse code example

One of the big problems of creating multitasking programs is keeping all of the tasks in sync which is why there are so many systems in place to help with that.

Today, I am going to show you a simple FreeRTOS example about one of those systems called a queue. Queues are normally used when you have a lot of tasks that need to send a lot of data, but to make this example very clear, we will stick with a simple two task program that sends a single number between the tasks.

Here is the code

QueueHandle_t connection;

void sender_task(void* arg) {
  while (true) {
    int num = random(0, 10);
    xQueueSend(connection, &num, portMAX_DELAY);
    Serial.printf("Sent: %i \n", num);
    delay(500);
  }
}

void receiver_task(void* arg) {
  while (true) {
    int num;
    xQueueReceive(connection, &num, portMAX_DELAY);
    Serial.printf("Recived: %i \n", num);
  }
}


void setup() {
  Serial.begin(115200);
  connection = xQueueCreate(10, sizeof(int));

  xTaskCreate(sender_task, "SEND", 2048, NULL, 1, NULL);
  xTaskCreate(receiver_task, "RECEIVE", 2048, NULL, 1, NULL);
}


void loop() {
}

How It Works?

Now that you have seen the code, let’s look through the interesting sections of it to see how queues work.

Queue Handlers

Obviously if we create a queue, we want to use it, but in FreeRTOS instead of directly accessing and using a queue, you need to go through a queue handler, so the first thing, we are going to do, is create one like this.

QueueHandle_t connection;

The First Task

The whole point of a queue is to allow two or more tasks to send information to each other, so we need to create some tasks. Lets start with the one that writes information to the queue.

void sender_task(void* arg) {
  while (true) {
 

  }
}

Next, we will need to create some data to send. When you create a queue, you tell it what size of data it should expect. We haven’t done this yet, but when we do we will set it to the size of integers, so lets create a random integer.

void sender_task(void* arg) {
  while (true) {
    int num = random(0, 10);

  }
}

When we actually want to send data to the queue, we use the xQueueSend() function. It takes three arguments: the queue handler, a pointer to the data to send, and the maximum time to wait, if the queue is full.

void sender_task(void* arg) {
  while (true) {
    int num = random(0, 10);
    xQueueSend(connection, &num, portMAX_DELAY);
    Serial.printf("Sent: %i \n", num);
    delay(500);
  }
}

Reading the Queue

Now we are going to create the task function that receives data from the queue. It starts like most task functions with an infinite loop.

void receiver_task(void* arg) {
  while (true) {

  }
}

Our queue is setup to hold integers, so to read them we need to create a blank integer.

void receiver_task(void* arg) {
  while (true) {
    int num;

  }
}

And then we use the xQueueReceive() function to get the data. It is almost exactly like the xQueueSend() function, the only difference is that when you call this function instead of sending num it actually sets num equal to what ever is in the queue.

void receiver_task(void* arg) {
  while (true) {
    int num;
    xQueueReceive(connection, &num, portMAX_DELAY);
    Serial.printf("Recived: %i \n", num);
  }
}

Creating the Queue

It is kind of surprising, but up to this point, we have not even created the queue yet. To create it, we will need to use xQueueCreate() in the setup function.

void setup() {
  Serial.begin(115200);
  connection = xQueueCreate(10, sizeof(int));
}

That function takes two arguments: the first is the maximum amount of data it should hold and the second is how big each piece of data should be.

The last little thing to take notice of is that we set our queue handler equal to the return value of xQueueCreate().

To finish up, we will need to start each of the tasks.

void setup() {
  Serial.begin(115200);
  connection = xQueueCreate(10, sizeof(int));

  xTaskCreate(sender_task, "SEND", 2048, NULL, 1, NULL);
  xTaskCreate(receiver_task, "RECEIVE", 2048, NULL, 1, NULL);
}

Bonus

While this example is very good at explaining the basics of queues, it is not that interesting, so as a little bonus here is a slightly more complex example that uses one task to retrieve some text and another to send the text out of an LED by Morse code.

I will let you try to figure this one out on your own.

#define LED_PIN 23
#define MORSE_SPEED 100

#define MESSAGE "Hello there"


QueueHandle_t connection;


void process(void* arg) {
  while (true) {
    char text[] = MESSAGE;
    int len = strlen(text);
    for (int i = 0; i < len; i++) {
      xQueueSend(connection, &text[i], portMAX_DELAY);
      Serial.printf("Sent: %c \n", text[i]);
    }
    delay(30000);
  }
}


void dot() {
  digitalWrite(LED_PIN, true);
  delay(MORSE_SPEED);
  digitalWrite(LED_PIN, false);
  delay(MORSE_SPEED);
}
void dash() {
  digitalWrite(LED_PIN, true);
  delay(MORSE_SPEED * 3);
  digitalWrite(LED_PIN, false);
  delay(MORSE_SPEED);
}
void end_letter() {
  digitalWrite(LED_PIN, false);
  delay(MORSE_SPEED * 2);
}
void space() {
  digitalWrite(LED_PIN, false);
  delay(MORSE_SPEED * 4);
}


void  blink_led(void* arg) {
  while (true) {
    char c;
    xQueueReceive(connection, &c, portMAX_DELAY);
    c = toupper(c);

    switch (c) {
      case 'A':
        dot();
        dash();
        end_letter();
        break;
      case 'B':
        dash();
        dot();
        dot();
        dot();
        end_letter();
        break;
      case 'C':
        dash();
        dot();
        dash();
        dot();
        end_letter();
        break;
      case 'D':
        dash();
        dot();
        dot();
        end_letter();
        break;
      case 'E':
        dot();
        end_letter();
        break;
      case 'F':
        dot();
        dot();
        dash();
        dot();
        end_letter();
        break;
      case 'G':
        dash();
        dash();
        dot();
        end_letter();
        break;
      case 'H':
        dot();
        dot();
        dot();
        dot();
        end_letter();
        break;
      case 'I':
        dot();
        dot();
        end_letter();
        break;
      case 'J':
        dot();
        dash();
        dash();
        dash();
        end_letter();
        break;
      case 'K':
        dash();
        dot();
        dash();
        end_letter();
        break;
      case 'L':
        dot();
        dash();
        dot();
        dot();
        end_letter();
        break;
      case 'M':
        dash();
        dash();
        end_letter();
        break;
      case 'N':
        dash();
        dot();
        end_letter();
        break;
      case 'O':
        dash();
        dash();
        dash();
        end_letter();
        break;
      case 'P':
        dot();
        dash();
        dash();
        dot();
        end_letter();
        break;
      case 'Q':
        dash();
        dash();
        dot();
        dash();
        end_letter();
        break;
      case 'R':
        dot();
        dash();
        dot();
        end_letter();
        break;
      case 'S':
        dot();
        dot();
        dot();
        end_letter();
        break;
      case 'T':
        dash();
        end_letter();
        break;
      case 'U':
        dot();
        dot();
        dash();
        end_letter();
        break;
      case 'V':
        dot();
        dot();
        dot();
        dash();
        break;
      case 'W':
        dot();
        dash();
        dash();
        end_letter();
        break;
      case 'X':
        dash();
        dot();
        dot();
        dash();
        end_letter();
        break;
      case 'Y':
        dash();
        dot();
        dash();
        dash();
        end_letter();
        break;
      case 'Z':
        dash();
        dash();
        dot();
        dot();
        end_letter();
        break;
      case ' ':
        space();
        break;
    }
  }
}


void setup() {
  Serial.begin(115200);
  pinMode(LED_PIN, OUTPUT);
  connection = xQueueCreate(20, sizeof(char));

  xTaskCreate(process, "PROCESS", 2048, NULL, 1, NULL);
  xTaskCreate(blink_led, "BLINK", 2048, NULL, 1, NULL);
}

void loop() {
}

I you are looking for some more cool examples about FreeRTOS, you might like to see how FreeRTOS Semaphores work.

Filed Under: FreeRTOS, Micropython

Micropython with an ESP32 Camera

April 11, 2023 by Baxter

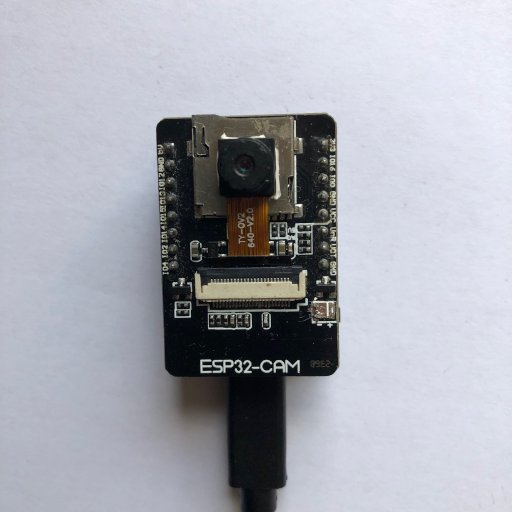
ESP32-CAM board

Putting an ESP32 camera in your projects is just fun, but programming one is not always that fun. Normally you would program a microcontroller camera with c++ which is a very powerful and very complicated language, but if you are just creating a project for fun, micropython is a little simpler to use and has some powerful features of its own.

The Firmware

Because cameras take a lot of computer power to run and micropython is not the fastest language, the best thing to do is to write the camera driver in a fast language like c++ and compile it into the firmware.

Thankfully, somebody has all ready done this for us. All you have to do is download one of the firmwares and upload it to your board with what ever tool you like.

On that page, there are actually two firmwares you can choose from. I am using the one with BLE, but the code we are working with today does not use Bluetooth, so it does not matter which one you choose.

The Code

Taking a picture with micropython is a breeze. You just import the camera module, then initialize it, and finally take a picture.

import camera
camera.init(0)
pic = camera.capture()

Unfortunately, pictures take a lot of memory. If you start taking lots of pictures, your ESP32 is going to run out of memory fast, so we have to find somewhere to put those images.

Because the ESP32-CAM comes with a SD card slot built in, we will use it to store the pictures.

import camera,os,machine

os.mount(machine.SDCard(),'/sd')

camera.init(0)
camera.speffect(camera.EFFECT_GREEN)
print("Camera Initlized")

pic = camera.capture()
print("Picture Taken")
print("Size:",len(pic))

file = open("/sd/picture.jpeg",'wb')
file.write(pic)
file.close()

print("Finished Storing")

del pic
camera.deinit()
os.umount('/sd')

How That Code Works

Let’s quickly run through that code, and see the interesting parts.

Setting Up

The code starts by importing the needed libraries and initializing the SD card.

import camera,os,machine

os.mount(machine.SDCard(),'/sd')

Initializing the Camera

The simplest way to initialize the camera is like this.

camera.init(0)

You always have to put the zero there, but I can’t find any information about what it actually does.

If your camera is wired differently than the ESP32-CAM board, you can tell micropython the different pins you want to use like this.

camera.init(0,d0 = 14,d1 = 15,... )

There is also a few other functions you can use to change the camera. For example, here is one that filters out all the colors except green.

camera.speffect(camera.EFFECT_GREEN)

You can find the rest that are available by running this snippet of code on your board. It will print out all the functions and some of the values you can set them to.

import camera
print(help(camera))

Taking the Picture

All you have to do to take a picture is call the capture funciton.

pic = camera.capture()

The pic variable now has a picture in it. The picture will be in the JPEG format. It is possible to use a different format, but it is known to be glitchy and every time I have done it, I get error after error.

Storing the Photo

To save the picture to the SD card, we first create a file called picture.jpeg on the SD card and open it.

file = open("/sd/picture.jpeg",'wb')

Then, we write the picture to that file.

file.write(pic)

And finally, we close the file.

file.close()

To make sure this program can be run more than once without rebooting, we will add a little clean up code.

del pic
camera.deinit()
os.umount('/sd')

What Next?

Once you have run the above program, you can take your SD card out of the ESP32 and put it in your computer. On it, you will find a file called picture.jpeg. If you open it, you will see the picture the ESP32 took.

Now that you have a basic understanding of how to use the ESP32-CAM with micropython, you probably want to hook your camera up to wifi. The same people that made the firmware also made a example sketch that uses wifi.

To use it, you will need to upload about 7 files to your ESP32 and edit at least one of them, but you will have a cool web server when you’re done.

If you are interested in cameras, you might also like to see how to get a microphone to work with micropython.

Filed Under: Micropython

How to Connect an ESP32 to a Raspberry Pi with WIFI

February 20, 2023 by Baxter

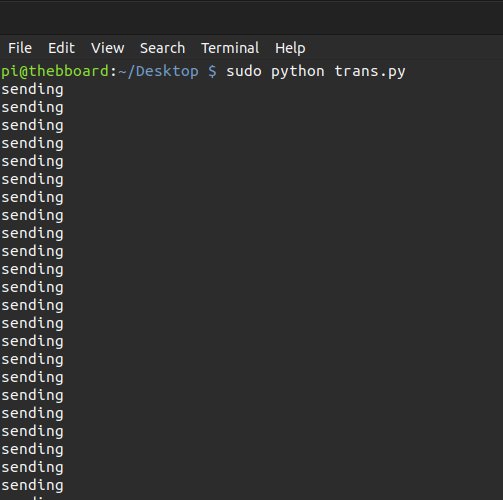
terminal output for raspberry pi
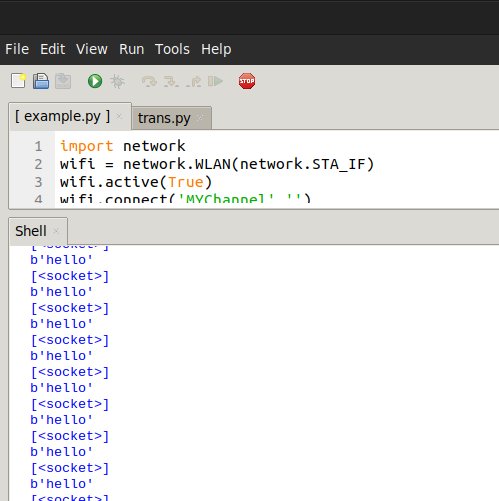
repl output for esp32

For a long time I have wanted a way to be able to run code on a raspberry pi and a esp32, and have the two programs talk to each other. Recently, I found a way to do that using sockets.

Sockets can be used for a lot of things, so to be more specific, today we will look at how to use wifi + sockets to connect two python programs together.

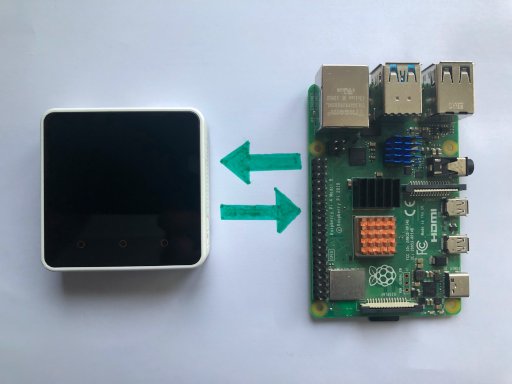
esp32 (CORE2) next to raspberry pi 4

Hardware

Before we dive into the code, its important to mention the hardware required.

The Computer

I am using a raspberry pi 4B, but you can use any computer that runs python and has internet access. In fact when I started testing, I was using my laptop for both the RPI and ESP32 sides.

The Other Computer

I am using an upgraded esp32 with more flash and psram, but the code is not specific to my board. It should run on any esp32 that has micropython installed.

You don’t even have to use an esp32, you could use any other computer or microcontroller that has python and WIFI. You don’t even need python, you should be able to use c++ instead. That being said the esp32 code is hardware specific, so you will need to create or modify your own code, if you use a different computer.

terminal output of raspberry pi

The RPI Code

We will start with the raspberry pi’s code because its simpler.

import socket

s = socket.socket()
s.bind(('',100))
s.listen(5)

c,a = s.accept()

while True:
        c.recv(5)
        print('sending')
        c.send(b'hello')

First we import the socket module, by default it should be installed with python.

import socket

Then we create a new socket, which we will call s.

s = socket.socket()

Then we need to bind our socket, which essentially turns it into a server. When you bind a socket you have to pass it a tuple, as a reminder tuples are like lists and they have the format (data1, data2, data3, …). The tuple we give it has two values Address and Port.

The Address can be an IP address,the host name of your computer, or some other connection to your computer. If you give ” for your address, the socket will manage all incoming traffic to your computer on its Port.

The Port number allows you to run multiple sockets at the same time. Its almost as if you are naming a socket. For this program we will use port 100.

If you choose to use a different port, it might be a good idea to research the meaning of port numbers for example if you used port 80 instead of 100, you might temporarily lose access to the internet on your computer .

I have rambled on long enough, here is the code we use to bind our socket to Address: ” and Port:100.

s.bind(('',100))

Then, we will tell the socket how many clients it can except at the same time. For this code, we will use 5, but there is really no point to that number, since the code will actually only be able to handle one client.

s.listen(5)

After that we tell the socket to wait until somebody connects to it. When somebody eventually connects to our socket, it will give us two new variables c and a. c stands for connection and a stands for address. For now we only care about c.

c,a = s.accept()

The Loop

Now the program will enter an infinite loop.

while True:

In that loop, we will wait for a message from the esp32 that is 5 characters long or shorter.

        c.recv(5)

Then, we will print ‘sending’ to the terminal.

        print('sending')

After that, we send hello back to the esp32.

        c.send(b'hello')
micropython repl output

The ESP32

Here is the esp32 code.

import network
wifi = network.WLAN(network.STA_IF)
wifi.active(True)
wifi.connect('MYChannel','')


import time
while not wifi.isconnected():
    time.sleep(0.1)

import socket
new_s = socket.socket()
new_s.connect(('Your IP Address',100))


def send(data):
    data = str(data).encode()
    left = len(data)
    while left:
        left -= new_s.send(data)
        
        
import select
def get():
    result,_,_ = select.select([new_s],[],[])
    if result:
        print(result)
        res = new_s.recv(5)
        print(res)
        new_s.send('hello')
        time.sleep(0.5)
        

send(b'start')
while True:
    get()
    time.sleep(0.1)

The Network Connection

For our sockets to work we need an internet connection. I turned my raspberry pi into a WIFI hotspot or more accurately a access point, and gave it the name MYChannel and then had my esp32 connect to it.

On the raspberry pi once you get the connection started, you will need to run the command hostname -I this should return the IP address of it. We will need it latter. If you get more than one IP address, you might have to try each of them individually.

On the ESP32, I run the following code to connect to my raspberry pi access point.

import network
wifi = network.WLAN(network.STA_IF)
wifi.active(True)
wifi.connect('MYChannel','')


import time
while not wifi.isconnected():
    time.sleep(0.1)

The Socket

Once you find some way to get your esp32 and raspberry pi on the same internet connection, we can move on to the socket code.

First we are going to import the socket module and create a new socket like we did earlier.

import socket
new_s = socket.socket()

Then, we will connect to the raspberry pi on port 100. You will also need to add your raspberry pi’s IP address.

new_s.connect(('Your IP Address',100))

The socket send and recv functions aren’t perfect. Sometimes you might try to send or receive some data and its not possible. Because of this, it’s best if you run a little extra code to guarantee everything goes as expected.

Below is how you can make a more reliable send function.

def send(data):
    data = str(data).encode()
    left = len(data)
    while left:
        left -= new_s.send(data)

The next function will use the select module, so we need to import it.

import select

This function was supposed to be a more reliable receive function, but I kind of went over board and its not really a receive function. Its more of a respond function.

def get():

The following code uses the select module to tell if our socket has any data to read.

    result,_,_ = select.select([new_s],[],[])
    if result:

If there is something to read, the code will print the result variable.

        print(result)

Then, it will ready 5 bytes of data from the esp32.

        res = new_s.recv(5)

After that, it prints the data it received.

        print(res)

And lastly it will send the text ‘hello’, and wait for half a second.

        new_s.send('hello')
        time.sleep(0.5)

We now use the fancy send function to send the text ‘start’.

send(b'start')

The last code we need to run is an infinite loop that repeats every 0.1 seconds and runs our get function.

while True:
    get()
    time.sleep(0.1)

The Close Function

The programs above have one vital thing missing from them. When your are done with a socket, you are supposed to call the close function on them like this.

YourSocketName.close()

The two programs above are infinite loops and never stop, so we never used the close function in the code and this can cause problems. For instance if you run the raspberry pi code, stop the program, and then try to run it again you will get errors, because the old program locked the socket.

To fix this, you will need to restart your pi. There are probably other ways to fix this, but that is the only way I now how to.

If you like playing around with esp32s and python, you will probably like LVGL. One of my favorite projects with LVGL is Building a Timer App with Micropython LVGL.

Filed Under: Micropython

How to Use Micropython LVGL Windows

February 15, 2023 by Baxter

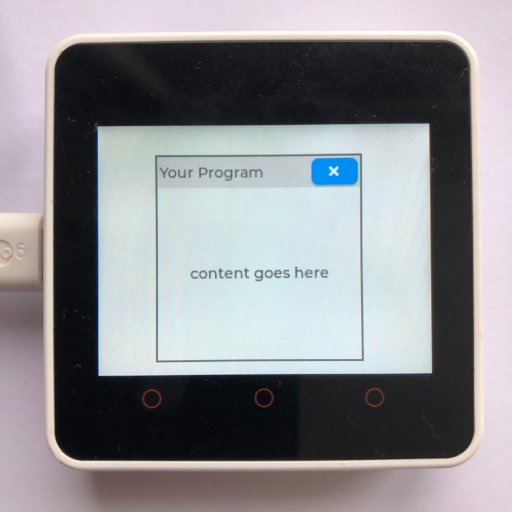
a lvgl window

Its easy to make a ridged GUI. Everything has a place that it always stays in, and while this type of program is easy to build. Its not the funnest to use, so its best to allow the user to be able to customize the interface a bit.

Windows are one of the simplest ways to pull this off. They allow you to group a bunch of objects together, and the user can move that group around the screen. Today we will look at how to create a LVGL window and make it dragable.

Setting Up a Micropython Screen

Because there are so many different screens out there, I can’t add support for all of them to the example, so to make the example work, you will need to add your screen’s setup code to the beginning of it.

There is a little more information on this process at How to get a LVGL Micropython Screen to Work if you aren’t familiar on how it’s done.

Here is the example

import lvgl

window = lvgl.win(lvgl.scr_act(),30)
window.set_size(200,200)
window.set_style_border_side(lvgl.BORDER_SIDE.FULL,0)
window.set_style_border_width(2,0)
window.set_style_border_color(lvgl.color_hex(0x454545),0)

window.add_title('Your Program')

close = window.add_btn(lvgl.SYMBOL.CLOSE,45)

def close_window(data):
    window.delete()
close.add_event_cb(close_window,lvgl.EVENT.CLICKED,None)

cont = window.get_content()
text = lvgl.label(cont)
text.set_text('content goes here')
text.center()


def follow(data):
    input_dev = lvgl.indev_get_act()
    move = lvgl.point_t()
    input_dev.get_vect(move)
    window.set_pos(window.get_x()+move.x,move.y+window.get_y())
    
header = window.get_header()
header.add_event_cb(follow,lvgl.EVENT.PRESSING,None)

How Does This Code Work?

Since you’ve seen the program above, why don’t we walk through the code and see how it works. This should make it clearer how you can modify this code for your own uses…

The Setup

First we need to import the LVGL module. This is also a good spot to put your screen setup code.

import lvgl

The Window

We start by creating a empty window. The 30 tells the computer to make the header section 30 pixels tall.

window = lvgl.win(lvgl.scr_act(),30)

Then we will set the windows size to 200*200 pixels.

window.set_size(200,200)

Our window look a lot like the background, and it can sometimes be hard to tell where it is on the screen, so we will create a border around our window to make it’s position clear.

To begin we need to have our window enable borders on all sides.

window.set_style_border_side(lvgl.BORDER_SIDE.FULL,0)

Then we will set the border width to 2 pixels.

window.set_style_border_width(2,0)

Then we will set the border color to a dark grey.

window.set_style_border_color(lvgl.color_hex(0x454545),0)

The Header Content

Windows have a header section. Often some text or a button is put there. To show how its done we will add both.

First we will add a tittle.

window.add_title('Your Program')

Then we will add a button. It will be 45 pixels long and have the close symbol in the center of it.

close = window.add_btn(lvgl.SYMBOL.CLOSE,45)

Next we are going to create a function that will delete our window.

def close_window(data):
    window.delete()

Finally we connect that function to the close button, so when the button is clicked the the window is deleted from the screen.

close.add_event_cb(close_window,lvgl.EVENT.CLICKED,None)

The Content

We have created the window, but now we need something to put in it. The first step in that process is to retrieve the content area of the window.

cont = window.get_content()

Then, we create a label inside of the content area.

text = lvgl.label(cont)

Next, we will set that label’s text.

text.set_text('content goes here')

And lastly, we center it to the window’s content area.

text.center()

Making the Window Dragable

You can’t just click a window and it move to were you want it by default, but that is what we want it to be able to do today.

To start we need to create a new function.

def follow(data):

In side that function we retrieve the current input device in my case that is a touch screen.

    input_dev = lvgl.indev_get_act()

After that we create a empty point object.

    move = lvgl.point_t()

Next we set that point equalt to the movement of the input deviece.

    input_dev.get_vect(move)

Lastly we move the window in the direct of the input device.

    window.set_pos(window.get_x()+move.x,move.y+window.get_y())

We want to make the window move if you click the header, but not move if you click the body of the window, so we retrieve the window’s header.

header = window.get_header()

Then we connect that function we made to the header.

header.add_event_cb(follow,lvgl.EVENT.PRESSING,None)

The Result

Once you run the program, the window should appear. If you click the header, the dark bar at the top, and drag it, the window will follow your finger. If you click the close button the window will be deleted and disappear.

Windows are a great way to organize things on your screen. It is best if you have a larger screen and a cursor, but with a little creativity they can work great for small touch screens as well.

A good replaysment for windows on small screens is tileviews. If you want to learn more about what they are and how they work check out LVGL Tileviews.

Filed Under: Micropython

How to Use LVGL Image Buttons

February 9, 2023 by Baxter

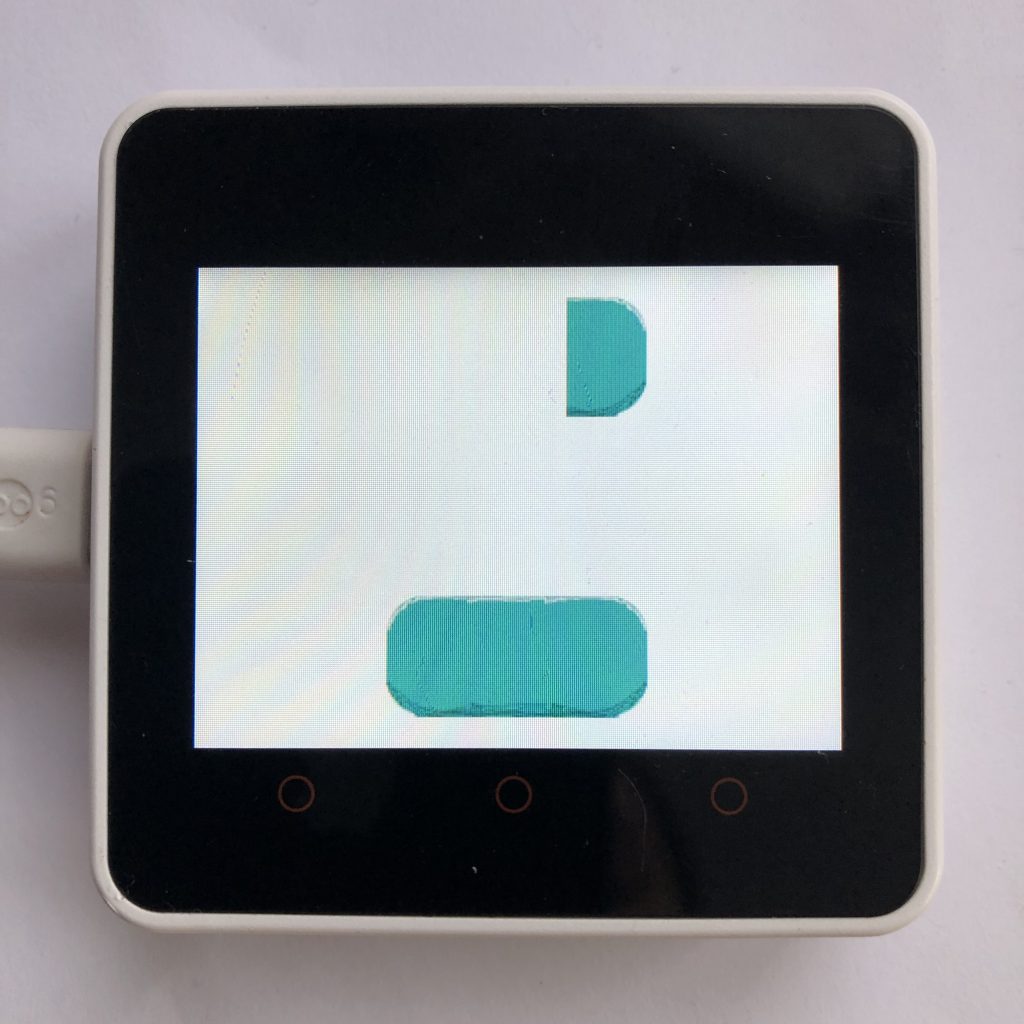
two blue buttons

If you need a button that has a lot of detail, it is usually best to create it with an image instead of drawing it from scratch. Doing it this way can simplify the process .

Today we will see how you can create a image button with LVGL. The images we will use to create the button are at the bottom of the page if you want to follow this tutorial exactly.

Setting Up a Micropython Screen

Because there are so many different screens out there, I can’t add support for all of them to this example, so to make this example work, you will need to add your screen’s setup code to the beginning of it.

There is a little more information on this process at How to get a LVGL Micropython Screen to Work if you aren’t familiar on how it’s done.

Here is the code

import lvgl
import fs_driver

drv = lvgl.fs_drv_t()
fs_driver.fs_register(drv,'A')


btn = lvgl.imgbtn(lvgl.scr_act())
btn.set_src(lvgl.imgbtn.STATE.RELEASED,'A:sd/left_button.png','A:sd/middle_button.png','A:sd/right_button.png')
btn.align(lvgl.ALIGN.BOTTOM_MID,0,-15)

otherbtn = lvgl.imgbtn(lvgl.scr_act())
otherbtn.set_src(lvgl.imgbtn.STATE.RELEASED,None,None,'A:sd/right_button.png')
otherbtn.align(lvgl.ALIGN.TOP_MID,0,15)


def clicked(data):
    print('button one clicked')

btn.add_event_cb(clicked,lvgl.EVENT.CLICKED,None)

def clicked_two(data):
    print('button two clicked')

otherbtn.add_event_cb(clicked_two,lvgl.EVENT.CLICKED,None)

How Does This Code Work?

Since you’ve seen the program above, why don’t we walk through the code and see how it works. This should make it clearer how you can use image buttons in your projects.

The Setup

First, we import the LVGL module. This is also a good spot to put your screen setup code.

import lvgl

The File System

Because images take up so much memory it is easiest if they are stored in a separate file than the code but, to be able to use those images, we need to tell LVGL how to use the file system.

To begin, we import the fs_driver module.

import fs_driver

After that, we create a new LVGL file system driver.

drv = lvgl.fs_drv_t()

Then we use the fs_driver module to setup that driver and install it. Every driver gets a single letter name in our case ‘A’. Later we will use that letter to access this driver.

fs_driver.fs_register(drv,'A')

The Button

We start by creating a new image button object.

btn = lvgl.imgbtn(lvgl.scr_act())

Image buttons are made of three images: Left, Middle, and Right. The left and right buttons are the ends of the button often times they have rounded corners. The middle image is the main body of the button.

To make our image button work we need to set those three images. I put mine on a SD card connected to my board. If you put them some where else, you will need to update the addresses below to the correct ones.

RELEASED is the default state, but you can add images to any of the other states and those images will be show when the buttons in that state.

btn.set_src(lvgl.imgbtn.STATE.RELEASED,'A:sd/left_button.png','A:sd/middle_button.png','A:sd/right_button.png')

Lastly we put the button near the botton of the screen.

btn.align(lvgl.ALIGN.BOTTOM_MID,0,-15)

The Other Button

If you don’t want to use three different images, you can use the None keyword instead. We will create one more image button, except this one will only use the right image.

otherbtn = lvgl.imgbtn(lvgl.scr_act())
otherbtn.set_src(lvgl.imgbtn.STATE.RELEASED,None,None,'A:sd/right_button.png')
otherbtn.align(lvgl.ALIGN.TOP_MID,0,15)

Connecting Everything Up

Once you create an image button they can be used just like a normal button. Lets make the computer print which button was pressed

We will begin by create a simple handler function.

def clicked(data):

Inside that function we print if that button one was pressed.

    print('button one clicked')

Then we connect it to the first image button we created.

btn.add_event_cb(clicked,lvgl.EVENT.CLICKED,None)

We repeat that process for the other button too.

def clicked_two(data):
    print('button two clicked')

otherbtn.add_event_cb(clicked_two,lvgl.EVENT.CLICKED,None)

Things To Think About

Creating a button and having it do something when its clicked is normally one of the simplest things you could do but when you use image buttons it gets really complicated both to code and to run.

That brings us to the last point images buttons require powerful microcontrollers to use them. You have to have a lot of ram and flash, plus you need a fast processor. I ran the above code on a esp32 which has both and there was some lag after you press the button to it responding.

All and all, image buttons are very useful but you need a good computer to run them.

LVGL has many types of interesting inputs, if you like image buttons you might also like LVGL Spinboxes.

I am not much of an artist but here is the images I used.

Filed Under: Micropython

How to Use Micropython LVGL Spinboxes

February 7, 2023 by Baxter

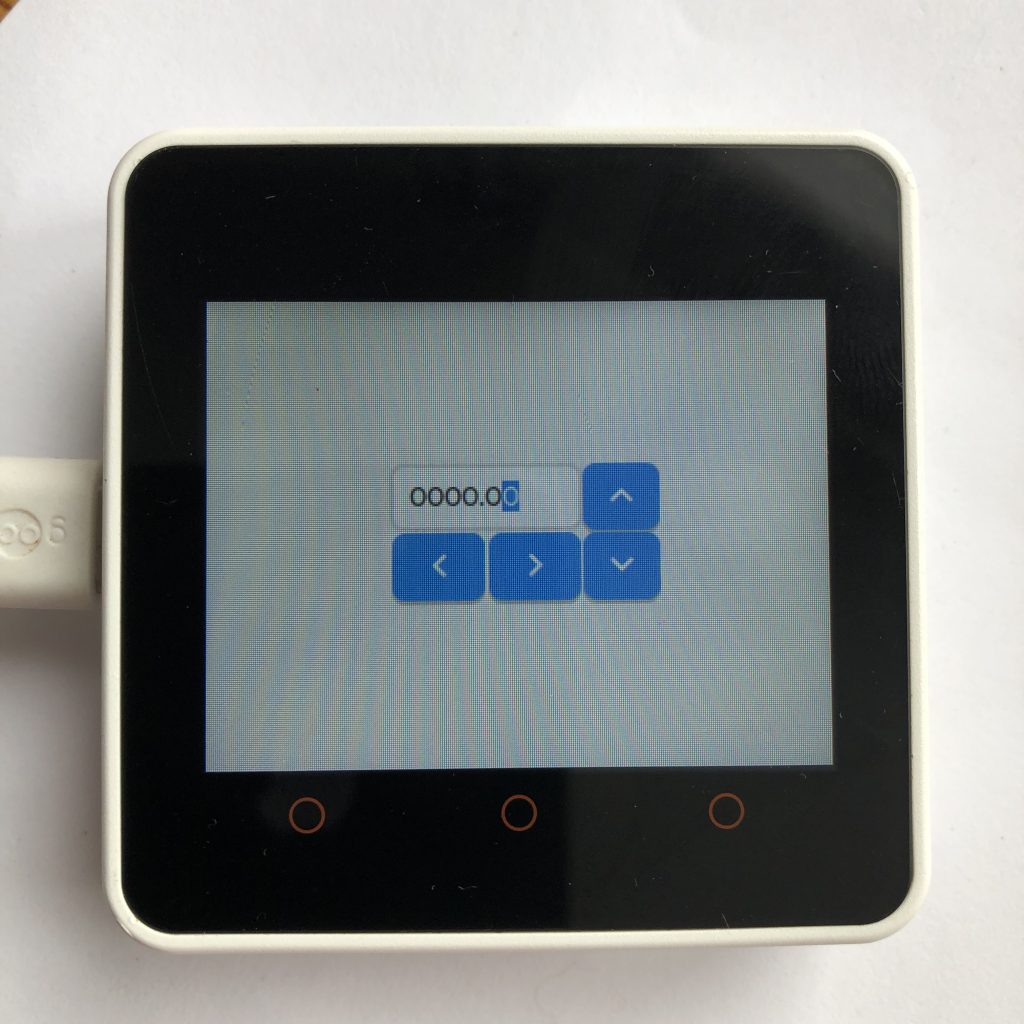
spinbox with four buttons

Many GUIs need a way to input a number. Normally this is done with a Keypad and a Textarea but that takes a lot of screen space. Spinboxes can do the same job but they are much smaller.

Lets look at how you can create a spinbox and use some buttons to control it.

Setting Up a Micropython Screen

Because there are so many different screens out there, I can’t add support for all of them to the example, so to make the example work, you will need to add your screen’s setup code to the beginning of it.

There is a little more information on this process at How to get a LVGL Micropython Screen to Work if you aren’t familiar on how it’s done.

Here is the code

import lvgl

spin = lvgl.spinbox(lvgl.scr_act())
spin.align(lvgl.ALIGN.CENTER,-17,-19)
spin.set_size(100,35)
spin.set_range(0,100000)
spin.set_digit_format(6,4)

up = lvgl.btn(lvgl.scr_act())
up.set_size(40,35)
up.align(lvgl.ALIGN.CENTER,53,-19)

down = lvgl.btn(lvgl.scr_act())
down.set_size(40,35)
down.align(lvgl.ALIGN.CENTER,53,17)
 
left = lvgl.btn(lvgl.scr_act())
left.set_size(48,35)
left.align(lvgl.ALIGN.CENTER,-42,17)

right = lvgl.btn(lvgl.scr_act())
right.set_size(48,35)
right.align(lvgl.ALIGN.CENTER,8,17)

def add_lb(text,obj):
    lb = lvgl.label(obj)
    lb.set_text(text)
    lb.center()
    
add_lb(lvgl.SYMBOL.UP,up)
add_lb(lvgl.SYMBOL.DOWN,down)
add_lb(lvgl.SYMBOL.LEFT,left)
add_lb(lvgl.SYMBOL.RIGHT,right)


def up_handler(data):
    spin.increment()
up.add_event_cb(up_handler,lvgl.EVENT.CLICKED,None)

def down_handler(data):
    spin.decrement()
down.add_event_cb(down_handler,lvgl.EVENT.CLICKED,None)

position = 0

def left_handler(data):
    global position
    if position == 0:
        position = 1
    position = min(position*10,100000)
    spin.set_step(position)
   
left.add_event_cb(left_handler,lvgl.EVENT.CLICKED,None)

def right_handler(data):
    global position
    position = int(max(position/10,0))
    spin.set_step(position)
    
right.add_event_cb(right_handler,lvgl.EVENT.CLICKED,None)

How Does This Code Work?

Since you’ve seen the program above, why don’t we walk through the code and see how it works. This should make it clearer how you can use spinners in your projects.

The Setup

First we import the LVGL module. This is also a good spot to put your screen setup code.

import lvgl

Creating the Spinner

To begin, we create a new spinner.

spin = lvgl.spinbox(lvgl.scr_act())

Then, we will position it on the screen.

spin.align(lvgl.ALIGN.CENTER,-17,-19)

Next, we set is size to 100*35 pixels.

spin.set_size(100,35)

After that, we will set the range of the spinbox to 0-100,000. The range limits the number inside the spinbox so for us that number can never be bigger that 100,000 or smaller than 0.

spin.set_range(0,100000)

Finally we will format the spinbox. When you format a spinbox you give it two numbers: the first tells LVGL how many digits the spinbox should have, and the second number tells LVGL where to put the decimal point.

spin.set_digit_format(6,4)

The Buttons

To use the spin box we need a few buttons. We will start by creating the up button.

up = lvgl.btn(lvgl.scr_act())

Then we will set its size.

up.set_size(40,35)

Lastly we set its position on the screen.

up.align(lvgl.ALIGN.CENTER,53,-19)

We create the rest of the buttons the same way.

down = lvgl.btn(lvgl.scr_act())
down.set_size(40,35)
down.align(lvgl.ALIGN.CENTER,53,17)
 
left = lvgl.btn(lvgl.scr_act())
left.set_size(48,35)
left.align(lvgl.ALIGN.CENTER,-42,17)

right = lvgl.btn(lvgl.scr_act())
right.set_size(48,35)
right.align(lvgl.ALIGN.CENTER,8,17)

The Labels

We now have four buttons but they all look the same so we need to add a label to each of them. To make that process easier we will create a function.

def add_lb(text,obj):

This function will create a label inside a button that we choose, set its text, and center it.

    lb = lvgl.label(obj)
    lb.set_text(text)
    lb.center()

After that we use the above function to add the UP symbol to the up button.

add_lb(lvgl.SYMBOL.UP,up)

We add the rest of the symbols like we did the first.

add_lb(lvgl.SYMBOL.DOWN,down)
add_lb(lvgl.SYMBOL.LEFT,left)
add_lb(lvgl.SYMBOL.RIGHT,right)

Connecting the Buttons

We last thing we have to do is connect the buttons we have made to the spinbox. We use handler functions to do that.

As usual we will start with the up button by create a new function.

def up_handler(data):

In side that function we simply tell the spin box to increment its value.

    spin.increment()

And finally we attach that handler to the up button so whenever the button is clicked the function is called.

up.add_event_cb(up_handler,lvgl.EVENT.CLICKED,None)

The down button is the same as the up bottom except we decrement the value instead of increment.

def down_handler(data):
    spin.decrement()
down.add_event_cb(down_handler,lvgl.EVENT.CLICKED,None)

The left and right buttons require a little more work we will start with the left.

To begin we create a new variable.

position = 0

Then we create the left handler function.

def left_handler(data):

Inside that function we import the position variable we created.

    global position

Then we check if position equals zero if it is we set position equal to one.

    if position == 0:
        position = 1

Then we multiply position by 10 and constrain it so its not bigger than 100,000.

    position = min(position*10,100000)

After that we set the spinbox’es cursor to the correct position.

    spin.set_step(position)

To finish the left button off we add that function to the button.

left.add_event_cb(left_handler,lvgl.EVENT.CLICKED,None)

The right buttons function is very similar to the one we just made except its a little simpler.

def right_handler(data):
    global position
    position = int(max(position/10,0))
    spin.set_step(position)

Last of all we add that function to the right button.

right.add_event_cb(right_handler,lvgl.EVENT.CLICKED,None)

What Should Happen?

Once you run the program, the spinbox and the four buttons should appear on your screen. If you click the up or down buttons the number in the spinbox that the cursor is on will get bigger or smaller. When you press the left or right button the cursor in the spinbox will move left or right.

Spinboxes are extremely customizeable. You can fit them into pretty much any little gap on your screen. The only side affect of using spinboxes is that they are a little slow to put numbers in.

In general a full on keypad will be nicer to use but if you don’t have the room spinboxes are a excellent replacement.

If you are looking for other ways to shrink down your GUI then you might like to look into LVGL dropdown boxes.

Filed Under: Micropython

How to Use Micropython LVGL Themes

February 6, 2023 by Baxter

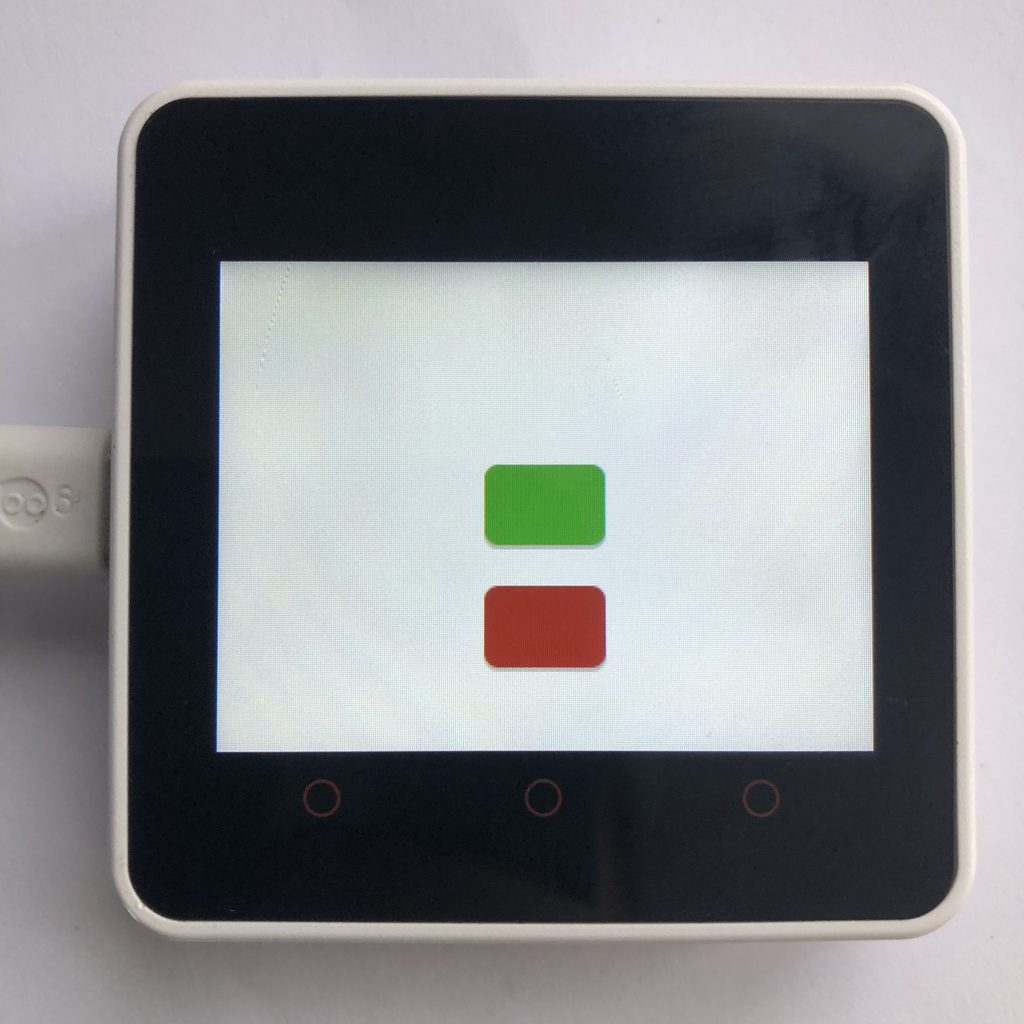
two buttons each with different themes applied to them.

Applying individual styles to every object on your screen is a lot of work. Because of how annoying this process is LVGL has super styles aka themes. You apply a theme to your display, and it styles every object on your screen.

Today we will work through how to create a custom theme and modify an existing theme.

How Themes Work

Themes are actually a function. Essentially a you create a function, and every time an object is created your function is called. Inside that function, you check what type of object was created and then apply a style to it.

Setting Up a Micropython Screen

Because there are so many different screens out there, I can’t add support for all of them to the example, so to make the example work, you will need to add your screen’s setup code to the beginning of it.

There is a little more information on this process at How to get a LVGL Micropython Screen to Work if you aren’t familiar on how it’s done.

Here is the example

import lvgl

display = lvgl.disp_get_default()
defualt_theme = lvgl.theme_get_from_obj(lvgl.scr_act())

def apply(th,obj):
    if obj.get_class() == lvgl.btn_class:
        obj.set_style_bg_color(lvgl.color_hex(0x009900),0)

theme = lvgl.theme_t()
theme.set_parent(defualt_theme)
theme.set_apply_cb(apply)

display.set_theme(theme)


btn = lvgl.btn(lvgl.scr_act())
btn.center()
btn.set_size(60,40)

gen_theme = lvgl.theme_default_init(display,lvgl.color_hex(0x990000),lvgl.color_hex(0x00ff00),False,lvgl.font_montserrat_16)

display.set_theme(gen_theme)

btn = lvgl.btn(lvgl.scr_act())
btn.align(lvgl.ALIGN.CENTER,0,60)
btn.set_size(60,40)

Understanding This Code

Just looking at a block of code is not always very informational. To make how this micropython code works more clear, lets walk through the lines of code above and see what they do.

The Setup

Of course before we can use LVGL we need to import it. This is also a good spot to put your screen setup code.

import lvgl

We also need to retrieve the active screen object. Themes are applied to physical screens, so if you have more than one screen connected to your board, your are going to need to apply a theme to each one.

display = lvgl.disp_get_default()

Custom Themes

Lets create a custom theme. To make this theme simple, it will only target LVGL buttons, so we will use the default themes settings for all the other widgets. First we are going to retrieve the default theme.

defualt_theme = lvgl.theme_get_from_obj(lvgl.scr_act())

Next we create the theme’s function.

def apply(th,obj):

Inside that function we check if the current object is a button.

    if obj.get_class() == lvgl.btn_class:

If it is, we change the buttons color to green.

        obj.set_style_bg_color(lvgl.color_hex(0x009900),0)

Now we create a empty theme object.

theme = lvgl.theme_t()

Then we set its parent to the default theme any thing our theme does not deal with the parent theme takes care of.

theme.set_parent(defualt_theme)

After that we set the themes function to the function we created earlier.

theme.set_apply_cb(apply)

Lastly we add our theme to the the screen.

display.set_theme(theme)

The Button

Our new theme is applied but nothing is actually using it. Lets create button to show its working.

btn = lvgl.btn(lvgl.scr_act())
btn.center()
btn.set_size(60,40)

Generating a Theme

Manually creating a theme that styles every widget takes a lot of work, so LVGL comes with some pre-made themes that you can modify to your liking.

Making a new theme, only takes one line of code.

gen_theme = lvgl.theme_default_init(display,lvgl.color_hex(0x990000),lvgl.color_hex(0x00ff00),False,lvgl.font_montserrat_16)

The theme_default_init() function takes five arguments. The first argument is the active display. The other four arguments are explained below.

Argument Value Controls
Primary Color Any LVGL Color the color of most objects
Secondary Color Any LVGL Color the color of a few objects
Dark/Light Mode True or False whether LVGL uses dark or light colors
Font Any LVGL Font the default font of LVGL

With that one line of code we have generated a complete theme that works for all widgets, but we still need to apply it to the screen to see it work.

display.set_theme(gen_theme)

One Last Button

Of course, we need to create one more button to show that our theme is working.

btn = lvgl.btn(lvgl.scr_act())
btn.align(lvgl.ALIGN.CENTER,0,60)
btn.set_size(60,40)

Things To Think About

One obvious question that comes up, if we change the theme why doesn’t every object on the screen get that new theme applied to it. The answer to that question is I don’t now. Sometimes it seems that adding a theme does overrides the current theme and some time it seems to let the old one exist in the background.

We looked at two ways to create themes today. The last one was clearly easier and is the best option for normal use. The first method should really only be used, if you need an extremely custom theme.

If you like LVGL Themes then you might like LVGL Drawing Descriptors. They are another great way to customize your projects.

Filed Under: Micropython

How to use Micropython LVGL Spinners

February 3, 2023 by Baxter

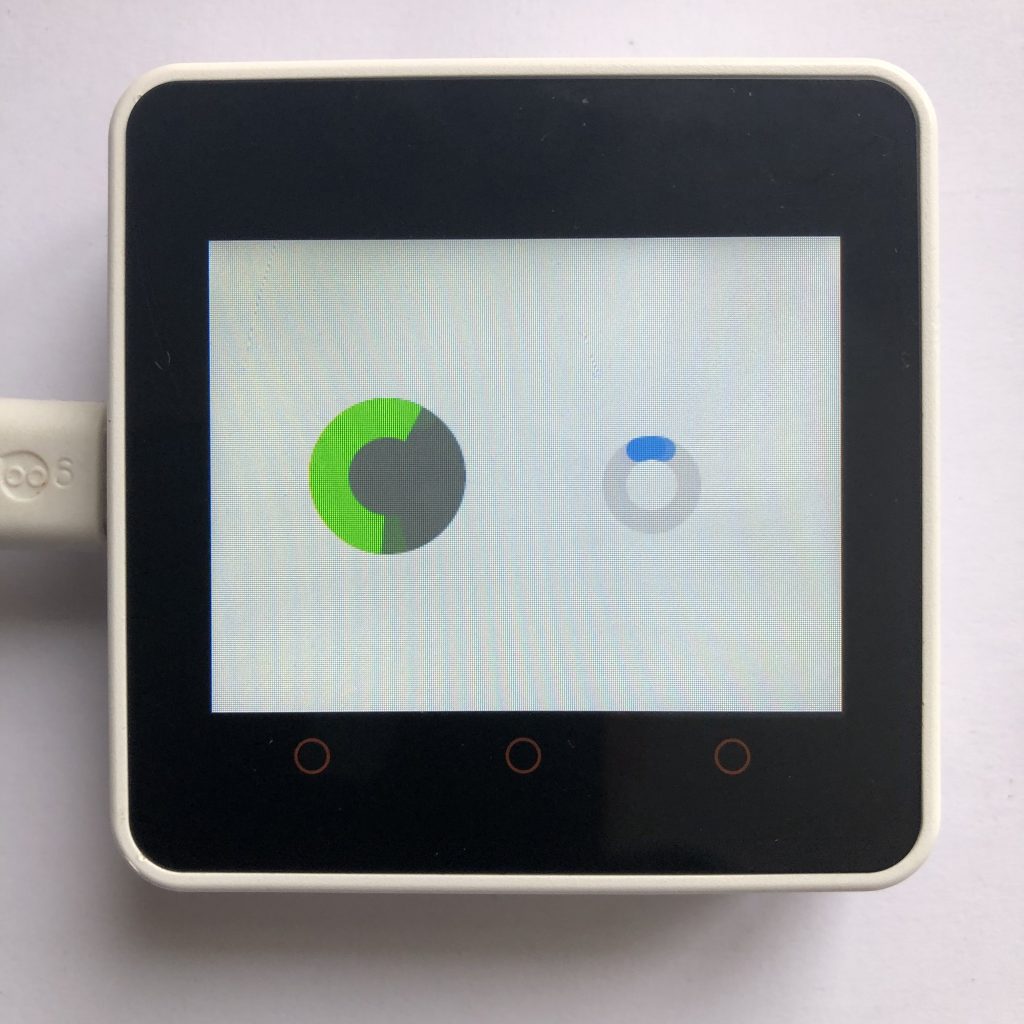
two lvgl spinners the one on the left is bigger.

Every now and then you will create a program that takes a while to complete. When that happens, it is best if you give the user some indicator of what is happening like a progress bar. One of the most common, indicators is the spinner.

Today, we will look at how you make and edit spinners. Below is some example code and below that is an explanation of how the code works

Setting Up a Micropython Screen

Obviously, if you are creating a program that draws things on a screen, you have to have access to a screen.

Because there are so many different screens out there, I can’t add support for all of them, so to make this example work, you will need to add your screen’s setup code to the beginning of the example.

There is a little more information on this process at How to get a LVGL Micropython Screen to Work if you aren’t familiar on how it’s done.

Here is the code

import lvgl

spin = lvgl.spinner(lvgl.scr_act(),900,60)
spin.set_pos(200,100)
spin.set_size(50,50)


background = lvgl.style_t()
background.init()
background.set_arc_color(lvgl.color_hex(0x555555))
background.set_arc_width(40)

indicator = lvgl.style_t()
indicator.init()
indicator.set_arc_color(lvgl.color_hex(0x00FF00))
indicator.set_arc_rounded(0)
indicator.set_arc_width(20)

wait = lvgl.spinner(lvgl.scr_act(),1000,200)
wait.set_size(80,80)
wait.align(lvgl.ALIGN.CENTER,-70,0)
wait.add_style(background,0)
wait.add_style(indicator,lvgl.PART.INDICATOR)

Understanding This LVGL Code

Ok, now that you have seen all the code, let’s step through each section, so you can understand exactly what each part does. This will make it much easier to actually use spinners in your projects…

The Setup

First we need to import the LVGL module. This is also a good spot to put you screen setup code.

import lvgl

A Basic Spinner

Because spinners are usually used when you microcontroller is doing some hard task its best to make them as simple as possible so they don’t slow down your microcontroller.

We will start by creating a new spinner. “lvgl.scr_act()” tells the computer to put the spinner on the main screen.

The first numbers is how many milliseconds it takes for the spinner to make one rotation, and the last number controls how big the blue part of the spinner is.

spin = lvgl.spinner(lvgl.scr_act(),900,60)

Then we will set the position of the spinner.

spin.set_pos(200,100)

And finally we set the size of the spinner.

spin.set_size(50,50)

This is all it takes to make a simple spinner.

Creating Some Styles

We are going to create one more spinner, and this one will have some styles added to it.

first we create the style for the background.

background = lvgl.style_t()

Then, we initialize our new style.

background.init()

After that, we are going to set the background color to a dark grey.

background.set_arc_color(lvgl.color_hex(0x555555))

Then, we will set the width of the arc.

background.set_arc_width(40)

Next, we make the style for the indicator.

indicator = lvgl.style_t()

Then, we initialize it.

indicator.init()

After that, we set the it’s color to a bright green.

indicator.set_arc_color(lvgl.color_hex(0x00FF00))

We are also going to make the edges of the indicator flat, normally they would be rounded.

indicator.set_arc_rounded(0)

And lastly, we will set the indicators width to 20 pixels.

indicator.set_arc_width(20)

The Last Spinner

We will start by creating a new spinner.

wait = lvgl.spinner(lvgl.scr_act(),1000,200)

Then we will set it’s size to 80*80 pixels.

wait.set_size(80,80)

We will align it to the center and then have it move 70 pixels to the left.

wait.align(lvgl.ALIGN.CENTER,-70,0)

The last thing we need to do is add the styles we created. First we add the background style like normal.

wait.add_style(background,0)

Then we add the indicator style to the indicator part.

wait.add_style(indicator,lvgl.PART.INDICATOR)

What Should Happen?

Once you run the program, the two spinners we created should spin. The big spinner should rotate slightly slower the the small one. For most projects, I would use the smaller spinner because it is simpler.

Once you task is done you should call .delete() on your spinner for example you would delete the to spinners we just created like this:

spin.delete()
wait.delete()

If you want a indicator that gives a little more information to the user, I would suggest looking into LVGL Bars.

Filed Under: Micropython

Building a Timer App with Micropython LVGL

February 2, 2023 by Baxter

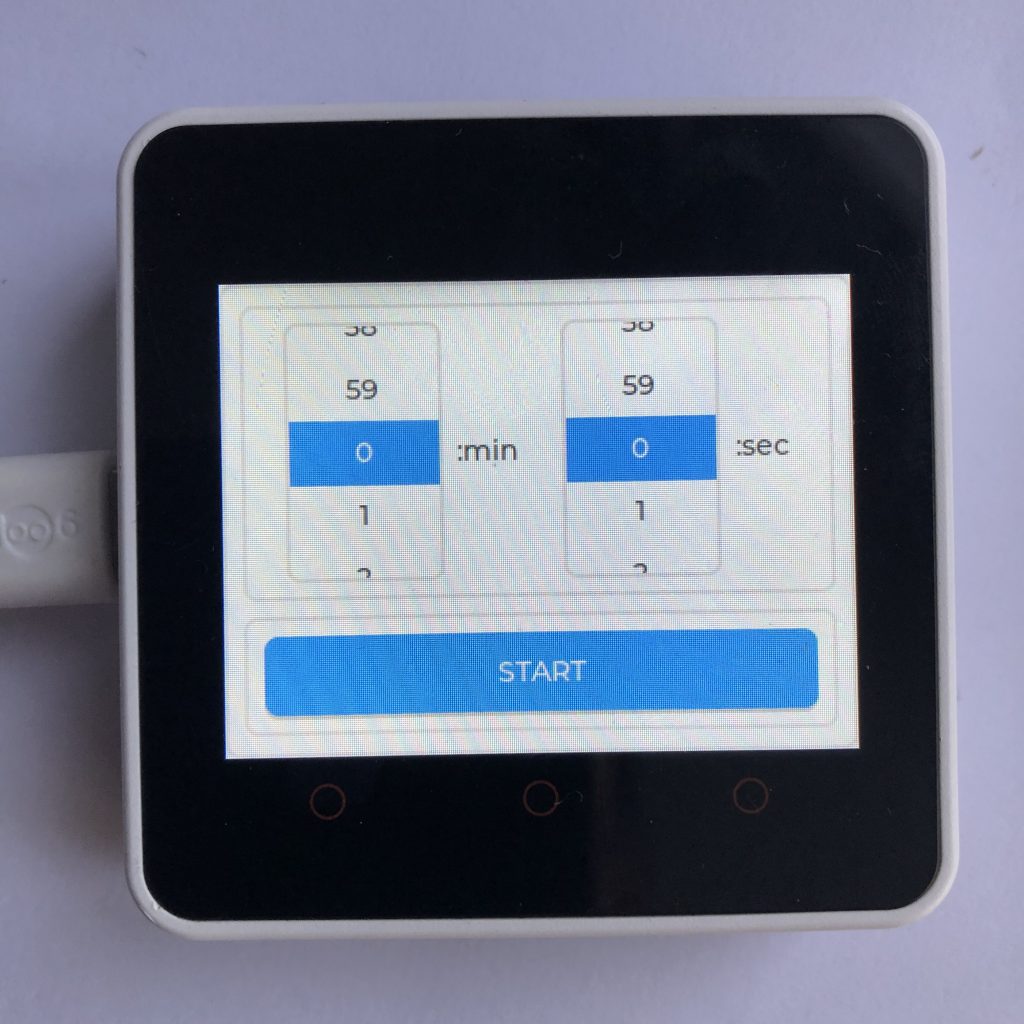
timer set to 0 second and minute and not started

Like all things, to get good at making GUIs you need practice. Creating a timers is a good place to start. They are simple enough to build, but they still contain a few complex elements to get you thinking.

Below is some code that creates a timer app. Today we will go through the most important parts of the code, and see how it works. Don’t worry about the size of the code, its very repetitive but not terribly complicated.

To get this example to work you will need to add your screen setup code to the beginning of the code below. If you want more information, you can try How to get a LVGL Micropython screen to work.

import lvgl

background = lvgl.obj(lvgl.scr_act())
background.set_size(320,240)
background.set_style_pad_all(0,0)

background.set_layout( lvgl.LAYOUT_FLEX.value )
background.set_flex_flow( lvgl.FLEX_FLOW.COLUMN )
background.set_flex_align( lvgl.FLEX_ALIGN.CENTER, lvgl.FLEX_ALIGN.CENTER, lvgl.FLEX_ALIGN.CENTER )

content = lvgl.obj(background)
content.set_style_pad_all(0,0)
content.set_size(300,150)

inputs = lvgl.obj(background)
inputs.set_style_pad_all(0,0)
inputs.set_size(300,60)

num_l = []
for x in range(60):
    num_l.append(str(x))
num_s = '\n'.join(num_l)


min_r = lvgl.roller(content)
min_r.set_size(80,130)
min_r.align(lvgl.ALIGN.LEFT_MID,20,0)
min_r.set_options(num_s,lvgl.roller.MODE.INFINITE)
min_r.set_visible_row_count(4)

min_l = lvgl.label(content)
min_l.set_text(':min')
min_l.align(lvgl.ALIGN.CENTER,-25,0)

sec_r = lvgl.roller(content)
sec_r.set_size(80,130)
sec_r.align(lvgl.ALIGN.RIGHT_MID,-55,0)
sec_r.set_options(num_s,lvgl.roller.MODE.INFINITE)
sec_r.set_visible_row_count(4)

sec_l = lvgl.label(content)
sec_l.set_text(':sec')
sec_l.align(lvgl.ALIGN.RIGHT_MID,-20,0)

start = lvgl.btn(inputs)
start.set_size(280,40)
start.center()
start_l = lvgl.label(start)
start_l.set_text('START')
start_l.center()


time_l = lvgl.label(content)
time_l.add_flag(lvgl.obj.FLAG.HIDDEN)
time_l.center()

reset = lvgl.btn(inputs)
reset.set_size(142,40)
reset.add_flag(lvgl.obj.FLAG.HIDDEN)
reset.align(lvgl.ALIGN.LEFT_MID,4,0)
reset_l = lvgl.label(reset)
reset_l.set_text('RESET')
reset_l.center()


pause = lvgl.btn(inputs)
pause.set_size(142,40)
pause.add_flag(lvgl.obj.FLAG.HIDDEN)
pause.align(lvgl.ALIGN.RIGHT_MID,-4,0)
pause_l = lvgl.label(pause)
pause_l.set_text('PAUSE')
pause_l.center()

resume = lvgl.btn(inputs)
resume.set_size(142,40)
resume.add_flag(lvgl.obj.FLAG.HIDDEN)
resume.align(lvgl.ALIGN.RIGHT_MID,-4,0)
resume_l = lvgl.label(resume)
resume_l.set_text('RESUME')
resume_l.center()


minute = 0
second = 0

def update_time(t):
    global minute,second
    
    if minute == 0 and second == 0:
        timer.pause()
        set_mode()
        alarm()
    else:
        if second == 0:
            second = 59
            minute -= 1
        else:
            second -= 1
        if second < 10:
            s = '0'+str(second)
        else:
            s = str(second)
        time_l.set_text(str(minute)+':'+s)
        print(minute,':',second)

timer = lvgl.timer_create(update_time,1000,None)
timer.set_repeat_count(-1)
timer.pause()


def set_mode():
    start.clear_flag(lvgl.obj.FLAG.HIDDEN)
    min_r.clear_flag(lvgl.obj.FLAG.HIDDEN)
    min_l.clear_flag(lvgl.obj.FLAG.HIDDEN)
    sec_r.clear_flag(lvgl.obj.FLAG.HIDDEN)
    sec_l.clear_flag(lvgl.obj.FLAG.HIDDEN)
    
    time_l.add_flag(lvgl.obj.FLAG.HIDDEN)
    pause.add_flag(lvgl.obj.FLAG.HIDDEN)
    reset.add_flag(lvgl.obj.FLAG.HIDDEN)
    resume.add_flag(lvgl.obj.FLAG.HIDDEN)
    
    
def timer_mode():
    start.add_flag(lvgl.obj.FLAG.HIDDEN)
    min_r.add_flag(lvgl.obj.FLAG.HIDDEN)
    min_l.add_flag(lvgl.obj.FLAG.HIDDEN)
    sec_r.add_flag(lvgl.obj.FLAG.HIDDEN)
    sec_l.add_flag(lvgl.obj.FLAG.HIDDEN)
    
    time_l.clear_flag(lvgl.obj.FLAG.HIDDEN)
    pause.clear_flag(lvgl.obj.FLAG.HIDDEN)
    reset.clear_flag(lvgl.obj.FLAG.HIDDEN)
    resume.add_flag(lvgl.obj.FLAG.HIDDEN)
    
    
def t(m,s):
    global minute,second
    minute = m
    second = s
    timer.reset()
    timer.resume()    
    
    
def start_handler(data):
    m = min_r.get_selected()
    s = sec_r.get_selected()
    timer_mode()
    if s < 10:
        s = '0' + str(s)
    s = str(s)
    
    time_l.set_text(str(m)+':'+s)
    t(m,int(s))

def pause_handler(data):
    timer.pause()
    pause.add_flag(lvgl.obj.FLAG.HIDDEN)
    resume.clear_flag(lvgl.obj.FLAG.HIDDEN)
    
def resume_handler(data):
    timer.resume()
    pause.clear_flag(lvgl.obj.FLAG.HIDDEN)
    resume.add_flag(lvgl.obj.FLAG.HIDDEN)
    
def reset_handler(data):
    timer.pause()
    set_mode()
    

pause.add_event_cb(pause_handler,lvgl.EVENT.CLICKED,None)
reset.add_event_cb(reset_handler,lvgl.EVENT.CLICKED,None)
resume.add_event_cb(resume_handler,lvgl.EVENT.CLICKED,None)
start.add_event_cb(start_handler,lvgl.EVENT.CLICKED,None)    


def alarm():
    cover = lvgl.obj(lvgl.scr_act())
    cover.set_size(320,240)
    cover.set_style_opa(lvgl.OPA._80,0)
    
    text = lvgl.label(cover)
    text.set_text('TIMER DONE')
    text.center()
    def delete(data):
        cover.delete()
    cover.add_event_cb(delete,lvgl.EVENT.RELEASED,None)
    text.add_event_cb(delete,lvgl.EVENT.RELEASED,None)

The Background

For the program to work, we need to create a background object. We set its size to cover the entire screen, and remove all the padding from it. We will also enable the flex layout for it.

background = lvgl.obj(lvgl.scr_act())
background.set_size(320,240)
background.set_style_pad_all(0,0)

background.set_layout( lvgl.LAYOUT_FLEX.value )
background.set_flex_flow( lvgl.FLEX_FLOW.COLUMN )
background.set_flex_align( lvgl.FLEX_ALIGN.CENTER, lvgl.FLEX_ALIGN.CENTER, lvgl.FLEX_ALIGN.CENTER )

Inside of that object, we create two more objects: one is for all of the objects that show the time and one is for all the buttons.

content = lvgl.obj(background)
content.set_style_pad_all(0,0)
content.set_size(300,150)

inputs = lvgl.obj(background)
inputs.set_style_pad_all(0,0)
inputs.set_size(300,60)
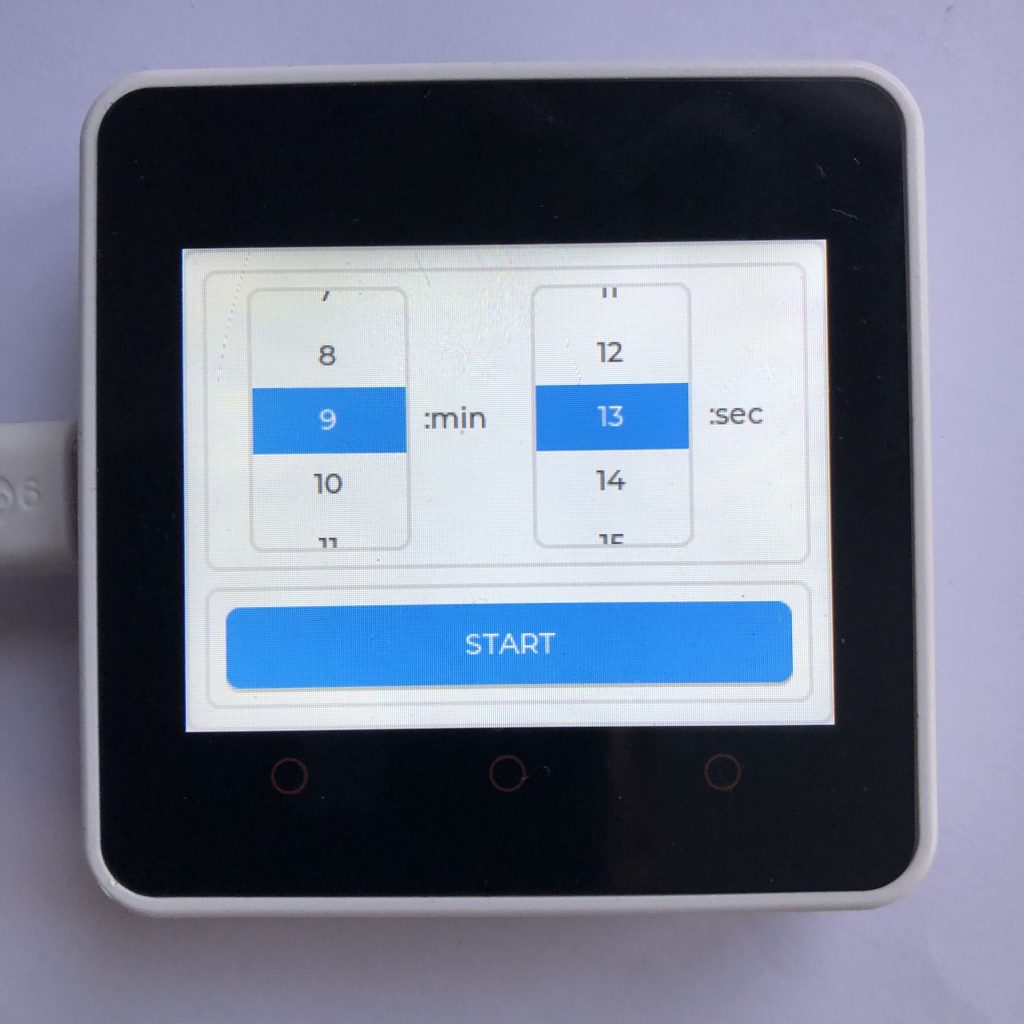
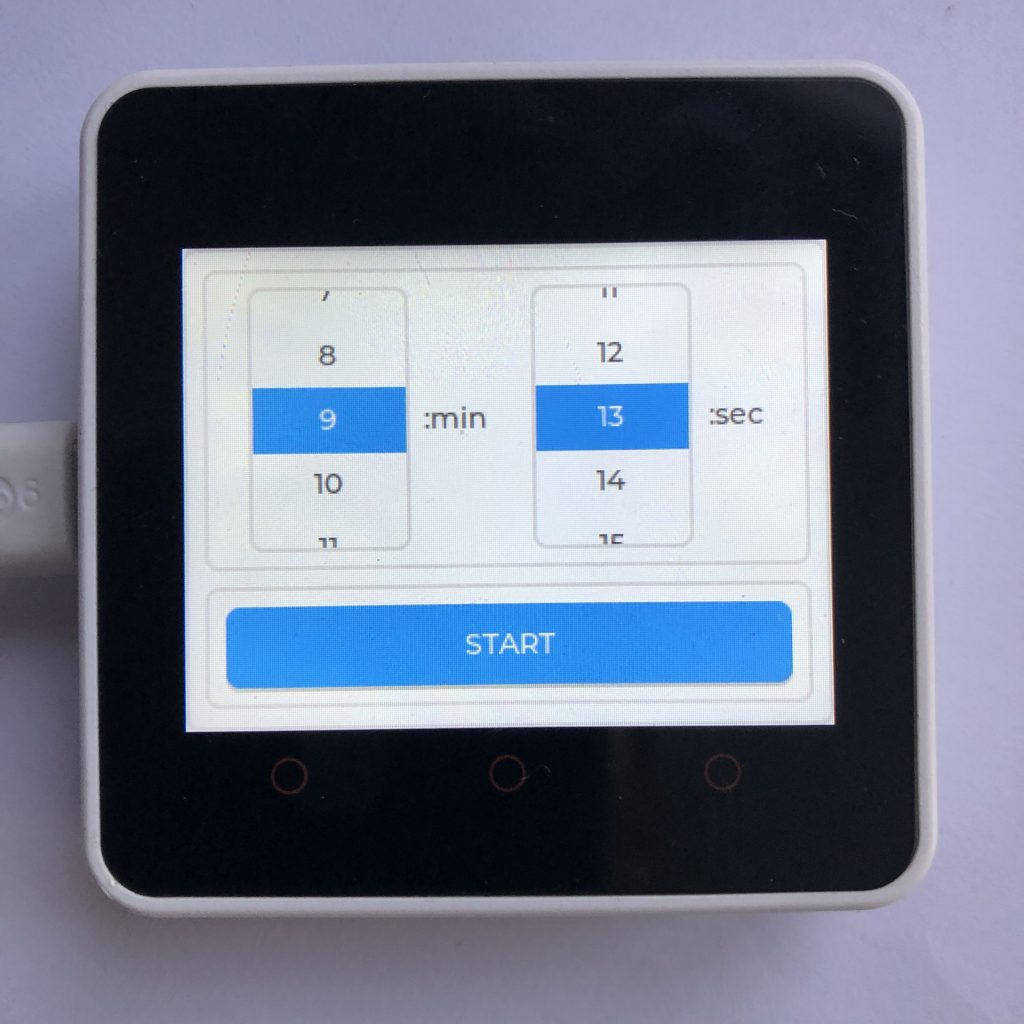
timer set to 9 min and 13 sec a=not started
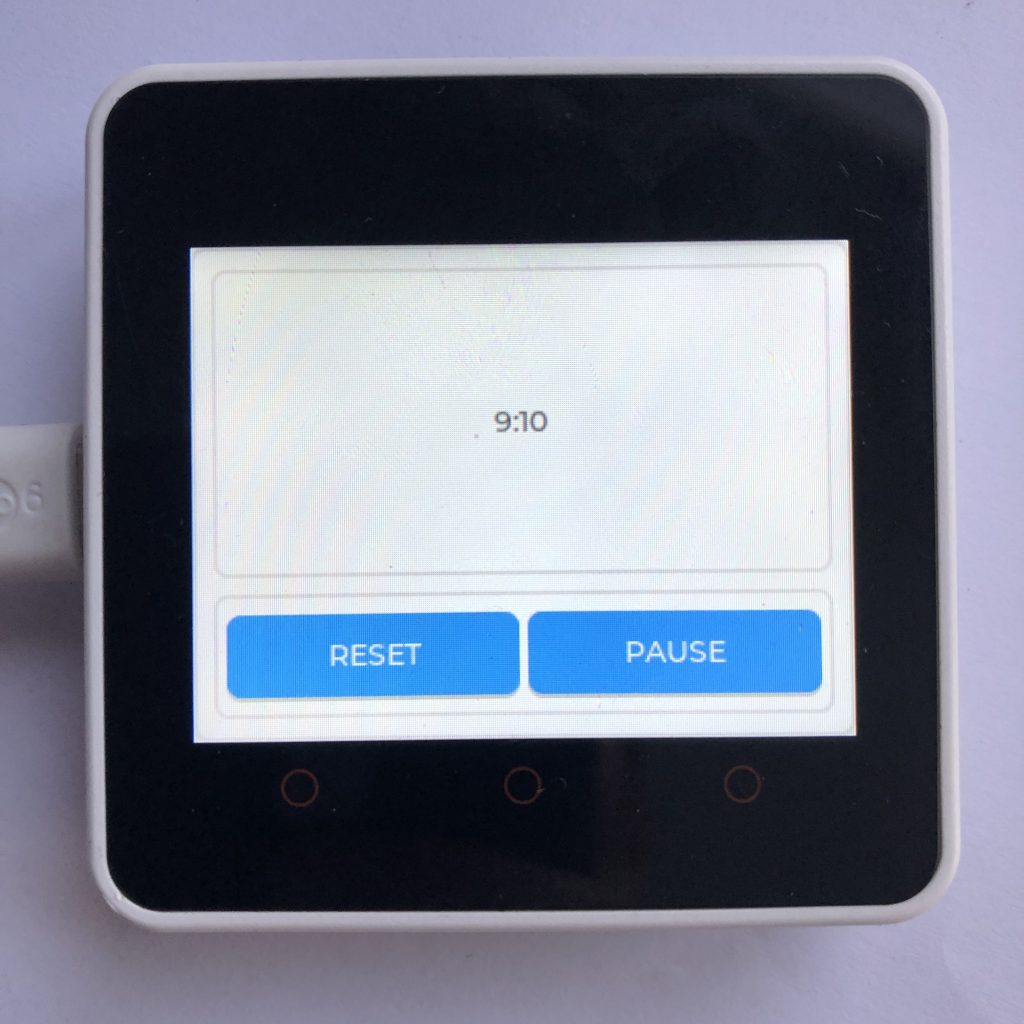
timer running screen
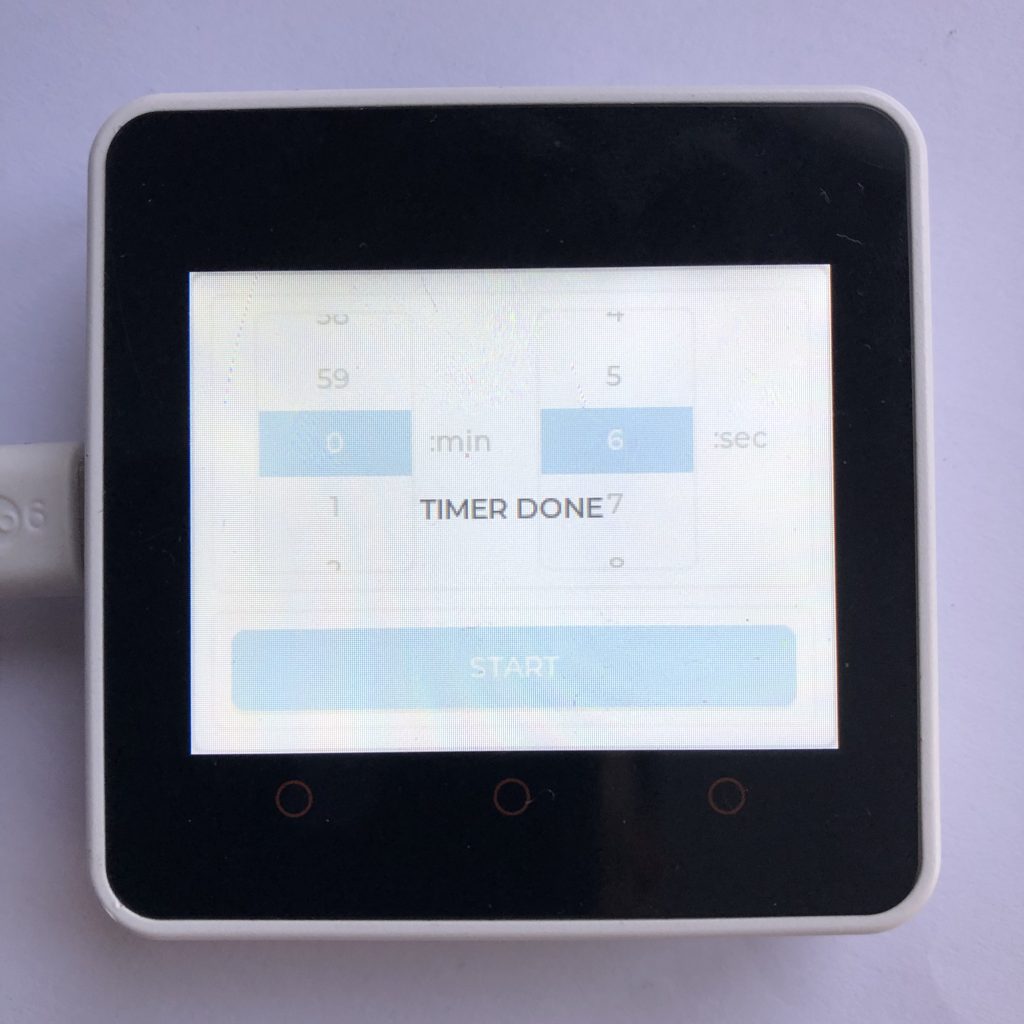
timer finished screen

Screens

This program has three major parts, the first is the settings screen, the second is the screen that shows how much time is left, and the third is the time over screen.

 
timer set to 9 min and 13 sec a=not started

The Settings Screen

In the content area, we create two rollers with a range from 0-59 and a label next to each roller.

num_l = []
for x in range(60):
    num_l.append(str(x))
num_s = '\n'.join(num_l)


min_r = lvgl.roller(content)
min_r.set_size(80,130)
min_r.align(lvgl.ALIGN.LEFT_MID,20,0)
min_r.set_options(num_s,lvgl.roller.MODE.INFINITE)
min_r.set_visible_row_count(4)

min_l = lvgl.label(content)
min_l.set_text(':min')
min_l.align(lvgl.ALIGN.CENTER,-25,0)

sec_r = lvgl.roller(content)
sec_r.set_size(80,130)
sec_r.align(lvgl.ALIGN.RIGHT_MID,-55,0)
sec_r.set_options(num_s,lvgl.roller.MODE.INFINITE)
sec_r.set_visible_row_count(4)

sec_l = lvgl.label(content)
sec_l.set_text(':sec')
sec_l.align(lvgl.ALIGN.RIGHT_MID,-20,0

In the inputs area, we create the start button.

start = lvgl.btn(inputs)
start.set_size(280,40)
start.center()
start_l = lvgl.label(start)
start_l.set_text('START')
start_l.center()
 
timer running screen

The Timer Screen

This screen is a little harder because we have to make all of the objects invisible by default.

The only thing we will add to the content section is a label to show how much time is left in the timer. We make the label invisible by adding the HIDDEN flag.

time_l = lvgl.label(content)
time_l.add_flag(lvgl.obj.FLAG.HIDDEN)
time_l.center()

In the inputs area we add three buttons, all of them are invisible.

reset = lvgl.btn(inputs)
reset.set_size(142,40)
reset.add_flag(lvgl.obj.FLAG.HIDDEN)
reset.align(lvgl.ALIGN.LEFT_MID,4,0)
reset_l = lvgl.label(reset)
reset_l.set_text('RESET')
reset_l.center()


pause = lvgl.btn(inputs)
pause.set_size(142,40)
pause.add_flag(lvgl.obj.FLAG.HIDDEN)
pause.align(lvgl.ALIGN.RIGHT_MID,-4,0)
pause_l = lvgl.label(pause)
pause_l.set_text('PAUSE')
pause_l.center()

resume = lvgl.btn(inputs)
resume.set_size(142,40)
resume.add_flag(lvgl.obj.FLAG.HIDDEN)
resume.align(lvgl.ALIGN.RIGHT_MID,-4,0)
resume_l = lvgl.label(resume)
resume_l.set_text('RESUME')
resume_l.center()

How We Know the Time

Before we move on to the last screen, lets see how the timer works behind the scenes.

First of all there are two variables: minute and second. They hold how many minutes and seconds are left on the timer.

minute = 0
second = 0

The update Function

Next, we create a function to update the time.

def update_time(t):

In that function, we begin by importing the minute and second variables.

    global minute,second

Then, we check if the minute and second variables equal zero.

    if minute == 0 and second == 0:

If they do, we we call three functions: one to end the timer (timer.pause), one two go back to the start screen (set_mode), and one to turn on the end screen (alarm).

If you have a speaker connected to your board this is where you could signal an alarm.

        timer.pause()
        set_mode()
        alarm()

If they didn’t equal zero, we minus one second from the current time, and then print the new time to the terminal and to the screen.

    else:
        if second == 0:
            second = 59
            minute -= 1
        else:
            second -= 1
        if second < 10:
            s = '0'+str(second)
        else:
            s = str(second)
        time_l.set_text(str(minute)+':'+s)
        print(minute,':',second)

We want that function to be called once every second, so we will use a LVGL timer to do that.

timer = lvgl.timer_create(update_time,1000,None)

We then make the timer repeat forever.

timer.set_repeat_count(-1)

Finally we turn it off for right now.

timer.pause()

The Helper Functions

There are also a few functions used to help control the timer.

The set_mode function makes all the start screen objects visible and hides the rest of the objects.

def set_mode():
    start.clear_flag(lvgl.obj.FLAG.HIDDEN)
    min_r.clear_flag(lvgl.obj.FLAG.HIDDEN)
    min_l.clear_flag(lvgl.obj.FLAG.HIDDEN)
    sec_r.clear_flag(lvgl.obj.FLAG.HIDDEN)
    sec_l.clear_flag(lvgl.obj.FLAG.HIDDEN)
    
    time_l.add_flag(lvgl.obj.FLAG.HIDDEN)
    pause.add_flag(lvgl.obj.FLAG.HIDDEN)
    reset.add_flag(lvgl.obj.FLAG.HIDDEN)
    resume.add_flag(lvgl.obj.FLAG.HIDDEN)

The timer_mode function does the opposite of the previous function it, hides the start screen objects and makes the timer objects visible.


def timer_mode():
    start.add_flag(lvgl.obj.FLAG.HIDDEN)
    min_r.add_flag(lvgl.obj.FLAG.HIDDEN)
    min_l.add_flag(lvgl.obj.FLAG.HIDDEN)
    sec_r.add_flag(lvgl.obj.FLAG.HIDDEN)
    sec_l.add_flag(lvgl.obj.FLAG.HIDDEN)
    
    time_l.clear_flag(lvgl.obj.FLAG.HIDDEN)
    pause.clear_flag(lvgl.obj.FLAG.HIDDEN)
    reset.clear_flag(lvgl.obj.FLAG.HIDDEN)
    resume.add_flag(lvgl.obj.FLAG.HIDDEN)


The T function is used to set the timer. It sets the minute and second variables and then resets and starts the timer.

def t(m,s):
    global minute,second
    minute = m
    second = s
    timer.reset()
    timer.resume()   

The Last Screen and the Handlers

These are the last few functions.

The start_handler is called when the the start button is clicked. It initializes the timer with the values from the rollers.

def start_handler(data):
    m = min_r.get_selected()
    s = sec_r.get_selected()
    timer_mode()
    if s < 10:
        s = '0' + str(s)
    s = str(s)
    
    time_l.set_text(str(m)+':'+s)
    t(m,int(s))

The pause_handler is connected to the pause button and obliviously pauses the timer.

def pause_handler(data):
    timer.pause()
    pause.add_flag(lvgl.obj.FLAG.HIDDEN)
    resume.clear_flag(lvgl.obj.FLAG.HIDDEN)

The resume_handler and reset_handler should be self explanatory.

def resume_handler(data):
    timer.resume()
    pause.clear_flag(lvgl.obj.FLAG.HIDDEN)
    resume.add_flag(lvgl.obj.FLAG.HIDDEN)
    
def reset_handler(data):
    timer.pause()
    set_mode()

The last step for these handlers is to connect them to the correct objects for example the pause_handler is connected to the pause button.

pause.add_event_cb(pause_handler,lvgl.EVENT.CLICKED,None)

Here is the rest of them.

reset.add_event_cb(reset_handler,lvgl.EVENT.CLICKED,None)
resume.add_event_cb(resume_handler,lvgl.EVENT.CLICKED,None)
start.add_event_cb(start_handler,lvgl.EVENT.CLICKED,None)    

There is one last function and then we are done with this program.

timer finished screen

The Alarm

This function is called when the timer is finished. Its creates the timer over screen which is simply an object that covers the entire screen with the text “TIMER DONE”. If you click the object it disappears and you can use the program as usual.

def alarm():
    cover = lvgl.obj(lvgl.scr_act())
    cover.set_size(320,240)
    cover.set_style_opa(lvgl.OPA._80,0)
    
    text = lvgl.label(cover)
    text.set_text('TIMER DONE')
    text.center()
    def delete(data):
        cover.delete()
    cover.add_event_cb(delete,lvgl.EVENT.RELEASED,None)
    text.add_event_cb(delete,lvgl.EVENT.RELEASED,None)

What Next?

The hole point of this program is to get practice with LVGL, so once you get it working, experiment around with it. The color and placement of some of the objects could be improved, and the most glaring problem is that the font for the current time is way to small.

Because enabling larger fonts takes a lot of work, I left that out of this program, but if you want to do it, you can find so more information on the process at How to Change Micropython LVGL Fonts.

Filed Under: Micropython

How to Use Micropython LVGL Bars

February 1, 2023 by Baxter

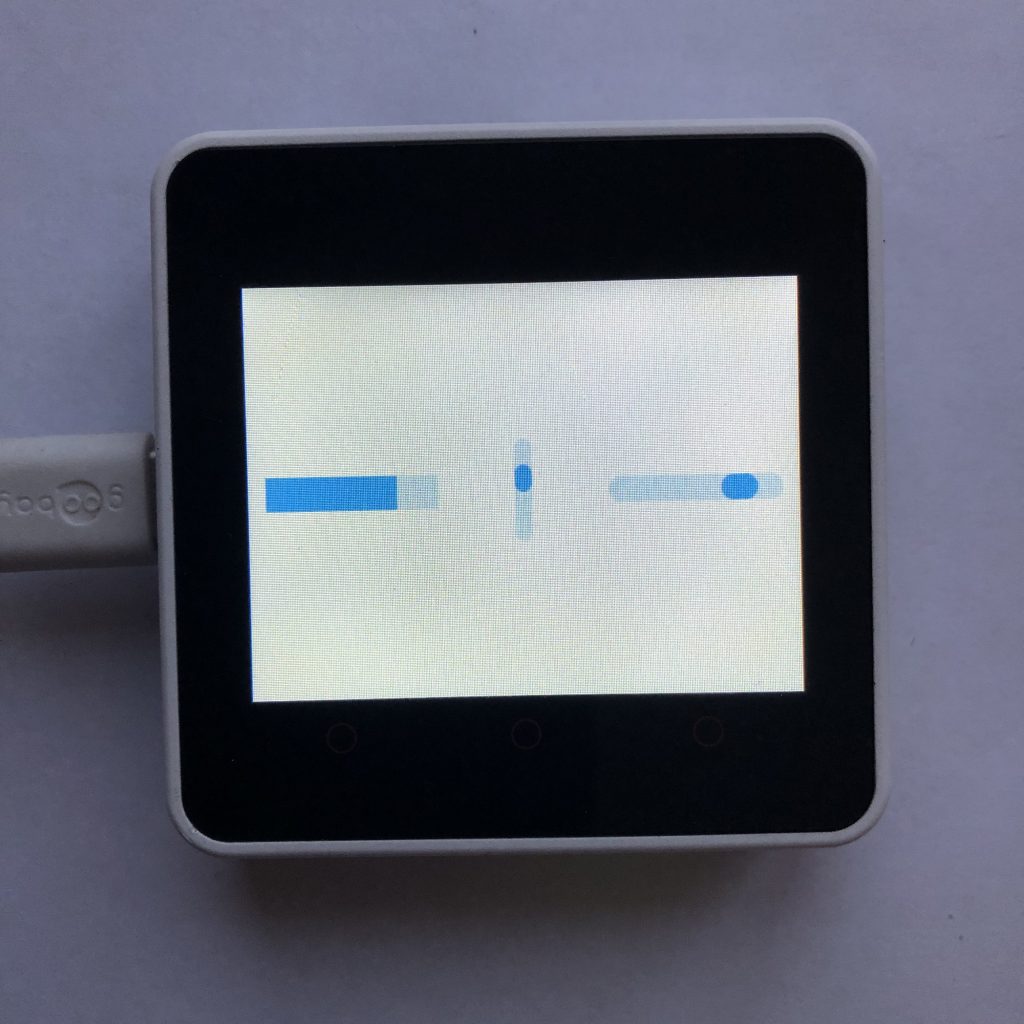
three lvgl bars set to about 75%

Output Bars are one of those things we see all of the time. You can find them in scroll bars, progress bars, etc. They are all over the place, because bars allow you to show numbers in a more visual way.

Today I will show you how to create and edit LVGL bars. We will work through the three main types of bars and setting each of there values.

Setting Up a Micropython Screen

Obviously, if you are creating a program that draws things on a screen, you have to have access to a screen.

Because there are so many different screens out there you could use with micropython, I can’t add support for all of them, so to make this example work, you will need to add your screen’s setup code to the beginning of the example.

There is a little more information on this process at How to get a LVGL Micropython Screen to Work if you aren’t familiar on how it’s done.

Here is the code we will work through.

import lvgl


bar1 = lvgl.bar(lvgl.scr_act())
bar1.set_size(100,20)
bar1.align(lvgl.ALIGN.CENTER,-100,0)
bar1.set_value(50,lvgl.ANIM.OFF)
bar1.set_range(0,100)
bar1.set_style_radius(0,0)
bar1.set_style_radius(0,lvgl.PART.INDICATOR)

bar2 = lvgl.bar(lvgl.scr_act())
bar2.set_size(10,60)
bar2.center()
bar2.set_value(50,lvgl.ANIM.OFF)
bar2.set_range(-50,50)
bar2.set_mode(lvgl.bar.MODE.SYMMETRICAL)

bar3 = lvgl.bar(lvgl.scr_act())
bar3.set_size(100,15)
bar3.align(lvgl.ALIGN.CENTER,100,0)
bar3.set_value(50,lvgl.ANIM.OFF)
bar3.set_range(0,100)
bar3.set_mode(lvgl.bar.MODE.RANGE)

import time
while True:
    for x in range(101):
        bar1.set_value(x,lvgl.ANIM.ON)
        bar2.set_value(x-50,lvgl.ANIM.ON)
        bar3.set_value(max(min(x+10,100),10),lvgl.ANIM.ON)
        bar3.set_start_value(max(min(x-10,99),0),lvgl.ANIM.ON)
        time.sleep(0.05)
    for x in range(100,-1,-1):
        bar1.set_value(x,lvgl.ANIM.ON)
        bar2.set_value(x-50,lvgl.ANIM.ON)
        bar3.set_value(max(min(x+10,100),10),lvgl.ANIM.ON)
        bar3.set_start_value(max(min(x-10,99),0),lvgl.ANIM.ON)
        time.sleep(0.05)

The Setup

The very first thing, we need to do is import the LVGL module. Around here is a good place to put your screen setup code.

import lvgl

Creating the First Bar

We will start by creating a new bar.

bar1 = lvgl.bar(lvgl.scr_act())

Next, we will set the size of our bar.

bar1.set_size(100,20)

After that, we will align our bar to a hundred pixels left of the center of the screen.

bar1.align(lvgl.ALIGN.CENTER,-100,0)

Then we will set the default value of our bar.

bar1.set_value(50,lvgl.ANIM.OFF)

We will also set the range.

bar1.set_range(0,100)

Next we are going to make this bar rectangular, normally bars have rounded edges but that is not what we want here.

bar1.set_style_radius(0,0)

To make the bar completely rectangular we need to remove the rounded edges from the indicator too.

bar1.set_style_radius(0,lvgl.PART.INDICATOR)

Making the Vertical Bar

The next bar we want to create is the vertical one. LVGL makes this simple, first you make a bar like normal.

bar2 = lvgl.bar(lvgl.scr_act())

Then, all you have to do is make the height of the bar bigger than the width.

bar2.set_size(10,60)

To make the bar fit, we put it in the center of the screen.

bar2.center()

After that, we will set the default value.

bar2.set_value(50,lvgl.ANIM.OFF)

Next, we set the range of this bar.

bar2.set_range(-50,50)

Bars have modes. We are going to put this bar into symmetrical mode which means that the bar fills from the middle out, looking at the middle bar in the picture above might help.

bar2.set_mode(lvgl.bar.MODE.SYMMETRICAL)

The Range Bar

We want this last bar to be in range mode. In range mode you can set both the bar’s end value and also the bar’s start value. In the picture above you can see that this bar, the third to the right, has only a little dot colored blue.

We begin as usual by creating an new bar.

bar3 = lvgl.bar(lvgl.scr_act())

Then, we do all the normal things set its size, range, value, etc.

bar3.set_size(100,15)
bar3.align(lvgl.ALIGN.CENTER,100,0)
bar3.set_value(50,lvgl.ANIM.OFF)
bar3.set_range(0,100)

And finally, we set it to range mode.

bar3.set_mode(lvgl.bar.MODE.RANGE)

Creating Some Values

You probably cannot tell it from the picture, but the bars are supposed to be constantly changing their value so lets make a little code that does that for us.

First the time module needs imported.

import time

Then, we will create a infinite loop.

while True:

After that, we will create a for loop that counts from 0 up to 100.

    for x in range(101):

X represents a number from 0 to 100 so we will simple set the value of bar1 to x.

        bar1.set_value(x,lvgl.ANIM.ON)

The range of bar2 is from -50 to 50 and because x can be bigger that 50, we subtract 50 from x before we use it.

        bar2.set_value(x-50,lvgl.ANIM.ON)

Bar3 has two values we have to set. For the first value, we add 10 to x then we do a little constraining math on x so it never dips below 10 or above 100

        bar3.set_value(max(min(x+10,100),10),lvgl.ANIM.ON)

Then, we set the start value to x minus 10 constrained to 0 through 99.

        bar3.set_start_value(max(min(x-10,99),0),lvgl.ANIM.ON)

Next, we tell the computer to wait 0.05 seconds before it resets the value of the bars.

        time.sleep(0.05)

Now that we have made our first for loop, we will create one more. This for loop is just like the previous, accept instead of counting up from 0-100 it counts down from 100-0.

    for x in range(100,-1,-1):
        bar1.set_value(x,lvgl.ANIM.ON)
        bar2.set_value(x-50,lvgl.ANIM.ON)
        bar3.set_value(max(min(x+10,100),10),lvgl.ANIM.ON)
        bar3.set_start_value(max(min(x-10,99),0),lvgl.ANIM.ON)
        time.sleep(0.05)

What Should Happen?

When you run the program, three bars should appear. Each should slowly increase in value and then slowly decrease and that process should repeat for ever. Don’t forget that you can stop the program by hitting the ctrl+c keys.

Bars have tons of customizability. We only went into some of things you can do like changing size and squaring, but you can also change their colors, rotate them, or shrink their indicators. That’s what makes bars so useful, you can put them in any GUI and with a little styling, they feel like they have always belonged.

If you like bars you might like arcs. They are like a bar that has been curved. If you want to now more on how to use them check out LVGL Arcs.

Filed Under: Micropython

How to Use Micropython LVGL LEDs

January 31, 2023 by Baxter

lvgl leds used to make a circle and a seven segment display

LVGL has several widgets intended to polish off your projects. LEDs are one of them. They are very simple to use because they do all of the color math and styling for you.

Today, I will show you how to create a LED and also how to use LEDs to make a 7 segment display. We will do that by walking through how the code down below works.

Setting Up a Micropython Screen

Obviously, if you are creating a program that draws things on a screen, you have to have access to a screen.

Because there are so many different screens out there, I can’t add support for all of them, so to make this example work, you will need to add your screen’s setup code to the beginning of the example.

There is a little more information on this process at How to get a LVGL Micropython Screen to Work if you aren’t familiar on how it’s done.

Here is that code

import lvgl
from time import sleep

led1 = lvgl.led(lvgl.scr_act())
led1.set_brightness(100)
led1.set_color(lvgl.color_hex(0x00ff00))
led1.set_pos(160,45)
led1.set_size(150,150)


def add_led(x,y,w,h):
    led = lvgl.led(lvgl.scr_act())
    led.set_style_radius(0,0)
    led.set_pos(x,y)
    led.set_size(w,h)
    led.off()
    return led

t = add_led(20,40,70,10)
m = add_led(20,110,70,10)
b = add_led(20,180,70,10)

tl = add_led(10,50,10,60)
tr = add_led(90,50,10,60)

bl = add_led(10,120,10,60)
br = add_led(90,120,10,60)


def display(top,middle,bottom,top_left,top_right,bottom_left,bottom_right):
    if top:
        t.on()
    else:
        t.off()   
    if middle:
        m.on()
    else:
        m.off()
    if bottom:
        b.on()
    else:
        b.off()
        
    if top_left:
        tl.on()
    else:
        tl.off()
    if top_right:
        tr.on()
    else:
        tr.off()
        
    if bottom_left:
        bl.on()
    else:
        bl.off()
    if bottom_right:
        br.on()
    else:
        br.off()

def update(num):
    if num == 0:
        display(1,0,1,1,1,1,1)        
    if num == 1:
        display(0,0,0,0,1,0,1)
    if num == 2:
        display(1,1,1,0,1,1,0)
    if num == 3:
        display(1,1,1,0,1,0,1)
    if num == 4:
        display(0,1,0,1,1,0,1)
    if num == 5:
        display(1,1,1,1,0,0,1)
    if num == 6:
        display(1,1,1,1,0,1,1)   
    if num == 7:
        display(1,0,0,0,1,0,1)
    if num == 8:
        display(1,1,1,1,1,1,1)
    if num == 9:
        display(1,1,0,1,1,0,1)

while True:
    for x in range(10):
        update(x)
        led1.set_brightness(x*20)
        sleep(1)

Understanding This Code

Just looking at a block of code is not always very informational. To make how this micropython code works more clear, lets walk through the lines of code above and see what they do.

The Setup

Before we can use LVGL we need to import it. This is also a good spot to add your screen setup code.

import lvgl

Some of this code requires special timing, so we import the sleep function from the time module.

from time import sleep

Creating a Simple LED

Will start by creating a LED.

led1 = lvgl.led(lvgl.scr_act())

Next we will set that LED’s brightness to 100. The brightness range is between 0 and 255.

led1.set_brightness(100)

Then we will set the color of the LED to green.

led1.set_color(lvgl.color_hex(0x00ff00))

After that we set its position.

led1.set_pos(160,45)

Lastly we set its size to 150 pixels wide by 150 pixels tall.

led1.set_size(150,150)

Simplifying the Process

We are going to have to create a lot of LEDs, so lets create a function that will make that process easier.

To start we define the function.

def add_led(x,y,w,h):

After that we create a new LED.

    led = lvgl.led(lvgl.scr_act())

Then we set the radius to zero. This makes the LEDs square instead of Circular.

    led.set_style_radius(0,0)

Next we set the position of the LED and its size.

    led.set_pos(x,y)
    led.set_size(w,h)

After that we turn it off which is the same as setting the brightness to 0.

    led.off()

Finally we return the LED object we created, so the program can use it.

    return led

Creating Lots of LEDs

For the 7 segment display, we need 7 LEDs so lets create them.

We will use that function we made earlier to create our LEDS. It takes four numbers; the first two numbers are the x and y coordinates of the led and the second two numbers are the width and height of the led.

We start by creating the top,middle, and bottom LEDs.

t = add_led(20,40,70,10)
m = add_led(20,110,70,10)
b = add_led(20,180,70,10)

Then we create the top_left and top_right LEDs.

tl = add_led(10,50,10,60)
tr = add_led(90,50,10,60)

Lastly we create the bottom left and bottom right LEDs.

bl = add_led(10,120,10,60)
br = add_led(90,120,10,60)

The Control Function

The next thing we are going to do is create a function to control all of those LEDs.

We begin by defining it.

def display(top,middle,bottom,top_left,top_right,bottom_left,bottom_right):

After that we check if the top LED should be on.

 if top:
        t.on()
    else:
        t.off()   

I won’t bore you with the process, but we do the exact same thing for the rest of the LEDs.

    if middle:
        m.on()
    else:
        m.off()
    if bottom:
        b.on()
    else:
        b.off()
        
    if top_left:
        tl.on()
    else:
        tl.off()
    if top_right:
        tr.on()
    else:
        tr.off()
        
    if bottom_left:
        bl.on()
    else:
        bl.off()
    if bottom_right:
        br.on()
    else:
        br.off()

Numbers to LEDs

We want the leds to display numbers. So we are going to create one last function. We will give this function a number like 4 and it figures out which LEDs should be turned on to show the number four.

As usual we start by defining the function.

def update(num):

Then we check if the number given to this function is the number zero.

    if num == 0:

If it was we turn on the correct LEDs to display zero.

        display(1,0,1,1,1,1,1)        

We repeat this process for the numbers 1-9.

    if num == 1:
        display(0,0,0,0,1,0,1)
    if num == 2:
        display(1,1,1,0,1,1,0)
    if num == 3:
        display(1,1,1,0,1,0,1)
    if num == 4:
        display(0,1,0,1,1,0,1)
    if num == 5:
        display(1,1,1,1,0,0,1)
    if num == 6:
        display(1,1,1,1,0,1,1)   
    if num == 7:
        display(1,0,0,0,1,0,1)
    if num == 8:
        display(1,1,1,1,1,1,1)
    if num == 9:
        display(1,1,0,1,1,0,1)

Generating The Numbers

The last thing we want to do is make the LEDs display different numbers.

First we create a infinite loop.

while True:

Next we use a for loop to generate our numbers.

    for x in range(10):

Then we update the LEDs to equal x ,which will be a number from 0-9, and we also change the brightness of the original LED.

        update(x)
        led1.set_brightness(x*20)

Lastly, we tell the computer to wait one second before it does anything else.

        sleep(1)

What Should Happen

Once you run the above code, you should see a number next to a green circle. If you let the program keep running the number get bigger and bigger and the circle get brighter. Eventually the number reaches 9 and the hole thing starts back from 0 and the circle goes dark.

LEDs are great because they can be made into almost anything. You can create complex displays like we did today, or you can create a simple dot that turns on and off.

A lot of the control of LEDS comes from using styles, if you want to learn more about how they work LVGL Style Examples might interest you.

Filed Under: Micropython

How to Change Micropython LVGL Fonts

January 30, 2023 by Baxter

screen displaying multiple lvgl fonts

Being able to change fonts is extremely important. Unfortunately It takes a bit of work to get new fonts onto microcontrollers. Thankfully once they are there, LVGL makes it easy to use them.

Today I will show you how to add some extra fonts to your board and use those fonts with LVGL. There is also some example code at the bottom to test if your fonts work.

Compiling

To add new fonts, you need to recompile micropython LVGL. This tutorial is not intended to teach you how to compile micropython LVGL. If you are not familiar on how that is done, the best place to find information is in the readme files in the micropython LVGL source code.

Make sure to follow the instructions at the main readme and your boards readme, for example here is what I use Micropython Readme, Esp32 Readme, and Core2 Readme.

Adding Builtin Fonts

To add a font, we need to enable it in the lv_conf.h file. Of course the first step is to find the lv_conf.h file.

First find the lv_micropython folder. If you have compiled LVGL before, then this should already be downloaded onto your computer. Usually its put in your root directory.

Inside of the lv_micropython folder, find and enter the lib folder.

Then find and enter the lv_binding folder. Your path should look something like: Home/lv_micropython/lib/lv_binding

Inside of the lv_binding folder you will find the lv_conf.h file.

Editing lv_conf.h

The lv_conf.h file controls pretty much all of LVGL. Open it in your text editor and around line 346, you should see a list of fonts similar to the picture below.

screenshot of lv_conf.h file

In each font name there is a number, that number is equal to how many pixels that font is high for example in LV_FONT_MONTSERRAT_30 each letter should be 30 pixels high.

Next to each font name there is ether a 1 or a 0. If the number is a one the font is added to LVGL if it is zero its not added. You can see from the picture above that I have the 14,16,20,30, and 46 size fonts enabled.

All you have to do now is add a one next to the fonts you want, save the file, and then recompile LVGL as normal, and the fonts you chose will be added to LVGL.

Fonts take a lot of memory, so if you add to many fonts your computer might not have enough memory to work. Its usually best if you only enable the fonts you know you will use.

Using Your Fonts with LVGL

Styles are what controls fonts. The most basic way you can use styles to change the font is like this.

YourObject.set_style_text_font(lvgl.YourFontName,0)

You will need to replace YourObject with what ever object you want to change the font of, and replace YourFontName with the name of your font, usually in lower case. Below is some code that shows this process in action.

The Screen

To get this or any code for that matter to work, you need to enable a screen for LVGL. If you don’t know how to do that then there is a little more information at How to get a LVGL Micropython screen to work.

import lvgl

big_lb = lvgl.label(lvgl.scr_act())
big_lb.set_style_text_font(lvgl.font_montserrat_46,0)
big_lb.align(lvgl.ALIGN.CENTER,0,-30)
big_lb.set_text('Hello 46')

large_lb = lvgl.label(lvgl.scr_act())
large_lb.set_style_text_font(lvgl.font_montserrat_30,0)
large_lb.align(lvgl.ALIGN.CENTER,0,0)
large_lb.set_text('Hello 30')

mid_lb = lvgl.label(lvgl.scr_act())
mid_lb.set_style_text_font(lvgl.font_montserrat_20,0)
mid_lb.align(lvgl.ALIGN.CENTER,0,20)
mid_lb.set_text('Hello 20')

default_lb = lvgl.label(lvgl.scr_act())
default_lb.set_style_text_font(lvgl.font_montserrat_16,0)
default_lb.align(lvgl.ALIGN.CENTER,0,35)
default_lb.set_text('Hello 16')

Other Options

You now can enable any of the default fonts LVGL has available but you might want a little more variaty for your projects. Thankfully you can add any font you want to LVGL. You just have to process them with LVGL Font Converter.

If you don’t want to go through that process there is a way around it. Down near the bottom of the lv_conf.h file there are some settings for enabling TTF fonts.

If enabled it is possible to load a normal font from the file system, meaning this method doesn’t even require you to recompile the the firmware when you add a new font.

In the code above we had to create a individual label for for each font we wanted to add. Because of how annoying this is, LVGL has the span. Spans are like labels but you can have more than one type of font in them.

If you are interested in spans you can learn more at LVGL Spans.

Filed Under: Micropython

How to use Micropython LVGL Dropdown Boxes

January 23, 2023 by Baxter

LVGL dropdown box with different times that you can select.

When creating a GUI, there is never enough room on the screen. You want to add this list here or that button there and there is no room left. Dropdown boxes are the age old trick to free up some space.

Dropdown boxes free space by shrinking lists, which usually take up a lot of your screen, into a small button. If you tap the button the list appears, then you can select the option you want and the list disappears again.

Today I will show you how to create, modify, and style dropdown boxes.

Setting Up a Micropython Screen

Obviously, if you are creating a program that draws things on a screen, you have to have access to a screen.

Because there are so many different screens out there, I can’t add support for all of them, so to make this example work, you will need to add your screen’s setup code to the beginning of the example.

There is a little more information on this process at How to get a LVGL Micropython Screen to Work if you aren’t familiar on how it’s done.

Here is the Example

import lvgl

drop = lvgl.dropdown(lvgl.scr_act())
drop.align(lvgl.ALIGN.CENTER,0,-50)

drop.set_dir(lvgl.DIR.BOTTOM)
drop.set_symbol('')
drop.set_selected_highlight(False)
drop.set_text('Time')

start = ['12:00','3:30','9:30','7:00','2:00','5:00']
opt = '\n'.join(start)

drop.set_options(opt)

def print_select(data):
    dr = data.get_target()
    ID = dr.get_selected()
    name = start[ID]
    print(name)
    
drop.add_event_cb(print_select,lvgl.EVENT.VALUE_CHANGED,None)

ls = drop.get_list()
ls.set_style_bg_color(lvgl.color_hex(0xDDFFFF),0)
ls.set_style_max_height(100,0)

Understanding This Code

Just looking at a block of code is not always very informational. To make how this micropython code works more clear, lets walk through the lines of code above and see what they do.

The Setup

First we need to import LVGL this is also a good spot to put your screen setup code.

import lvgl

The Dropdown

To begin, we create a new dropdown box.

drop = lvgl.dropdown(lvgl.scr_act())

Then we align it to 50 pixels above the center of the screen.

drop.align(lvgl.ALIGN.CENTER,0,-50)

Next we select which direction we want the list to pop out of.

drop.set_dir(lvgl.DIR.BOTTOM)

Dropdown boxes usually have a symbol next to their text. For this example, we don’t want that, so we set the symbol to ” (aka. blank text).

drop.set_symbol('')

Dropdown boxes can also highlight the list item that was last clicked. We will disable that too.

drop.set_selected_highlight(False)

After that we will set the default text of our dropdown box.

drop.set_text('Time')

Setting the Options

The whole point of the dropdown box is that it gives us a list of options and we select one. Obliviously before it can do that, it has to have a list of options, so it’s finally time to create our list of options.

To start we create a list of texts.

start = ['12:00','3:30','9:30','7:00','2:00','5:00']

Then we format the list correctly. The code below turns a list like [ ’12:00′,’3:30′,’9:30′] into the string ’12:00\n3:30\n9:30′.

opt = '\n'.join(start)

Lastly, we add the correctly formatted list of options to the dropdown box.

drop.set_options(opt)

Finding the Clicked Option

The next major thing we need to do is find the clicked option. We do that by using LVGL events.

Firstly, we need to create a new function.

def print_select(data):

Inside it we run some code that finds the object (aka. our dropdown box) that called this function.

    dr = data.get_target()

Then we use that object to find the currently selected option.

    ID = dr.get_selected()

After that we use the list options that we originally created to figure out the text of the selected option.

    name = start[ID]

Finally we print that text to the terminal.

    print(name)

Hooking Up That Function

We just created our event handler function but now we need to connect it to the dropdown box for it to work.

drop.add_event_cb(print_select,lvgl.EVENT.VALUE_CHANGED,None)

Styling the List

The last thing we want to do is style the list that appears when the dropdown is clicked.

First, we collect the list object.

ls = drop.get_list()

Then we will change the background.

ls.set_style_bg_color(lvgl.color_hex(0xDDFFFF),0)

And finally, we set the maximum size of our list.

ls.set_style_max_height(100,0)

What Should Happen

Once you run this program you should see a button that says Time. If you click it, a list will appear with different times on it and if you click one of those times, the list will disappear and the time you clicked will appear in your REPL window.

Dropdowns are useful when you don’t have lots of screen space or you are just trying to make your GUI interesting.

If you have a little more space on your screen, then LVGL rollers are a great alternative to dropdowns. Rollers make really cool GUIs but dropdowns still win when it comes to simplicity and ease of use.

Filed Under: Micropython

How to Draw Arcs and Circles with Micropython LVGL

January 19, 2023 by Baxter

A blue circle and 2 arcs that are draw on screen with lvgl.

Being able to draw basic shapes is extremely important in building a GUI. This tutorial is part of a series on drawing primitive shapes. Today we will explore arcs.

If you are not familiar with LVGL descriptors then I would suggest looking at the intro page for this series. How to Draw a Rectangle with Micropython LVGL

Arcs are the tool, that lets you draw rounded shapes. Today we will look at how you create and modify arcs and how to use an arc to create a circle.

Setting Up a Micropython Screen

Obviously if you are creating a program that draws things on a screen, you have to have access to a screen.

Because there or so many different screens out there, I can’t add support for all of them, so to make this code work, you will need to add your screen’s setup code to the beginning of the example.

There is a little more information on this process at How to get a LVGL Micropython Screen to Work if you aren’t familiar on how it’s done.

Here is the Example

import lvgl


def draw(data):    
    arc = lvgl.draw_arc_dsc_t()
    arc.init()
    arc.color = lvgl.color_hex(0x0000FF)
    arc.width = 50
    arc.rounded = 1
    
    spot = lvgl.point_t()
    spot.x = 120
    spot.y = 160
    
    arc2 = lvgl.draw_arc_dsc_t()
    arc2.init()
    arc2.color = lvgl.color_hex(0x00ff00)
    arc2.width = 20
    
    spot2 = lvgl.point_t()
    spot2.x = 260
    spot2.y = 120
    
    arc3 = lvgl.draw_arc_dsc_t()
    arc3.init()
    arc3.color = lvgl.color_hex(0xFF0000)
    arc3.width = 10
    arc3.rounded = 1
    
    spot3 = lvgl.point_t()
    spot3.x = 140
    spot3.y = 140
        
    draw_ctx = data.get_draw_ctx()
    draw_ctx.arc(arc,spot,50,90,89) 
    draw_ctx.arc(arc2,spot2,55,90,-90)
    draw_ctx.arc(arc3,spot3,100,250,-60)

scr = lvgl.scr_act()
scr.add_event_cb(draw,lvgl.EVENT.DRAW_MAIN_END,None)
scr.invalidate()

Understanding This Code

Just looking at a block of code is not always very informational. To make how the code works more clear, lets walk through the lines of code above and see what they do.

The Setup

To begin, we need to import the LVGL module. This would be a good spot to add your screen setup code.

import lvgl

The Draw Function

When drawing shapes directly to the screen, it’s best if we put all the drawing related code inside of a draw function.

To do that we start by defining a new function.

def draw(data):

To make the inside of this function more understandable we will divide it into four parts.

The First Arc

First, we need to create a new arc descriptor (it’s like a LVGL style).

    arc = lvgl.draw_arc_dsc_t()

We also need to initialize it.

    arc.init()

Then, we will set the color of our arc to blue.

    arc.color = lvgl.color_hex(0x0000FF)

After that, we will set the width of the arc to 50 pixels. Later on we will set the radius of the arc to 50 as well. If the radius and width of an arc are the same then your arc will be a circle.

Something to keep in mind is that we can control how much of an arc is visible, so even thought this arc starts out as a circle that doesn’t mean it will be a perfect circle when we are done with it.

    arc.width = 50

Next, we tell the computer that we want rounded corners.

    arc.rounded = 1

Our next step is to create a LVGL point object.

    spot = lvgl.point_t()

Then, we will set the x and y coordinates of that point.

    spot.x = 120
    spot.y = 160

The Second Arc

This arc is very similar to the last one. We start by creating and initializing a new arc descriptor.

    arc2 = lvgl.draw_arc_dsc_t()
    arc2.init()

After that, we set the color to blue and the width to 20 pixels.

    arc2.color = lvgl.color_hex(0x00ff00)
    arc2.width = 20

Then, we create a new point and set its x and y values.

    spot2 = lvgl.point_t()
    spot2.x = 260
    spot2.y = 120

The Third Arc

First, we create a new arc and initilise it.

    arc3 = lvgl.draw_arc_dsc_t()
    arc3.init()

Then, we set its color and width, and we will make it have rounded corners as well.

    arc3.color = lvgl.color_hex(0xFF0000)
    arc3.width = 10
    arc3.rounded = 1

After that, we create a new point and set its x and y values.

    spot3 = lvgl.point_t()
    spot3.x = 140
    spot3.y = 140

 Making the Arcs Visible

We have created three sets of arc descriptors and their points. Now we need to use draw_ctx to actually draw them onto the screen.

To begin, lets get the draw_ctx variable.

    draw_ctx = data.get_draw_ctx()

Then, we will use it to draw the first arc. The three numbers mean the following things:

The 50 tells the computer to draw an arc that has a radius of 50 pixels.

The the 90 tells the computer to start drawing the arc at 90 degrees.

The 89 tells it to end the arc at 89 degrees. Because LVGL draws arcs clockwise it will start the arc at 90 degrees and go all the way round until it stop at 89 degrees. That is why this arc looks like a circle.

    draw_ctx.arc(arc,spot,50,90,89) 

After that, we draw the second arc.

    draw_ctx.arc(arc2,spot2,55,90,-90)

Finally, we draw the last arc.

    draw_ctx.arc(arc3,spot3,100,250,-60)

Running the Draw Function

We just made a function that draws three arcs. The last step we have to do is connect it to the object that it will draw on.

We are going to use the screen object but first we have to retrieve it.

scr = lvgl.scr_act()

Then, we add the draw function to the screen object.

scr.add_event_cb(draw,lvgl.EVENT.DRAW_MAIN_END,None)

Finally, we invalidate the screen so the arcs get drawn.

scr.invalidate()

What You Should See

Once you run the code above, your screen should display a blue circle, a red arc, and a green arc. If you play around with the width, radius, x, y, start_angle, and end_angle, you can create pretty much any rounded shape you want.

What makes arcs super useful is the control you have. Not only can you draw arcs on the screen with minimal memory usage but you can edit any arcs that was already going to be draw which means you can customize the widgets that already exist to suit your needs.

If you want to know how to use some more draw descriptors you might be interested in LVGL rectangles or LVGL polygons.

Filed Under: Micropython

How to use Micropython LVGL Button Matrixes

January 17, 2023 by Baxter

Simple calculator made with lvgl button matrix

If you have ever had to create a program that uses lots of buttons, you know what a pain it can be to have to create, style, and position each one. That is why button matrixes were created.

The button matrix groups all the buttons together. This makes it easy to apply styles to the entire group and means it takes less memory to create and use the buttons.

Today, I will show you how to create and edit your own button matrix. We will do that by walking through some example code, which creates a button matrix for a simple calculator.

The Screen

To get the code to work with your screen, you will need to add your screen setup code to the beginning of it. If you want more information, you can try How to get a LVGL Micropython screen to work.

Here is the code

import lvgl

matrix = lvgl.btnmatrix(lvgl.scr_act())

MAP = ['7','8','9','+','\n',
       '4','5','6','-','\n',
       '1','2','3','=','\n',
       '0',lvgl.SYMBOL.REFRESH,
       None]

matrix.set_map(MAP)
matrix.set_btn_width(12,3)
matrix.set_btn_width(13,1)

matrix.set_size(320,150)
matrix.align(lvgl.ALIGN.BOTTOM_MID,0,0)

matrix.set_btn_ctrl(3,lvgl.btnmatrix.CTRL.CHECKABLE)
matrix.set_btn_ctrl(7,lvgl.btnmatrix.CTRL.CHECKABLE)
matrix.set_btn_ctrl(11,lvgl.btnmatrix.CTRL.CHECKABLE)

matrix.set_one_checked(True)

label = lvgl.label(lvgl.scr_act())
label.align(lvgl.ALIGN.TOP_MID,0,20)
label.set_text('')

def update_button(data):
    btn_matx = data.get_target() 
    btn_id = btn_matx.get_selected_btn()
    btn_text = btn_matx.get_btn_text(btn_id)
    if btn_text == lvgl.SYMBOL.REFRESH:
        label.set_text('')
    elif btn_text == '=':
        try:
            label.set_text(str(eval(label.get_text())))
        except:
            pass
    else:
        label.set_text(label.get_text() + btn_text) 
        
matrix.add_event_cb(update_button,lvgl.EVENT.VALUE_CHANGED,None)

Understanding the Code

Now that you have seen the code, lets walk through it to figure out how it works.

The Setup

To begin, we need to import the LVGL module. Around here is a good place to put your screen setup code.

import lvgl

Creating the Button Matrix

We will start by creating an empty button matrix.

matrix = lvgl.btnmatrix(lvgl.scr_act())

Next ,we will create a list of names for the buttons in our button matrix.

MAP = ['7','8','9','+','\n',
       '4','5','6','-','\n',
       '1','2','3','=','\n',
       '0',lvgl.SYMBOL.REFRESH,
       None]

How the List Works

For the most part the list above is just a bunch of text, but there are three special types of items in the list.

First there is the text ‘\n’, whenever a button matrix sees this it starts a new row of buttons. Without this command all the buttons in a button matrix would be squeezed into one row.

Secondly, there is the code lvgl.SYMBOL.REFRESH. A buttons label can be any kind of string. LVGL considers words and numbers as strings but it also considers symbols as strings. lvgl.SYMBOL.REFRESH is one of the special symbols available to LVGL.

Thirdly, The None at the end of the list is part of the background code. I will not bore you with why it’s there, but you should always put a None at the end of you list of buttons.

Now that we have created our list of button labels, we need to add it to the button matrix.

matrix.set_map(MAP)

The last row has only two buttons in it: ‘0’ and REFRESH SYMBOL. Normally the buttons would be the same size, but for this example we want the the 0 button to be three times bigger that the REFRESH button.

First we tell the matrix that button 12,the zero button, should have a relative size of three.

matrix.set_btn_width(12,3)

Then we tell the matrix that button 13,the REFRESH button, should have a relative size of one. Because both buttons are in the same row that makes the zero button three times bigger than the REFRESH button.

matrix.set_btn_width(13,1)

We are also going to set the size of the the button matrix and align it to the bottom of the screen to make it look nicer.

matrix.set_size(320,150)
matrix.align(lvgl.ALIGN.BOTTOM_MID,0,0)

Next we want the ‘+’, ‘-‘, and ‘=’ buttons to be checkable. If you tap a checkable button it turns on and if tap it again, it will turn of. So we set the the ctrl checkable on each of those buttons.

matrix.set_btn_ctrl(3,lvgl.btnmatrix.CTRL.CHECKABLE)
matrix.set_btn_ctrl(7,lvgl.btnmatrix.CTRL.CHECKABLE)
matrix.set_btn_ctrl(11,lvgl.btnmatrix.CTRL.CHECKABLE)

Then we will turn one_check on. The feature just makes sure that only one button can be checked at the same time.

matrix.set_one_checked(True)

The Label

We are going to create a label that will display the buttons we have pressed. To start we create an empty label object.

label = lvgl.label(lvgl.scr_act())

Then we align it to the middle of the top of the screen.

label.align(lvgl.ALIGN.TOP_MID,0,20)

Then we will set the text so the default is blank.

label.set_text('')

The LVGL Event Handler

Event handlers are functions that are run when ever something important happens. We need to create one that runs when the button matrix is clicked.

To begin we create a new function.

def update_button(data):

After that we get the object that called this function.

    btn_matx = data.get_target() 

Then we use that object to figure out what button was pressed.

    btn_id = btn_matx.get_selected_btn()

The computer gave us the id of the button pressed but the actual text of the button is more useful so we will retrieve that to.

    btn_text = btn_matx.get_btn_text(btn_id)

Next we use a IF statement to process which button was pressed. We start by checking if the button is the refresh button.

    if btn_text == lvgl.SYMBOL.REFRESH:

If it was we delete all the text from the label we made earlier.

        label.set_text('')

Then we check if the button was the ‘=’ button.

    elif btn_text == '=':

If it was we then get the label’s text (it is supposed to contain a math equation) and try to calculate the result. After that we set the label’s text to the result.

We do all this in try except blocks so that any errors that occurs in the calculation don’t crash the hole program.

        try:
            label.set_text(str(eval(label.get_text())))
        except:
            pass

Lastly if the button pressed was not any of the previous buttons, we add the button’s text the the label.

    else:
        label.set_text(label.get_text() + btn_text)

Connecting the Handler

The only thing left to do is connect the function, we just made, to the button matrix. We will connect them so whenever a button is pressed(value changed) it calls our function.

matrix.add_event_cb(update_button,lvgl.EVENT.VALUE_CHANGED,None)

What It Outputs

Once you run the code, you should see a number keyboard. If you hit any of the numbers, the +, or the – buttons, the symbol you pressed will be added to a label above the keyboard. If you click the equal button, It will try to calculate the equation in the label and put the result back into the label.

Button matrixes are great if you need lots of buttons but don’t have lots of memory on your board. They also allow you to style all the buttons at once.

Button matrixes are so often used to create keyboards, that LVGL has a widget called the keyboard that is just a button matrix with some settings changed. If you want you can learn more about keyboards at Micropython LVGL Keyboard Examples.

Filed Under: Micropython

How to Draw a Polygon with Micropython LVGL

January 13, 2023 by Baxter

a green polygon in the center of a screen

Sometimes you need to be able to draw things that don’t use LVGL’s objects, buttons, sliders, etc. It is possible to do this, if you directly manipulate LVGL draw engine.

This post is intended to explain some of the more complex features of LVGL’s draw engine. You can find the fundamentals of the draw engine at How to Draw a Rectangle with Micropython LVGL.

Today, I will explain LVGL’s polygon. A polygon is essentially any shape that is not a circle and does not have parts of a circle in it. Some common polygons are squares, triangles, pentagons, etc.

There is one main limitation of LVGL’s polygon; LVGL can’t draw concave polygons (don’t worry if you don’t know what that is I will explain it latter.)

The Screen

To get the code below to work with your screen, you will need to add your screen setup code to the beginning of it. If you want more information, you can try How to get a LVGL Micropython screen to work.

Here is the code we will work through

import lvgl

def draw(data):    
    background = lvgl.draw_rect_dsc_t()
    background.init()
    background.bg_color = lvgl.color_hex(0x00ff00)
    
    points = []
    
    def add_point(x,y):
        pt = lvgl.point_t()
        pt.x = x
        pt.y = y
        points.append(pt)
    
    add_point(160,120)
    add_point(0,100)
    add_point(100,200)
    add_point(250,170)
    
    draw_ctx = data.get_draw_ctx()
    draw_ctx.polygon(background,points,len(points))
 
scr = lvgl.scr_act()
scr.add_event_cb(draw,lvgl.EVENT.DRAW_MAIN_END,None)
scr.invalidate()

Understanding This LVGL Code

Ok, now that you have seen all the code, let’s step through each section, so you can understand exactly what each part does. This will make it much easier to actually use polygons in your projects…

The Setup

We start by importing the LVGL library. Around here is a good place to put your screen setup code.

import lvgl

The Draw Function

We need to create a function to draw the polygon on the screen, so we start by defining it.

def draw(data):    

Behind the scenes polygons use the same object as rectangles to apply styles to them, so we create a new one.

    background = lvgl.draw_rect_dsc_t()

Next we have to initialize that variable.

    background.init()

Just to show what this is for, we will set the polygons background color to green.

    background.bg_color = lvgl.color_hex(0x00ff00)

To create a polygon you give LVGL a list of points and it will color in between those points. There are some restrictions on the points you give it, they are explained in the next section. For now we create an empty list.

    points = []

To make this code smaller, we are going to create a function that helps us add points to that list. will start by defining it.

    def add_point(x,y):

Inside this function, we start by creating a LVGL point.

        pt = lvgl.point_t()

After that we will set the point’s x and y values.

        pt.x = x
        pt.y = y

Lastly, we append that point to the list of points.

        points.append(pt)

Now we use the function we just created to add four points to our list.

    add_point(160,120)
    add_point(0,100)
    add_point(100,200)
    add_point(250,170)

To be able to draw on the screen, we need to get the draw_ctx class.

    draw_ctx = data.get_draw_ctx()

Finally, we use draw_ctx to put our polygon on the screen. To make that work we have to give draw_ctx the background variable we created, the list of points, and how many points are in our list.

    draw_ctx.polygon(background,points,len(points))

Restrictions

There are two types of polygons convex and concave. LVGL can not draw concave polygons.

Convex polygon on left and concave polygon of right.

What makes Concave polygons special is that one point dips inside of all the others. That part of the polygon looks like the > symbol.

If you do accidentally tell LVGL to draw one of these, all that will happen is that you board will freeze and you will have to restart it.

If you want to draw a concave polygon, you need to divide it into smaller pieces and draw those pieces separately.

Applying The Draw Function

We created a function to draw a polygon, but we need to add it to some object so its visible. For this example we will add it to the screen object. The first thing we need to do is collect the screen object.

scr = lvgl.scr_act()

Then we add our draw function to the screen.

scr.add_event_cb(draw,lvgl.EVENT.DRAW_MAIN_END,None)

And of course, we invalidate the screen so are polygon gets drawn.

scr.invalidate()

What Next?

Now that you have seen the code, try running it. You should see a green polygon that looks kind of like a rectangle that has been squished. If you modify the list of points you can create lots of new shapes. Don’t forget that you can also change the number of points you use.

The background variable we created is very similar to styles and has many of the same properties. You can use it to customize you polygons color,opacity, and several other properties.

The Polygon is probably the most important shape to know how to draw. The next shapes I would suggest learning is LVGL Arcs and Circles using polygons and arcs you can draw any shape.


Filed Under: Micropython

How to Use Micropython LVGL Masks

January 10, 2023 by Baxter

Micropython LVGL masks darken left and right side of screen but leave center normal

Once you have created a project the normal way with buttons, sliders, and such, you sometimes would like to do a little more. Maybe you want to fade out a portion of your screen or darken parts of it. For that reason LVGL has masks.

Masks allow you to disable a portion of the screen from being edited. If you created a button, any part of it that fell inside a mask would not be drawn, making that part invisible.

Today, I will show you how to use the line mask. We will use it twice. First to darken the left side of the screen and second to darken the right side of the screen. The center is left untouched.

Cautions

Masks are LVGL’s lowest drawing functions which means that they can be very glitchy. If they break, they can make your GUI look like it went through a blender. Thankfully they don’t cause any real damage. They are just hard to work with.

The Screen

To get this example to work you will need to add your screen setup code to the beginning of the example. If you want more information, you can try How to get a LVGL Micropython screen to work.

Here the code is

import lvgl

def draw_rect(x1,y1,x2,y2,ctx,opa):
    rect = lvgl.draw_rect_dsc_t()
    rect.init()
    rect.bg_opa = opa
    rect.bg_color = lvgl.color_hex(0x000000)
    
    size_and_spot = lvgl.area_t()
    size_and_spot.x1 = x1
    size_and_spot.y1 = y1
    size_and_spot.x2 = x2
    size_and_spot.y2 = y2
    
    ctx.rect(rect,size_and_spot)

def mask(data):
    line = lvgl.draw_mask_line_param_t()
    line.points_init(35,240,65,0,0)
    
    num = lvgl.draw_mask_add(line,None)
    draw_rect(0,0,320,240,data.get_draw_ctx(),lvgl.OPA._50)
    lvgl.draw_mask_remove_id(num)
            
            
    line2 = lvgl.draw_mask_line_param_t()
    line2.points_init(255,240,285,0,1)
    
    num2 = lvgl.draw_mask_add(line2,None)
    draw_rect(0,0,320,240,data.get_draw_ctx(),lvgl.OPA._50)
    lvgl.draw_mask_remove_id(num2)  
        
scr = lvgl.scr_act()
scr.add_event_cb(mask,lvgl.EVENT.DRAW_POST_END,None)

#This is just some code to create something on the screen so we can show the mask is working
textarea = lvgl.textarea( lvgl.scr_act() )
textarea.set_text( 'Hello this is a test to show how masks work. The left and right sides of the screen should be darkened.' )
textarea.set_size(250,200)
textarea.center()
#End of random code

scr.invalidate()

How It Works

Masks are complicated so to make this example more complete, below is an explanation on how the code works and some of the options that are available to masks.

The Setup

To use LVGL we need to import it. This would also be a good spot to add your screen setup code.

import lvgl

Drawing Rectangles

To prove that our mask is working, we need to have a function that edits part of the screen. Conventionally, masks are pared with draw descriptors to do this.

Draw descriptors are also complicated so I will not explain them here. You can learn more about them at How to Draw a Rectangle with Micropython LVGL if you wish.

The function below works by selecting an area of the screen and darken it by the amount you set.

def draw_rect(x1,y1,x2,y2,ctx,opa):
    rect = lvgl.draw_rect_dsc_t()
    rect.init()
    rect.bg_opa = opa
    rect.bg_color = lvgl.color_hex(0x000000)
    
    size_and_spot = lvgl.area_t()
    size_and_spot.x1 = x1
    size_and_spot.y1 = y1
    size_and_spot.x2 = x2
    size_and_spot.y2 = y2
    
    ctx.rect(rect,size_and_spot)

The Handlar

You have to think about what time you use masks. If you use them at the wrong time half of your screen might disappear.

So we use handlers to get all the timing right. To start we need to create a new function.

def mask(data):

Then we are going to create a new mask parameter. These store all our mask’s settings.

    line = lvgl.draw_mask_line_param_t()

Then we need to initialize all the settings. The prototype of that function looks like this points_init(x1,y1,x2,y2,side). This function is used to create a line.

The starting coordinates of the line are x1 and y1 and the end coordinates are x2 and y2. The side variable uses numbers to control which side of the line to mask off and which side to keep.

The Side numbers are show below.

SIDE TO KEEPLeftRightTopBottom
NUMBER0123
    line.points_init(35,240,65,0,0) 

Now that we have created the line mask. We need to apply it so it actually masks off part of the screen. The function that does this also gives us a number we need to store for later.

    num = lvgl.draw_mask_add(line,None)

With the mask finally in place, we are going to use the draw function we defined earlier to darken the entire screen. Of course the mask will actually only let it darken part of the screen.

    draw_rect(0,0,320,240,data.get_draw_ctx(),lvgl.OPA._50)

That was all we need the mask for, so now we need to remove it. When we applied the mask we got a number, that we stored in the variable num. With that number, we can delete the mask.

    lvgl.draw_mask_remove_id(num)

Now to finish this program we need to do all that again.

We begin by creating a new line mask.

    line2 = lvgl.draw_mask_line_param_t()

Next we initialize its points.

    line2.points_init(255,240,285,0,1)

After that we apply it to the screen.

    num2 = lvgl.draw_mask_add(line2,None)

Then we darken the screen while the mask is applied.

    draw_rect(0,0,320,240,data.get_draw_ctx(),lvgl.OPA._50)

Finally, we delete the second mask now that its not needed.

    lvgl.draw_mask_remove_id(num2) 

Setting the Handler Up

We just spent a lot of work creating that handler, but unless we add it to an object it will not run. For this project we will add it to the entire screen but masks can be added to normal LVGL objects to.

First we need to get the the screen object.

scr = lvgl.scr_act()

Then we add the handler to the screen.

scr.add_event_cb(mask,lvgl.EVENT.DRAW_POST_END,None)

You may have noticed the lvgl.EVENT.DRAW_POST_END. There are four main events that you can use here. They control at what stage of drawing your masks are created and deleted.

lvgl.EVENT.Time
DRAW_MAIN_BEGINBefore any thing is drawn
DRAW_MAIN_ENDAfter most things are drawn
DRAW_POST_BEGINBefore Post drawing (aka. mostly scrollbars)
DRAW_POST_ENDAfter everything is drawn

Besides just creating and deleting a mask in one event, it is also possible to create a mask and delete it in two different events for example you could create a mask in MAIN_BEGIN and then delete it in POST_END.

The Content

To show that the masks are working we need content. Below is some code that creates a textarea and gives it some text.

#This is just some code to create something on the screen so we can show the mask is working
textarea = lvgl.textarea( lvgl.scr_act() )
textarea.set_text( 'Hello this is a test to show how masks work. The left and right sides of the screen should be darkened.' )
textarea.set_size(250,200)
textarea.center()
#End of random code

INVALIDATE

This is a very important step not to forget. Because we created the masks, LVGL doesn’t know they exist and so it has not updated the screen. Calling invalidate on the screen will force it to update and show that our code is working.

scr.invalidate()

What Next?

You have seen the code above. If you try running it, a textarea should appear then the left and right side of the screen should darken. Once you get it to work, experimenting with moving the masks around the screen is a great way to increase your understanding of masks.

The main reason we use masks is because they are a fast way to draw complex shapes. Once you understand the line mask, its a great idea to learn the other masks. They are the angle, fade, map, radius, and polygon masks.

If you are looking for information on them the LVGL source code is where I found most of the information about them and the LVGL docs give a basic description of how they work.

Filed Under: Micropython

How to Draw a Rectangle with Micropython LVGL

January 6, 2023 by Baxter

green rectangle drawn by LVGL draw engine

No matter how long you have been using LVGL, you have probably wonder at some point how to draw shapes like rectangles or circles on a screen. While creating things like buttons and lists is easy, drawing basic shapes is a bit more complicated because you have to go through LVGL’s drawing engine.

Today I will explain how you can use draw descriptors to draw a rectangle any where on your screen. In LVGL the basic principles are the same for all shapes but we will start with the rectangle.

Cautions about Drawing

When you use drawing descriptors you are directly manipulating the draw engine. Doing this can sometimes result in glitches: buttons covering your text, things disappearing, etc. This should not stop you from using them, but it is something to keep in mind.

To get the code below to work with your screen you will need to add your screen setup code to the beginning of it. If you want more information, you can try How to get a LVGL Micropython screen to work.

Here is some example code

import lvgl

scr = lvgl.obj(lvgl.scr_act())
scr.set_size(200,200)
scr.center()

def draw(data):    
    rect = lvgl.draw_rect_dsc_t()
    rect.init()
    rect.bg_color = lvgl.color_hex(0x00ff00)
    
    size_and_spot = lvgl.area_t()
    size_and_spot.x1 = 0
    size_and_spot.y1 = 20
    size_and_spot.x2 = 260
    size_and_spot.y2 = 100
    
    draw_ctx = data.get_draw_ctx()
    draw_ctx.rect(rect,size_and_spot)
 
def extend(data):
    data.set_ext_draw_size(60)
    
scr.add_event_cb(draw,lvgl.EVENT.DRAW_MAIN_END,None)
scr.add_event_cb(extend,lvgl.EVENT.REFR_EXT_DRAW_SIZE,None)

scr.refresh_ext_draw_size()

scr.invalidate()

Understanding This LVGL Code

Ok, now that you have seen all the code, let’s step through each section, so you can understand exactly what each part does. This will make it much easier to actually use descriptors in your projects…

The Setup

We need to import the LVGL module to be able to use it. This would also be a good place to add your screen setup code.

import lvgl

Creating the Canvas

To be able to draw we need something to draw on. You can draw on the background but because of the some of the things we are going to do latter we will create a new object to draw on.

scr = lvgl.obj(lvgl.scr_act())

Then we will set it’s size and put it in the center of the screen.

scr.set_size(200,200)
scr.center()

If you wanted to draw on the background you could replace the three lines above with the line below.

scr = lvgl.scr_act()

The Draw Function

If you draw a rectangle on your screen and just leave it, the next time LVGL refreshes the screen your drawing will disappear. To fix that, we will make a system that redraws the rectangle after every refresh.

First thing we need is a new function. Inside this function we will draw the rectangle.

def draw(data):    

Next we need to create a rectangle descriptor this is essentially a special type of style.

    rect = lvgl.draw_rect_dsc_t()

And just like styles we need to initialize it first.

    rect.init()

The only setting we will edit is the background color of the rectangle.

    rect.bg_color = lvgl.color_hex(0x00ff00)

The way you set the size and position of a rectangle is with an area variable so lets create a new one.

    size_and_spot = lvgl.area_t()

Now we will set the starting position of our rectangle.

    size_and_spot.x1 = 0
    size_and_spot.y1 = 20

Then we set the end position. If you subtract the starting position from the end you will get the size of the rectangle.

(x2 – x1, y2 – y1) == (260 – 0, 100 – 20) == (260,80)

    size_and_spot.x2 = 260
    size_and_spot.y2 = 100

Latter we are going to use this function that we are creating as a handler, and handler functions are always passed an event variable. From that data ,we can get the draw_ctx class which is how we access the draw engine.

    draw_ctx = data.get_draw_ctx()

Now that we have the draw_ctx, we can use it to draw a rectangle all we have to give it is our rectangle descriptor and the area its supposed to be put in.

    draw_ctx.rect(rect,size_and_spot)

Extending The Draw Area

We are drawing on a object that we created earlier called scr. Currently the rectangle we have made is partially out side of scr and LVGL will crop anything that goes out side of an object.

Normally that is what we want ,but sometimes its not, so I will show how you can extend the drawing area.

To begin we need to create another function.

def extend(data):

Then inside that function we add the command to extend the draw area by 60 pixels.

    data.set_ext_draw_size(60)

Latter we will hook up this function to the scr object so it has the correct timing.

Adding the Handlers

We now have created two handler functions and its time to connect them to the scr object.

Lets start with the draw function. We could run this function after every post drawing and that would make it be drawn on top of everything else.

But running the function after the main drawing is more practical. Things like scroll bars would be draw on top of our rectangle which is how they are supposed to work.

scr.add_event_cb(draw,lvgl.EVENT.DRAW_MAIN_END,None)

Next we will connect the function that extends the draw area.

scr.add_event_cb(extend,lvgl.EVENT.REFR_EXT_DRAW_SIZE,None)

Triggering Some Events

Everything is ready to go but because nothing has append to our screen it has not updated anything. We are going to manually trigger some of the events ,so the screen actually shows the changes we’ve made.

To start we need to call the extend area function by using this command on our object.

scr.refresh_ext_draw_size()

Lastly we need to tell LVGL to just redraw our object. The invalidate command tell LVGL that an object needs updating so we run it on our scr object.

scr.invalidate()

What Should Happen

You have seen the code. If you run it, a large green rectangles should appear near the top of your screen. Over all your screen should look like the picture of mine.

The most useful feature of knowing how to use drawing descriptors is that you can modify the ones that already exist. LVGL widgets use drawing descriptors, which means you can edit those descriptors to change how any widget looks.

Now that you understand how to draw a rectangle, learning to draw the rest of LVGL’s shapes will be easy. I would suggest learning how to use LVGL Polygons and LVGL Arcs and Circles

Drawing descriptors are powerful but they are hard to get working and a can be glitchy. If you have a project that needs custom drawing Micropython LVGL Canvases can be a simpler and more reliable way to reach your goal.

Filed Under: Micropython

How To Use Micropython LVGL Tables

January 5, 2023 by Baxter

lvgl table with equations like 1+1, 2+2, etc. and sums like 2, 4 , etc.

If you want to organize a lot of text on your screen, then usually you need lots of processing power, but there is another way. LVGL has a widget called the table.

The table organizes text into rows and columns. It generates and styles the text on the fly, so its fast and memory efficient. The side affect of doing it this way is that it can be hard to style individual cells. Highlighting a single piece of text or changing its size takes a lot of code.

Today I will show you how to create and modify a table. Below is some example code on tables and an explanation on how that code works.

To get this example to work you will need to add your screen code to the beginning of the code below. If you want more information, you can try How to get a LVGL Micropython screen to work.

Here is the example

import lvgl

table = lvgl.table(lvgl.scr_act())
table.set_col_width(0,185)
table.set_height(240)
table.set_row_cnt(10)
table.set_col_cnt(2)

style = lvgl.style_t()
style.init()
style.set_border_side(lvgl.BORDER_SIDE.LEFT | lvgl.BORDER_SIDE.RIGHT | lvgl.BORDER_SIDE.TOP | lvgl.BORDER_SIDE.BOTTOM)
style.set_border_color(lvgl.color_hex(0x004422))

table.add_style(style,lvgl.STATE.DEFAULT | lvgl.PART.ITEMS)

table.set_cell_value(0,0,'Equation')
table.set_cell_value(0,1,'Sum')

table.set_cell_value(1,0,'0')
table.add_cell_ctrl(1,0,lvgl.table.CELL_CTRL.MERGE_RIGHT)

for x in range(8):
    table.set_cell_value(x+2,0,str(x+1)+'+'+str(x+1))
    table.set_cell_value(x+2,1,str(x+x+2))
    
def clicked(data):
    col = lvgl.C_Pointer()
    row = lvgl.C_Pointer()
    tar = data.get_target()
    tar.get_selected_cell(row,col)
    col = col.uint_val
    row = row.uint_val
    print(row,col)

table.add_event_cb(clicked,lvgl.EVENT.VALUE_CHANGED,None)

How Does This Code Work?

Since you’ve seen the program above, why don’t we walk through the code and see how it works. This should make it clearer how you can modify this code for your own uses…

The Setup

To be able to use LVGL, we need to import it.

import lvgl

Creating the Table

The first thing we need to do is create an empty table object.

table = lvgl.table(lvgl.scr_act())

To make the table look more interesting, we are going to make the first column bigger than the second.

The first column has the id of 0, and we will set its width to 185 pixels which is a little bigger than a normal column.

table.set_col_width(0,185)

By setting the height of the table, we can force it to stay the same size, normally it would grow to the size of the data you give it.

If not all the data fits into the restricted table size, then the table will become scroll able so you can reach the rest of the data.

table.set_height(240)

We are going to tell the table how many rows and columns we will eventually create. This is not required, but it will speed up the process latter.

table.set_row_cnt(10)
table.set_col_cnt(2)

Styling the Borders

We want the table to have lines separating the rows and columns, so we need to create a new style.

style = lvgl.style_t()

Styles need to be initialized before use, so we do that as well.

style.init()

The way we are going to create the lines is with borders. To make that work, we first have to enable boarders on all sides.

style.set_border_side(lvgl.BORDER_SIDE.LEFT | lvgl.BORDER_SIDE.RIGHT | lvgl.BORDER_SIDE.TOP | lvgl.BORDER_SIDE.BOTTOM)

We are also going to set the boarder color to a greenish-black.

style.set_border_color(lvgl.color_hex(0x004422))

Now that we have created the style we need to add it to the table.

To make the border appear around the individual cells instead of one boarder around the entire table, we need to target the cells.

We do that by applying the style to lvgl.PART.ITEMS (aka. the cells).

table.add_style(style,lvgl.STATE.DEFAULT | lvgl.PART.ITEMS)

Adding the First Data

To demonstrate how tables work we need some data. For this example, the data we are using is a list of equations and their answers.

The equations will follow the form 0+0, 1+1, 2+2, 3+3, etc. and the answers will simply be numbers like 0, 2, 4, 6, etc.

At the top of the page we also want two boxes one that says ‘Equation‘ and another that says ‘Sum‘.

We will start by creating the ‘Equation’ label, it’s position is the first cell on the table which has the address 0,0.

table.set_cell_value(0,0,'Equation')

Then we will add the ‘Sum’ label to the address 0,1.

table.set_cell_value(0,1,'Sum')

Merging Cells

The first equation would be 0+0 = 0 which is a bit boring, so to make things interesting we will combine the Equation and Sum cells together into one big cell that has the text 0.

To begin we set the first cell to the value of 0.

table.set_cell_value(1,0,'0')

Then we will merge the first cell and the cell to the right of it to create the new over sized cell.

table.add_cell_ctrl(1,0,lvgl.table.CELL_CTRL.MERGE_RIGHT)

The Rest of the Cells

Instead of manually adding each cell, we will use a For Loop that creates the equations and the answers.

first we create a loop that runs 8 times.

for x in range(8):

Then we will generate and add the text to the Equation cell.

    table.set_cell_value(x+2,0,str(x+1)+'+'+str(x+1))

After that we calculate the answer, and put the result in the Sum cell.

   table.set_cell_value(x+2,1,str(x+x+2))

Getting the Clicked Cell

Being able to figure out if a cell is clicked is extremely useful , but takes a little bit of work.

First we need to create is a function to process if any cells are clicked.

def clicked(data):

In that function, we need to create two pointers one for that column and one for the row.

    col = lvgl.C_Pointer()
    row = lvgl.C_Pointer()

Then we will retrieve the table that called this function. Because we have only one table, this is pointless, but if you create additional tables then this will keep the program working.

    tar = data.get_target()

Then we load the row and column of the clicked cell.

    tar.get_selected_cell(row,col)

The row and column variables now contain the address of the clicked cell, but they are still pointers, which aren’t easy to use, so we will reset the pointers to be normal integers.

    col = col.uint_val
    row = row.uint_val

Finally the program knows the exact cell that was clicked. For now we will simply print that data to the terminal but you could do whatever you wanted with it.

    print(row,col)

Connecting the Table

To make the function we just created work we need it to be called whenever the table is clicked, which we do like this.

table.add_event_cb(clicked,lvgl.EVENT.VALUE_CHANGED,None)

What Next?

That you have seen how the code works, try running it. You should see a table that has 2 columns and 10 rows. About six of the rows will be visible, the rest you will have to scroll down to see. If you tap on any of the cells, the board will print to your terminal the coordinates of the cell that you clicked.

Tables can be used for a lot of different projects. Because of how light weight they are, you can use them to simply optimize a program you have already made or you could experiment even further and give them more complex styles to make a spread sheet or something else.

Tables are useful in displaying lots of text, but if you have a lot of numbers then micropython LVGL charts may be a better tool.

Filed Under: Micropython

Micropython LVGL Calendar Example

January 3, 2023 by Baxter

lvgl calendar with highlighted days

Calendars are how we tell time, which is why they are needed so often. If you have ever tried to create a calendar, you will know that it’s hard. You need lots of math and weird algorithms to pull it off. Thankfully LVGL has a widget that does all that stuff for us.

Today I will show you some code that creates a LVGL calendar and modifies some of its properties. After the code there is an explanation on how it works.

To get this example to work you will need to add your screen code to the beginning of the code below. If you want more information, you can try How to get a LVGL Micropython screen to work.

Here is the code:

import lvgl

cal = lvgl.calendar(lvgl.scr_act())
cal.set_size(320,240)
cal.set_today_date(2023,1,2)
cal.set_showed_date(2023,1)
lvgl.calendar_header_arrow(cal)

highlight = []

bug_fix = lvgl.calendar_date_t({'year':1,'month':1,'day':1})
highlight.append(bug_fix)

def unhighlight_list(date):
    for x in highlight:
        if x.year == date.year and x.month == date.month and x.day == date.day:
            highlight.remove(x)
            return True
    return False
  
def date_clicked(data):
    date = lvgl.calendar_date_t()
    if not cal.get_pressed_date(date) == lvgl.RES.OK:
        return
    print(date.year,date.month,date.day)
    if not unhighlight_list(date):
        highlight.append(date)
    cal.set_highlighted_dates(highlight,len(highlight))

cal.add_event_cb(date_clicked,lvgl.EVENT.CLICKED,None)

Understanding This LVGL Code

Ok, now that you have seen all the code, let’s step through each section, so you can understand exactly what each part does. This will make it much easier to actually use calendars in your future projects…

The LVGL Module

Before we can use LVGL we have to import it, so that is the first thing we do.

import lvgl

Creating the Calendar

To begin, we need to create an empty calendar object.

cal = lvgl.calendar(lvgl.scr_act())

Next, we set its size. My screen is 320*240, so setting the calendar’s size to 320*240 makes it fill the entire screen.

cal.set_size(320,240)

Setting the Date

If we left the calendar as is, it would display some random day, so we need to tell it what date to display.

To do this correctly, you need some sort of clock that has the current date, but getting something like that can be a bit of work. Instead, I set the date to the day I created the code.

cal.set_today_date(2023,1,2)

The calendar can only show one month at a time, so we have to set what month is visible. I set it to show the date we created earlier.

cal.set_showed_date(2023,1)

The Header

The default calendar will only show the days of the week. If you want your calendar to show the year and the month there are two options.

lvgl calendar with dropdown month and year controls

First, you could use the dropdown method. This will create two dropdown lists one for the year and one for the month. This code enables the dropdown lists.

lvgl.calendar_header_dropdown(cal)
lvgl calendar with arrow controls for month

Second, you could use the arrows method. This way creates a title at the top of the calendar that displays the year and month, then creates two buttons that allow you to move to the next or previous month. The code below will turn arrows on.

lvgl.calendar_header_arrow(cal)

I prefer the arrow method, so it’s the one used in this example.

Highlighting Dates

One feature of Calendars is that you can give it a list of dates to highlight. So we are going to start by creating an empty list to use latter.

highlight = []

Once you tell a Calendar to highlight some dates, you seem to have to always leave at least one date highlighted. The way we can get around this glitch is to highlight a random date that no one will see.

First we have to create an date object with the desired year,month, and day.

bug_fix = lvgl.calendar_date_t({'year':1,'month':1,'day':1})

Then we add it to the list of highlighted dates.

highlight.append(bug_fix)

The Unhighlight Function

To make the code more streamlined we need to create a function that helps us unhighlight a date that we have already highlighted.

We start by creating the new function.

def unhighlight_list(date):

Then we will use a for loop to check if the date we care about is in the highlight list.

    for x in highlight:

We will use the if statement below to check the date.

        if x.year == date.year and x.month == date.month and x.day == date.day:

If the date is found in the list, we remove it from the list, and then the functions returns True.

            highlight.remove(x)
            return True

If the date was not in the list, then the function returns False.

    return False

The Event Handler

The end goal is that when a date is clicked, it is highlighted, and if you click it again, it will unhighlight. To do all that, we need to create a handler function.

We begin as usual by defining it.

def date_clicked(data):

Next, we are going to create an empty date object.

    date = lvgl.calendar_date_t()

This line of code does two things.

First, the if statement checks if a date was clicked.

Second, the get_pressed_date() part sets the date object we created to the clicked date.

    if not cal.get_pressed_date(date) == lvgl.RES.OK:

If no date was clicked, the the functions stops running and returns.

        return

To make sure everything is working well, the computer prints to the terminal the date that it thinks was clicked.

    print(date.year,date.month,date.day)

This code runs the unhighlight function we created on the date that was clicked.

    if not unhighlight_list(date):

If the unhighlight function could not find the date we gave it, we will add that date to the highlight list.

The overall effect of these two lines of code is that it toggles whether a date is highlighted or not.

        highlight.append(date)

All we have really done up to this point is add and remove dates from a list. Now we need to give that list to the calendar so it can highlight the actual dates.

    cal.set_highlighted_dates(highlight,len(highlight))

Connecting the Handler

The last step we need to do is connect the handler we made to the calendar, so whenever a date is clicked the function is called.

cal.add_event_cb(date_clicked,lvgl.EVENT.CLICKED,None)

What Next?

Now that you have seen the code, try running it. You should see a large calendar that displays the date 1/2/2023. Clicking on a date will highlight that date. If you click a highlighted date it will remove the highlight. If you press one of the blue buttons in the corners it will change the visible month.

Calendars by themselves aren’t super useful. A great next step would be hooking up a clock system, so you can tell the real date. You could also experiment with styling to make it look nicer and might add some code that allows you to attach text to certain dates like Christmas or New Years Eve.

If you liked LVGL Calendars another widget that you might also like is the micropython LVGL Tileview.

Filed Under: Micropython

How To Get A Microphone To Work With Micropython LVGL

January 2, 2023 by Baxter

Screen with blue line representing microphone data

Microphones add lots of important features to your project, but unfortunately, they can be a pain to get working.

Today I would like to show you how to get an audio recording from a PDM microphone (there will be more on PDM later) and display it with LVGL.

Below you will find a definition of some terms, some code, and a walk-through of how that code works.

What is I2S

I2S is how we connect the microphone to our computer. It takes four wires to fully hook it up. If you are using only a microphone and not an additional speaker, then you can get away with three wires.

PDM vs. PCM

First I need to explain that PDM and PCM are the format that your microphone sends data in. So you still use I2S to get data from both types of microphones, there is no difference there.

PCM is essentially raw data. It’s high quality and simple to use.

PDM is more complicated, I don’t work with microphones that much so I don’t know what exactly makes it so special.

The microphone on my board is a PDM microphone, so the code below will work with PDM microphones. If you are use a PCM microphone, there is one line of code you will need to change. Down in the explanation there is a section on how to do that.

Micropython LVGL

Besides getting the actual microphone data, I wanted to display it on a screen, so I chose to use LVGL.

To get this example to work you will need to add your screen code to the beginning of this example. If you want more information try How to get a LVGL Micropython screen to work.

The Espidf Module

One of the features of micropython LVGL is that is has a module called espidf. This module is how we process the PDM signal. There are simpler ways if you are using a PCM microphone.

If you are using a PCM mic, try the machine module.

Two important facts to keep in mind are that the espidf module only works on esp boards like the esp32, and that you are unlikely to find it in a normal micropython firmware.

Here is the code:

import espidf,lvgl

config = espidf.i2s_config_t()
config.mode = espidf.I2S_MODE.MASTER| espidf.I2S_MODE.RX | espidf.I2S_MODE.PDM 
config.sample_rate = 16000
config.bits_per_sample = espidf.I2S_BITS_PER_SAMPLE._16BIT
config.channel_format = espidf.I2S_CHANNEL_FMT.ONLY_RIGHT
config.communication_format = espidf.I2S_COMM_FORMAT.I2S
config.intr_alloc_flags = 0
config.dma_buf_count = 2
config.dma_buf_len = 800
config.use_apll = False

mic = espidf.i2s_pin_config_t()
mic.bck_io_num = 12
mic.ws_io_num = 0
mic.data_in_num = 34
mic.data_out_num = 2

espidf.i2s_driver_install(espidf.I2S_NUM._0,config,0,None)
espidf.i2s_set_pin(espidf.I2S_NUM._0,mic)

chart = lvgl.chart( lvgl.scr_act() )
chart.set_size( 320, 240 )
chart.center()
chart.set_point_count( 100 )
chart.set_style_size( 0, 0, lvgl.PART.INDICATOR )
chart.set_range(lvgl.chart.AXIS.PRIMARY_Y,0,240)
series1 = chart.add_series( lvgl.color_hex( 0x0099FF ), lvgl.chart.AXIS.PRIMARY_Y )


def get_round(data,High,nHigh):
    div = High/nHigh
    return int(data/div)

def get_val(data):
    total = 0
    for x in range(int(len(data)/2)):
        total += get_round(data[2*x+1]+(data[2*x]*256),65536,240)
    total = total/(len(data)/2)
    return int(total)

import struct
val = 0
while True:
    leng = struct.pack('P',val)
    buffer= bytearray(800)
    length = espidf.i2s_read(espidf.I2S_NUM._0,buffer,300,leng,1000000)
    chart.set_next_value( series1, get_val(buffer))

How It Works

Now that you have seen the code, let’s step through it to see how it works behind the scenes.

The Setup

Before we do anything we need to import two modules. The lvgl module is a graphics library, and the espidf module is what lets us talk to the microphone.

import espidf,lvgl

The Config

First thing we need to do is create a I2S config object. This is what tells the the computer how to process the I2S signals.

config = espidf.i2s_config_t()

Then we need to set the configs mode. Modes control whether your devise is a master or slave, whether you device is transmitting or receiving, and whether your device uses PDM or PCM.

config.mode = espidf.I2S_MODE.MASTER| espidf.I2S_MODE.RX | espidf.I2S_MODE.PDM 

Enabling PCM

If you have a PCM microphone you will need to replace the above code with the following line. This should work, but I have not tested it yet, so I can’t say for sure.

config.mode = espidf.I2S_MODE.MASTER| espidf.I2S_MODE.RX 

Next we set the sample rate. This is how many chunks of audio you want to revive per second. 16000 seams to be the minimum value for the esp32. For reference, 44100 is CD quality.

config.sample_rate = 16000

After that we need to set the word length which tells the computer how big a chunck of audio is. For my microphone that is 16 bits.

config.bits_per_sample = espidf.I2S_BITS_PER_SAMPLE._16BIT

Many headphones or speakers are stereo, which means that the computer can tell the headphones to send data only to a specific ear, like your left ear. Because my microphone is not stereo, I have to set which channel I want it to send data to. I chose the right channel, but it doesn’t really matter.

config.channel_format = espidf.I2S_CHANNEL_FMT.ONLY_RIGHT

Another feature we are going to set is the audio format. Because there are some slight differences in how I2S data can be sent, we need to change which format we are using. For my microphone, I need standard I2S. If you are not sure which format to use, start with standard.

config.communication_format = espidf.I2S_COMM_FORMAT.I2S

Next we set the interrupt flags. Setting it to zero is a simple way to get it to work.

config.intr_alloc_flags = 0

Because the microphone sends so much data, we need to give it a buffer to temporally store the data in.

To start, we need to tell the computer how many buffers we want. You will want at least two, but having more can potentially speed up performance.

config.dma_buf_count = 2

Then we need to set how large each of those buffers are. I chose 800 samples per buffer.

config.dma_buf_len = 800

This last line of code controls if the apall clock is used. It will give you more accurate timing, but because we don’t need it, I turned it off.

config.use_apll = False

The Wiring

Next thing we need to do is setup the pins that we are using. I2S as four pins that can be used. They are as follows.

NAMEDESCRIPTIONOTHER NAMES
BCKThis is the clock pinCLK
WSThis pin selects whether the microphone is to send the left or right channel dataLRCK, LR
DATA INThis pin is how your computer receives audio.DATA, DIN, RX
DATA OUTThis pin is how your computer sends audio.DATA, DOUT, TX

Because I am using only one microphone I don’t not have to wire up the DATA OUT or WS pins. If your microphone has a WS pin than it might still be wise to wire it up, to avoid glitches.

NAMEESP32 PIN
BCK12
WS (optional)0
DATA IN34

Setting Up the Pins

Now that we have deciede on the pins we are going to use we need to set them up.

first we create a I2S pin object.

mic = espidf.i2s_pin_config_t()

Then we set the BCK pin.

mic.bck_io_num = 12

We set the WS and DATA IN pin the same way.

mic.ws_io_num = 0
mic.data_in_num = 34

Next we have to give a value to the data out pin. There is a way to disable this pin, but it’s simpler just to give it an fake pin.

mic.data_out_num = 2

Turning the I2S on

Finally, we can take all the configs we have created and turn on the I2S.

To start, we add the driver config we created earlier to I2S port 0.

espidf.i2s_driver_install(espidf.I2S_NUM._0,config,0,None)

Then we setup the pins for I2S 0 as well.

espidf.i2s_set_pin(espidf.I2S_NUM._0,mic)

Displaying the Data

We have the microphone data now, but what do we do with it? I decided that I would build a graph that shows the sound being recorded.

First, we have to create a LVGL chart that is 320 pixels wide and 240 pixels tall.

chart = lvgl.chart( lvgl.scr_act() )
chart.set_size( 320, 240 )

Then we center it on the screen.

chart.center()

The code below sets up some of the features of the chart. Because this is a tutorial on microphones and not charts I will not waste your time explaining it.

chart.set_point_count( 100 )
chart.set_style_size( 0, 0, lvgl.PART.INDICATOR )
chart.set_range(lvgl.chart.AXIS.PRIMARY_Y,0,240)
series1 = chart.add_series( lvgl.color_hex( 0x0099FF ), lvgl.chart.AXIS.PRIMARY_Y )

The Rounding Functions

The microphone we are using gives so much data that the screen would be swamped in data if we tried to use it all. So instead, I created the following two rounder functions to help shrink the data.

def get_round(data,High,nHigh):
    div = High/nHigh
    return int(data/div)

def get_val(data):
    total = 0
    for x in range(int(len(data)/2)):
        total += get_round(data[2*x+1]+(data[2*x]*256),65536,240)
    total = total/(len(data)/2)
    return int(total)

Getting the Audio

To begin, we need to import the struct module. This is used to create a pointer which is needed to read the mic’s data.

import struct

Then we create an empty variable called val.

val = 0

Next, we create a infinite loop so the computer constantly reads the microphone’s data.

while True:

After that we need to create a pointers so we can read the mic.

    leng = struct.pack('P',val)

We also need a buffer to store the microphone’s data in.

    buffer= bytearray(800)

And finaly, we actually read the microphone.

    length = espidf.i2s_read(espidf.I2S_NUM._0,buffer,300,leng,1000000)

The last thing we do is update the chart so it has the new mic data.

    chart.set_next_value( series1, get_val(buffer))

Wraping Up

Now that you have seen the code, try running it. If every thing works right, you should see a bunch a squiggly lines that change when you say something.

After you get the code to run you can experiment with it. Maybe you can hook up a speaker and record some audio then play it back.

When I was building this project, I started by recording data to an SD card. Then I played it on my computer. That is a great way to test that you are getting a good recording from your mic.

If you liked this project you might also like How To Use A PNG Image With Micropython LVGL.

Filed Under: Micropython

How To Style Parts Of Text In Micropython LVGL

December 13, 2022 by Baxter

lvgl span with green background, and text that in some places is highlighted or underlined

The LVGL library has a lot of powerful features for styling text. You can set the color, underline the text, set the opacity, etc., but if you want to style a small part of some text instead of the entire thing, that gets a little more complicated. The best way to pull that off is with the span.

What Is A Span?

The span is an LVGL widget that is similar to the label. Think of them like a container that holds a bunch of individual labels inside. Spans take care of all the details like word wrap and line positioning, and let you take care of the other details like styling the text.

How Do You Use Spans?

The rough idea is that you create a Spangroup(aka. Span), and inside of it you create spans. Spans are little snippets of text, plus any styles you want to add to that text. To make the process a little clearer I have included an example below. Down there is also an explanation of how the example works.

Here is that code:

import lvgl

group = lvgl.spangroup(lvgl.scr_act())
group.set_size(120,100)
group.set_mode(lvgl.SPAN_MODE.BREAK)
group.set_style_bg_color(lvgl.color_hex(0x005050),0)
group.set_style_bg_opa(255,0)
group.set_style_text_color(lvgl.color_hex(0x000000),0)
group.center()

span = group.new_span()
span.set_text('This is some normal text but')

other_span = group.new_span()
other_span.set_text(' some of it is colored')
other_span.style.set_text_color(lvgl.color_hex(0x00FF50))

other_other_span = group.new_span()
other_other_span.set_text(' and some of it is underlined')
other_other_span.style.set_text_decor(lvgl.TEXT_DECOR.UNDERLINE)

other_other_other_span = group.new_span()
other_other_other_span.set_text(' and that is because spans allow you to style individual parts of your text')

group.refr_mode()

Understanding This LVGL Code

Ok, now that you have seen all the code, let’s step through each section, so you can understand exactly what each part does. This will make it much easier to actually use the span in your projects…

The Setup

First we have to import LVGL so we can use it.

import lvgl

Setting Up the Spangroup

To start, we need to create an empty spangroup.

group = lvgl.spangroup(lvgl.scr_act())

Then we will set its size to 120 pixels wide and 100 pixels high.

group.set_size(120,100)

If you put more text into the span than it can hold, it will normally cut off that extra text, but Spans have modes to control what they do. Below, I set the mode to BREAK, which makes the span increase its height if it has to much text.

If you don’t care what it does, then you can remove this line of code entirely and the span will continue to work fine.

group.set_mode(lvgl.SPAN_MODE.BREAK)

After that we will change the background color to a greenish blue.

group.set_style_bg_color(lvgl.color_hex(0x005050),0)

The background of spans is normally invisible, so to see the new color we added, we need to make the background visible by setting its opacity to 255.

group.set_style_bg_opa(255,0)

To make the text more readable we are going to change its color to black. This code will change the default color but later we can override it to highlight portions of the text that we want.

group.set_style_text_color(lvgl.color_hex(0x000000),0)

Lastly we will center the span because that makes it look a little better.

group.center()

Creating the First Span

It is finally time to actually create a span which is not to be confused with the spangroup.

span = group.new_span()

After that we set its text.

span.set_text('This is some normal text but')

The Other Span

This span is colored greenish. We start just like we did last time by creating a new span.

other_span = group.new_span()

Then we set its text.

other_span.set_text(' some of it is colored')

Here is where it gets interesting. We are going to add a style to the span to change the color. Take a good look at the code below, because for some reason, the way you add styles to spans is done differently than normal styles.

I haven’t seen any other object that uses styles this way. It seems to be unique to spans.

other_span.style.set_text_color(lvgl.color_hex(0x00FF50))

The Underlined Span

In this span, we are going to underline the text, but first we have to create it.

other_other_span = group.new_span()

After that the text needs to be set.

other_other_span.set_text(' and some of it is underlined')

Add then we add the style that underlines the text.

other_other_span.style.set_text_decor(lvgl.TEXT_DECOR.UNDERLINE)

The Last Span

This last span is again set to the default settings and works like all the previous ones. First we create it.

other_other_other_span = group.new_span()

Then we set its text.

other_other_other_span.set_text(' and that is because spans allow you to style individual parts of your text')

Making Every Thing Work Right

This last line of code is very important. Whenever we change something in the spangroup, like creating a span, changing some text, or adding a style, we need to refresh the main spangroup otherwise our updates might not be displayed.

The code below is what calls that refresh. Thankfully, it’s pretty simple.

group.refr_mode()

What Next?

Now that you know how the above code works, try running it. Your screen should look like the picture at the top of this page. Hopefully, in spite of my poor choice of colors, it is clear what spans can do and how useful they are.

One of the best features about spans is that they are similar to labels, so if you have created a project that uses labels, it is not too complicated to update those labels with spans.

If you’re looking for useful ways to display text on your screens then Micropython LVGL Textarea Examples might be able to interest you.


Filed Under: Micropython

Micropython LVGL Buttons, Switches, and Checkboxes

December 12, 2022 by Baxter

lvgl switch

Having good inputs for you projects is extremely important. Today I am going to show you three of the simplest yet most important inputs that the LVGL graphics library has to offer.

The first example will explain how to create buttons and tell when they have been clicked.

After that, I will show you how switches work, and how you know what state they are in.

Then finally, I take you through the process of creating checkboxes and figuring out if they are checked.

After each example we can walk through the code to see how they work. This will make it easier to add these inputs to your own projects.

To get these examples to work you will need to add your screen code to the beginning of this example. If you want more information try How to get a LVGL Micropython screen to work.

lvgl blue button

Micropython LVGL Buttons

Buttons are the most important and most basic input that I can think of. The code below will create a button and give it a label. When you click the button it will change the label’s text to clicked, and if you press the button for a long time it will change the text to ‘long pressed’.

import lvgl

btn = lvgl.btn(lvgl.scr_act())
btn.center()
lb = lvgl.label(btn)
lb.set_text('default')


def handler(data):
    if data.get_code() == lvgl.EVENT.LONG_PRESSED:
        print('long pressed')
        lb.set_text('long pressed')
    elif data.get_code() == lvgl.EVENT.CLICKED:
        print('clicked')
        lb.set_text('clicked')
        
btn.add_event_cb(handler,lvgl.EVENT.ALL,None)

The Setup

The first thing the code does is import the LVGL library so we can use it.

import lvgl

The Button

Then we have to create the button object.

btn = lvgl.btn(lvgl.scr_act())

The button will look better if we put it in the center of the screen.

btn.center()

The Label

Next we want to give the button some text, so we create a label inside of our button.

lb = lvgl.label(btn)

After that we will give the label the text ‘default’ .

lb.set_text('default')

The Handler

When the button is pressed we want it to change the text. To begin, we need to create a function.

def handler(data):

Inside that function we are going to do a few things. First, we are going to check if the button was long pressed.

    if data.get_code() == lvgl.EVENT.LONG_PRESSED:

If it was, we are going to run the code below, which prints the text ‘long pressed’ and changes the label’s text to ‘long pressed’.

        print('long pressed')
        lb.set_text('long pressed')

If the the button wasn’t long pressed we are going to check if it was clicked.

    elif data.get_code() == lvgl.EVENT.CLICKED:

And if it was clicked, the code prints to the terminal ‘clicked’ and changes the label’s text to ‘clicked’.

        print('clicked')
        lb.set_text('clicked')

Connecting It All Together

Finally we have to connect the handler function we just created to the button.

btn.add_event_cb(handler,lvgl.EVENT.ALL,None)
lvgl switch that is on

Micropython Switches

Switches are a GUI object we are all familiar with. LVGL makes it pretty easy to make a switch, though it will take a little work to get the current position of it.

Here is the basic code:

import lvgl

sw = lvgl.switch(lvgl.scr_act())
sw.set_size(100,50)
sw.center()

def handler(data):
    switch = data.get_target()
    print(switch.has_state(lvgl.STATE.CHECKED))

sw.add_event_cb(handler,lvgl.EVENT.CLICKED,None)   

The Setup

Before we do anything else we need to import the LVGL library.

import lvgl

Creating the Switch

To create a switch we first have to create an empty switch object.

sw = lvgl.switch(lvgl.scr_act())

To make this switch a little more interesting and more visible for my camera, let’s make it bigger.

sw.set_size(100,50)

Lastly, we center it so it looks more pleasing.

sw.center()

The Handler

To be able to tell if the slider is on or off we need to start by creating a handler function. Because I am not very creative, we will name that function, “handler”.

def handler(data):

After that, we are going to run some code to find the switch that called the handler.

    switch = data.get_target()

Now that we know which switch called this function, we figure out if it is checked or not, and print that value to the terminal.

    print(switch.has_state(lvgl.STATE.CHECKED))

Wrapping Up

The last thing we need to do for this example is to connect the handler we just made to the switch we created earlier.

sw.add_event_cb(handler,lvgl.EVENT.CLICKED,None) 
lvgl checkbox that is checked

LVGL Checkboxes

Checkboxes are similar to switches. The main difference between them is how they look, but most of the code behind them is the same.

Here is the checkbox code:

import lvgl

ch = lvgl.checkbox(lvgl.scr_act())
ch.set_text('hello there')
ch.center()

def handler(data):
    check = data.get_target()
    print(check.has_state(lvgl.STATE.CHECKED))

ch.add_event_cb(handler,lvgl.EVENT.CLICKED,None)    

The Setup

As usual, we start by importing LVGL.

import lvgl

Creating the checkbox

First, we are going to create the checkbox object.

ch = lvgl.checkbox(lvgl.scr_act())

Checkboxes allow you to add some text next to them. If you click the text it will also check the box.

ch.set_text('hello there')

Lastly we center the box.

ch.center()

The Handler

This handler is pretty much identical to the one used for switches. It just prints if the checkbox is checked or not.

def handler(data):
    check = data.get_target()
    print(check.has_state(lvgl.STATE.CHECKED))

Connecting Everything Together

The last step is to connect the handler to the checkbox.

ch.add_event_cb(handler,lvgl.EVENT.CLICKED,None)

What Next?

Buttons are the simplest type of input, which is why they are so powerful. They can be modified in tons of creative ways to meat whatever you need. The example I gave you was intended to show some of the special features that buttons have available, but you could use the handler functions we created for the switch or checkbox, to simplify the code.

Switches are great if you want an input that stays on after you have pressed it. They are perfect if you are trying to make a settings menu, or if you just want your GUI to look more polished.

Checkboxes aren’t needed in everyday projects, but they can make a large GUI interesting. They are practically identical to switches, so you can easily add them in wherever you put switches.

If you want some more complicated inputs to play with, then you might like Micropython LVGL Keyboard Examples.

Filed Under: Micropython

Micropython LVGL Arc Example

December 9, 2022 by Baxter

A screen showing a lvgl arc in an arc

It always seems difficult to make a GUI interesting. Thankfully, the LVGL library has some useful objects to help our projects. One of those objects is the arc. They are like sliders, but are curved and have a few more settings.

Today, I am going to show and explain some code for creating and positioning arcs, modifying some of their features, and getting their current value. By the end you should have a firm understanding of arcs.

To get this example to work you will need to add your screen code to the beginning of the example. If you want more information try How to get a LVGL Micropython screen to work.

Here is that code:

import lvgl

arc_main = lvgl.arc(lvgl.scr_act())
arc_main.set_size(200,200)
arc_main.set_bg_angles(180,90)
arc_main.center()

min_arc = lvgl.arc(lvgl.scr_act())
min_arc.set_size(100,100)
min_arc.set_bg_angles(0,270)
min_arc.set_mode(lvgl.arc.MODE.SYMMETRICAL)
min_arc.center()
min_arc.remove_style(None,lvgl.PART.KNOB)

label = lvgl.label(lvgl.scr_act())
label.set_text('0')

pointer = lvgl.obj(lvgl.scr_act())
pointer.set_size(10,40)
pointer.set_style_bg_color(lvgl.color_hex(0x000000),0)
pointer.center()

label.set_text('91')
min_arc.set_value(91)
arc_main.set_value(91)

arc_main.align_obj_to_angle(label,0)
arc_main.rotate_obj_to_angle(pointer,-80)

def new_val(data):
    arc = data.get_target()
    
    label.set_text(str(arc.get_value()))
    
    min_arc.set_value(arc.get_value())
    
    arc_main.set_value(arc.get_value())
    arc_main.align_obj_to_angle(label,0)
    arc_main.rotate_obj_to_angle(pointer,-80)

arc_main.add_event_cb(new_val,lvgl.EVENT.VALUE_CHANGED,None)
min_arc.add_event_cb(new_val,lvgl.EVENT.VALUE_CHANGED,None)

Understanding This LVGL Code

Ok, now that you have seen all the code, let’s step through each section, so you can understand exactly what each part does. This will make it much easier to actually use arcs in your future projects…

The Setup

First we have to import the LVGL library.

import lvgl

Creating the Main Arc

We want a large arc to go around the screen, so first we have to create an empty arc object.

arc_main = lvgl.arc(lvgl.scr_act())

Secondly, we want to set the size of are new arc.

arc_main.set_size(200,200)

Then we will set the start and end angle of our arc.

arc_main.set_bg_angles(180,90)

Lastly, we will put the arc in the center of the screen.

arc_main.center()

The Small Arc

We also want a smaller arc in the center of the screen, so let’s create that.

min_arc = lvgl.arc(lvgl.scr_act())

Then we set its size.

min_arc.set_size(100,100)

Next, the angles need to be set.

min_arc.set_bg_angles(0,270)

Instead of our arc shading the background blue from the start, we want it to start shading from the middle. You can see that happening in the picture at the beginning of this page. To do that, we will have to change the mode.

min_arc.set_mode(lvgl.arc.MODE.SYMMETRICAL)

Then we center the small arc.

min_arc.center()

The last little detail is to remove the blue knob.

min_arc.remove_style(None,lvgl.PART.KNOB)

The Label

We want the arc’s knob to have the current position written on it, so we need to create a label now. Later we will setup the code that has it follow the knob.

label = lvgl.label(lvgl.scr_act())

Next, let’s set the default text to 0.

label.set_text('0')

The Pointer

In center of the screen we want an indicator that points to where the arc currently is. To start we will make our pointer out of an object.

pointer = lvgl.obj(lvgl.scr_act())

Then we will set its size, making it tall and thin.

pointer.set_size(10,40)

After that we will make it black.

pointer.set_style_bg_color(lvgl.color_hex(0x000000),0)

And of course we will center it on the screen.

pointer.center()

Creating a Default Value

If we left this program as is, when it starts up, all of the arcs, pointers, and labels would be in random positions. We need to set them all to the correct values.

The default value I decided for this system is 91, so we need to set the label’s text to 91 first.

label.set_text('91')

Then we will set both of the arcs to position 91.

min_arc.set_value(91)
arc_main.set_value(91)

Finally, we need to put the label on the main arc’s knob, and make the pointer point at the the main arc’s knob.

arc_main.align_obj_to_angle(label,0)
arc_main.rotate_obj_to_angle(pointer,-80)

How to Update Everything

Whenever the arcs are moved, we need to update the rest of the screen. Because we have two arcs, we normally would need two functions to update the screen, but since the arcs update the same thing, we will make one function and have both of them use it.

To start, we define our new function.

def new_val(data):

When the function is called, we need to be able to tell which arc called it so we add this.

    arc = data.get_target()

Then we get the new value of that arc and set the label’s text to that value.

    label.set_text(str(arc.get_value()))

After that, we are going to set the the arc that did not change to the value of the one that changed. Unfortunately, we don’t know which arc did not change, so we simply update both arcs.

    min_arc.set_value(arc.get_value())
    arc_main.set_value(arc.get_value())

The last thing we need to do is move the label to the new arcs position and point the pointer at the arc.

    arc_main.align_obj_to_angle(label,0)
    arc_main.rotate_obj_to_angle(pointer,-80)

Setting Up the Events

Finally, we need to connect that function to both the arcs, so when their value changes, that function gets called.

arc_main.add_event_cb(new_val,lvgl.EVENT.VALUE_CHANGED,None)
min_arc.add_event_cb(new_val,lvgl.EVENT.VALUE_CHANGED,None)

What Happens Next?

Once you have run the program above, it will create two arcs, a pointer, and a label. If you move ether one of the arcs, the other arc will move with it. The current position will be displayed on the label, and the pointer will point at the position of the main arc.

While the example on this page is not extremely useful, it does show you most of the features available for arcs, and gives you a chance to experiment with arcs to see how they work.

Events are used with arcs to get their values. If you want some more examples on how events work, Micropython LVGL Event Examples might be helpful.

Filed Under: Micropython

Micropython LVGL Roller Example

December 7, 2022 by Baxter

roller with red center and black background

Trying to get a lot of information on a small screen is hard. Fortunately, LVGL has a widget called the roller. It allows you to let the user choose between a large amount of options, but at the same time, the roller only takes a small amount of your screen space.

Rollers work by showing only a few of the options available, usually three, and then if you want to see the other options you have to scroll up or down. Today I would like to show you how to create and style your own roller and print the selected option in your terminal.

To get this example to work you will need to add your screen code to the beginning of this example. If you want more information try How to get a LVGL Micropython screen to work.

Here is that code:

import lvgl

names = ['one','two','three','four','five']
text = '\n'.join(names)

#Another way you could have create the list above.
other_way_text = 'one\ntwo\nthree\nfour\nfive'


roll = lvgl.roller(lvgl.scr_act())
roll.set_size(200,100)
roll.center()
roll.set_options(text,lvgl.roller.MODE.INFINITE)

main = lvgl.style_t()
main.init()
main.set_text_line_space(30)
main.set_bg_color(lvgl.color_hex(0x000000))

select = lvgl.style_t()
select.init()
select.set_bg_color(lvgl.color_hex(0x300000))
select.set_text_color(lvgl.color_hex(0xFFAAAA))

roll.add_style(main,lvgl.PART.MAIN)
roll.add_style(select,lvgl.PART.SELECTED)
roll.set_visible_row_count(4)

def handler(data):
    roller = data.get_target()
    print(names[roller.get_selected()])
    
roll.add_event_cb(handler,lvgl.EVENT.VALUE_CHANGED,None)

How Does This Code Work?

Since you’ve seen the program above, why don’t we walk through the code and see how it works. This should make it clearer so you know how you can modify this code for your own uses…

The Setup

Before we can use the LVGL library we need to import it.

import lvgl

The Options

Selecting which option you want is the whole point of the roller, so we have to create the options.

First, we will create a list of the option names.

names = ['one','two','three','four','five']

Then we will have to create a string with all of those names, each one being separated by a ‘\n’.

text = '\n'.join(names)

Another potentially simpler way you could create that list is to do it by hand, like this.

other_way_text = 'one\ntwo\nthree\nfour\nfive'

Creating the Roller

To begin, we need to create a empty roller object.

roll = lvgl.roller(lvgl.scr_act())

Secondly, we will set the size of the roller. Later on we will adjust the height, but the width will stay 200 throughout the program.

roll.set_size(200,100)

Everything looks better when put in the center of the screen.

roll.center()

Now we have to add the options that we created earlier and set the mode.

Rollers have two modes available, NORMAL and INFINITE. In INFINITE mode, when you scroll to the last option and continue scrolling, it will send you back to the first option. In NORMAL mode, if you hit the last option, it doesn’t let you scroll any more.

roll.set_options(text,lvgl.roller.MODE.INFINITE)

The Main Style

To make our roller look better, we need to add some styles. The first style will set the background properties.

To start, we need to create and initialize our style.

main = lvgl.style_t()
main.init()

Then we will set the text spacing (how far apart the options are).

main.set_text_line_space(30)

Lastly, we’re going to set the background color to black.

main.set_bg_color(lvgl.color_hex(0x000000))

The Selected Style

This style modifies the option that is currently selected. As usual we create and initialize the new style.

select = lvgl.style_t()
select.init()

Secondly, we will set the background color to a dark red.

select.set_bg_color(lvgl.color_hex(0x300000))

Finally, we will set the text color to a reddish gray.

select.set_text_color(lvgl.color_hex(0xFFAAAA))

Adding the Styles to the Roller

First, we will add the main style to the roller.

roll.add_style(main,lvgl.PART.MAIN)

Then we will add the select style to the roller. The lvgl.PART.SELECTED is what apples this style only to the selected options.

roll.add_style(select,lvgl.PART.SELECTED)

Editing the Roller Height

To make the roller look more professional, we’ll set the ruler to display only 4 options at a time. Because of how rollers work, it will display 3 options in the middle and half of one option at the top and at the bottom of the roller.

roll.set_visible_row_count(4)

Printing The Selected Option

The function below will be called when the roller’s value changes. It simply gets the roller object, then gets the index of the option that was selected. Lastly, we feed that index into the list of names we created earlier to get the name of the selected option.

def handler(data):
    roller = data.get_target()
    print(names[roller.get_selected()])

The next thing we will need to do is connect the handler to the roller and set the handler to only be called when the roller’s value changes.

roll.add_event_cb(handler,lvgl.EVENT.VALUE_CHANGED,None)

What next?

Since you now can create rollers and style them, and you know how to print out the currently selected option, you can now modify the code above or create entirely new code for your own custom rollers.

If you have a screen with more space available on it, then another widget that works similar to the roller is the list. You can find some more information that might be helpful about them at Micropython LVGL List Example.
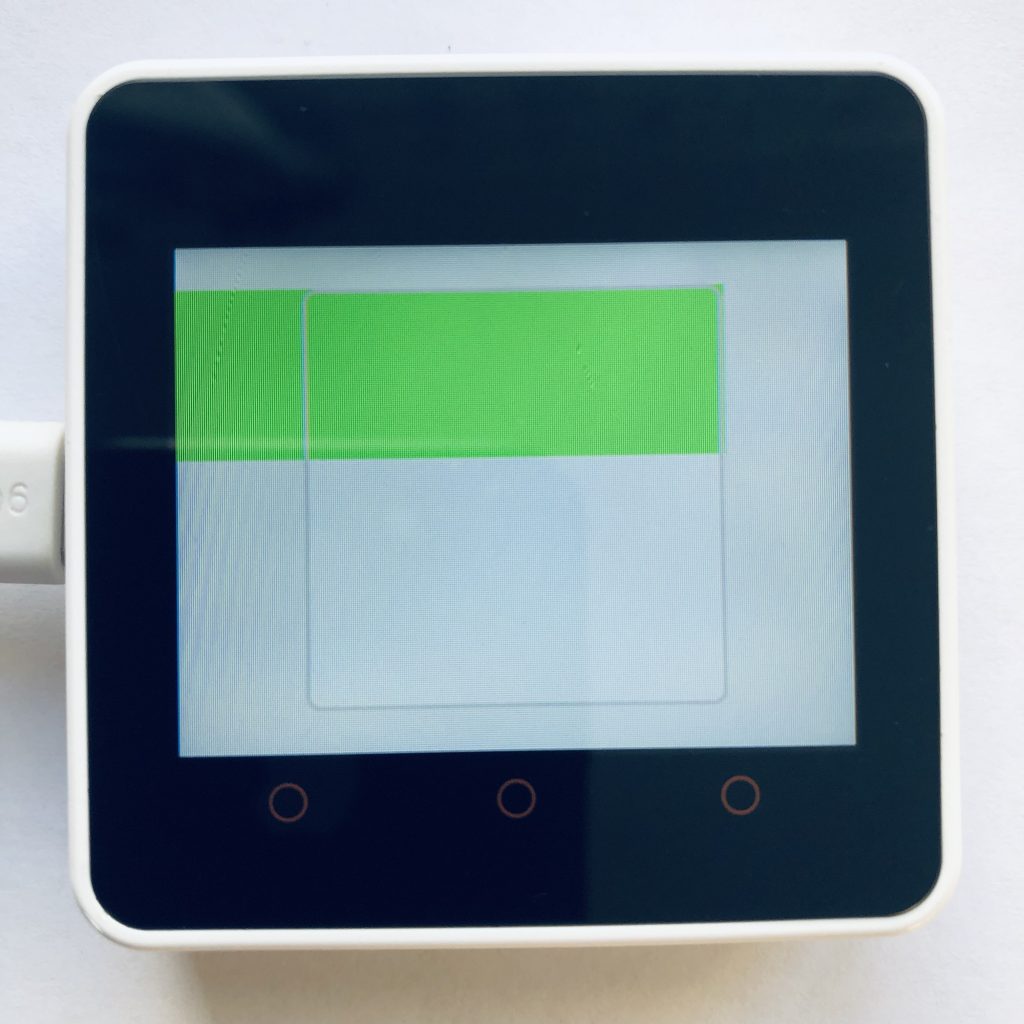
Filed Under: Micropython

How To Use A PNG Image With Micropython LVGL

December 6, 2022 by Baxter

lvgl screen with small picture in the center

Images are extremely important when building a GUI, but LVGL does not have a very simple way to add images to your project. I have been searching for awhile for a good way to add them to my projects, and today, I am going to show you the best way I have found so far.

The Code below will load a PNG image from your file system, setup all the necessary settings for that image, and display it in the center of your screen. The image I tested with is at the bottom of this page. It’s 150*150 pixels wide and about 18 kb in size.

To get this example to work you will need to add your screen code to the beginning of the example. If you want more information try How to get a LVGL Micropython screen to work.
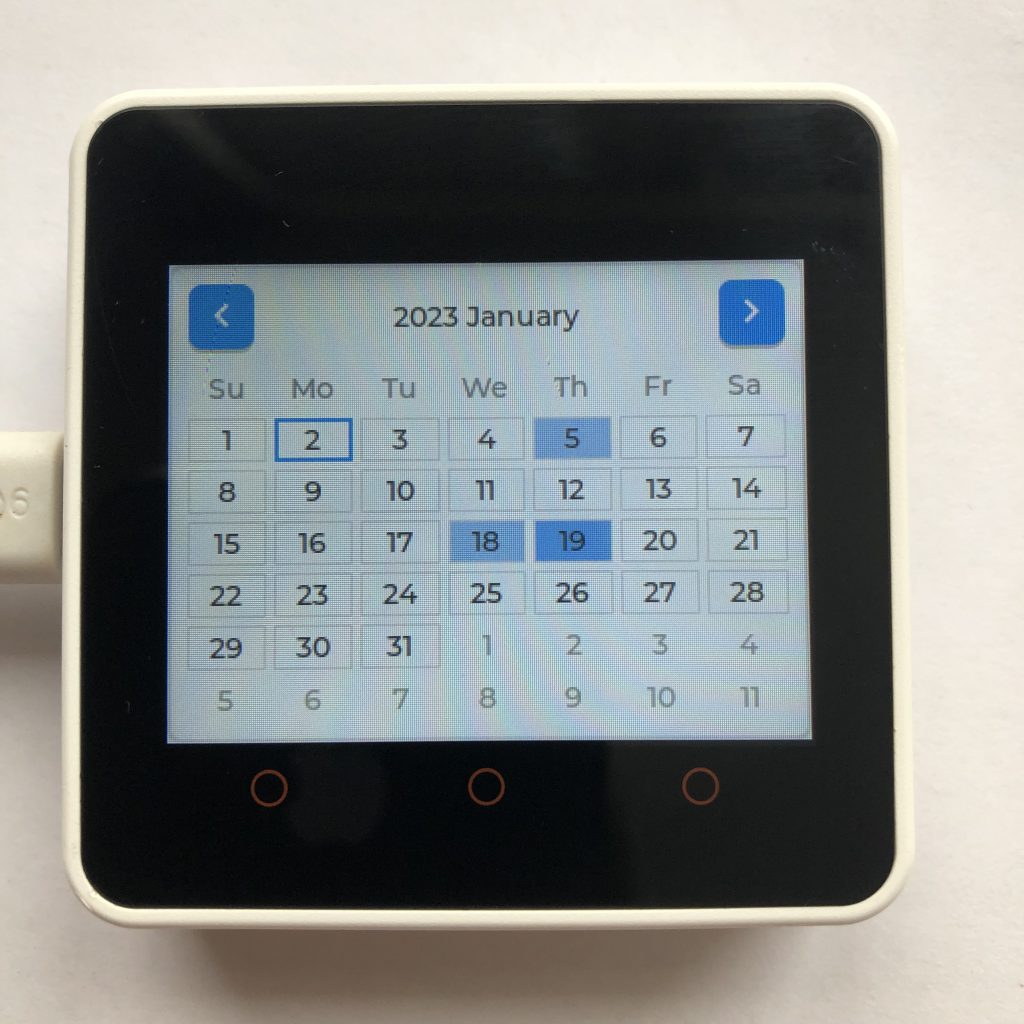
Here is the Code:

import lvgl,imagetools

driver = lvgl.img.decoder_create()
driver.open_cb = imagetools.open_png
driver.info_cb = imagetools.get_png_info

file = open('sd/lvgl_test.png','rb')
raw_image = file.read()
file.close()

image_description = lvgl.img_dsc_t()
image_description.data = raw_image
image_description.data_size = len(raw_image)

image = lvgl.img(lvgl.scr_act())
image.set_src(image_description)
image.center()

lvgl.scr_act().set_style_bg_color(lvgl.color_hex(0x000000),0)

Things To Know Before Running

The Image

For this code to work you will need to put an image somewhere in your file system. I attached an SD card to my board and put the image on that.

If you don’t want to use an SD card in your project, you will need to upload the image to your board’s file system. I know the AMPY tool can do that, but there might be others that you could use as well.

Memory

Images take a lot of memory. Besides the flash or SD memory used to store the image, you will also need a decent amount of ram. LVGL seems to load the entire image into ram before using it.

For the image I used, it seemed to take about 32kb of ram. If you run into problems about not having enough memory, you might need to get a smaller image. To get my images to work, I scaled them down with GIMP.

Understanding This LVGL Code

Since you have seen the code, let’s step through each section, so you can understand exactly what each part does. This will make it much easier to actually add images to your future projects…

The Setup

First we will need to import the lvgl library and the imagetools library.

import lvgl,imagetools

The Decoder

To be able to display a PNG image, we need a PNG decoder. To start, we have to create a plain image decoder.

driver = lvgl.img.decoder_create()

Then we will use parts of the imagetools library to modify that decoder to work with PNGs.

driver.open_cb = imagetools.open_png
driver.info_cb = imagetools.get_png_info

Loading the Image

Now we need to load your image from your file system. Replace the “sd/lvgl_test.png” with the path to your image.

file = open('sd/lvgl_test.png','rb')

Next, it loads the image to the raw_image variable.

raw_image = file.read()

Then it closes the now unused file.

file.close()

The Image Descriptor

To begin we create a blank LVGL descriptor.

image_description = lvgl.img_dsc_t()

Then we set the descriptors source to the image we loaded earlier.

image_description.data = raw_image

Lastly we set the descriptors size to the size of the image.

image_description.data_size = len(raw_image)

Displaying The Image

Up to this point we have just been setting up the image. Now we will tell it were we want it to be put on the screen.

First we create a new img object.

image = lvgl.img(lvgl.scr_act())

Then we set the picture it’s going to display to the image descriptor we made before.

image.set_src(image_description)

The image will look nicer if its centered on the screen.

image.center()

Last Touches

Because the image does not fill the whole screen, we will want the background to be black, so we add this line of code.

lvgl.scr_act().set_style_bg_color(lvgl.color_hex(0x000000),0)

What Next?

This method for loading images to micropython LVGL is simple, which is why I like it. Unfortunately, it leaves a little to be desired when it comes to efficiency. With the computers I am using, I am going to have to be careful about how many images I use.

The best part about using PNGs and LVGL is that they are straightforward. You don’t have to recompile your firmware, heavily edit the image on your computer, or create a custom image driver.

blurry image of a lvgl list that looks like a file system.
Here is that image I promised. I scaled it down and changed the color palette which is why it looks blurry.

Filed Under: Micropython

Micropython LVGL Style Example

December 2, 2022 by Baxter

LVGL screen with textarea and  keyboard

If you have ever worked with LVGL, you’ve probably wondered how to change the color of text or the background color of the screen. The way you do that in micropython lvgl is with styles.

When you are finished with this code tutorial today, you will be able to apply styles on the background to a keyboard and to a textarea, and you will now how to set styles to specific parts of an object.

To get this example to work, you will need to add your screen code to the beginning of the example. If you want more information try How to get a LVGL Micropython screen to work.
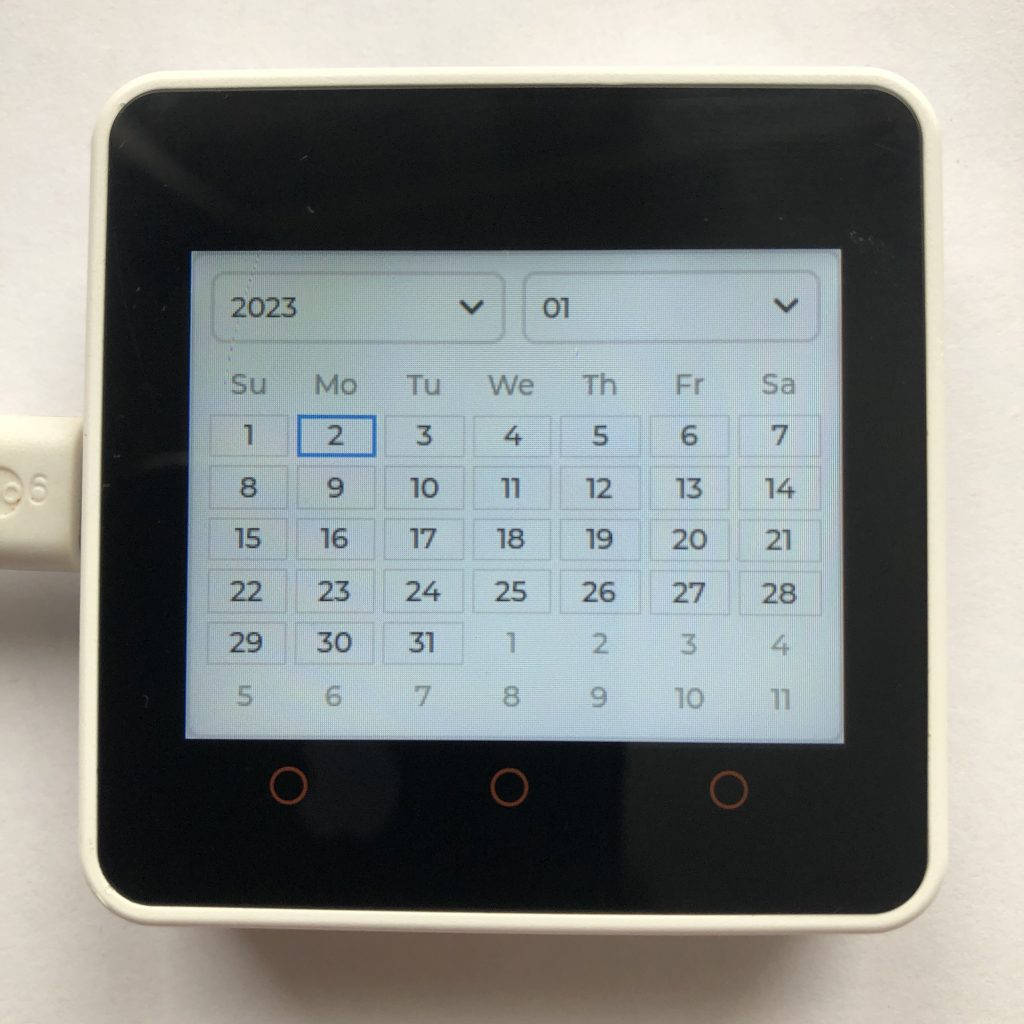
Here is the code:

import lvgl

ta_style = lvgl.style_t()
ta_style.init()
ta_style.set_bg_color(lvgl.color_hex(0x303030))
ta_style.set_text_color(lvgl.color_hex(0x00df00))

kb_style = lvgl.style_t()
kb_style.init()
kb_style.set_bg_color(lvgl.color_hex(0x000000))

btn_style = lvgl.style_t()
btn_style.init()
btn_style.set_bg_color( lvgl.color_hex( 0x505050 ))
btn_style.set_text_color( lvgl.color_hex( 0x00DF00 ))

obj_style = lvgl.style_t()
obj_style.init()
obj_style.set_bg_color(lvgl.color_hex(0x000000))
lvgl.scr_act().add_style(obj_style,0)

ta = lvgl.textarea( lvgl.scr_act() )
ta.set_size( 320, 100 )
ta.set_pos( 0, 0 )
ta.add_style(ta_style,0)

kyb = lvgl.keyboard( lvgl.scr_act() )
kyb.set_textarea(ta)
kyb.add_style(kb_style,lvgl.PART.MAIN | lvgl.STATE.DEFAULT)
kyb.add_style(btn_style,lvgl.PART.ITEMS | lvgl.STATE.DEFAULT )

How Does This Code Work?

Since you’ve seen the program above, why don’t we walk through the code and see how it works. This should make it clearer how you can modify this code for your own uses…

The Setup

First we have to import the LVGL library so we can use it.

import lvgl

The Textarea Style

To start, we will need a style for the textarea we are going to create later.

ta_style = lvgl.style_t()

Then we need to initialize it so it’s ready to use.

ta_style.init()

Next we want to set the background color to gray (aka. 0x303030).

ta_style.set_bg_color(lvgl.color_hex(0x303030))

Finally we will change the text color to green (aka. 0x00df00)

ta_style.set_text_color(lvgl.color_hex(0x00df00))

The Keyboard Style

We need to divide the keyboard style into two parts: the main keyboard style and the buttons style.

The Main Keyboard Style

To start we will create and initialize the style.

kb_style = lvgl.style_t()
kb_style.init()

Then we will set the keyboard background color to black.

kb_style.set_bg_color(lvgl.color_hex(0x000000))

The Button Style

As usual we create and initialize the new style.

btn_style = lvgl.style_t()
btn_style.init()

Finally we will set the styles background color to light gray (aka. 0x505050) and the text color to green (aka. 0x00DF00).

btn_style.set_bg_color( lvgl.color_hex( 0x505050 ))
btn_style.set_text_color( lvgl.color_hex( 0x00DF00 ))

The Background Style

To begin we will create the new style and initialize it.

obj_style = lvgl.style_t()
obj_style.init()

Then we will set the background color to black.

obj_style.set_bg_color(lvgl.color_hex(0x000000))

Connecting the Background Style Up

To actually use a style we need to add it to an object. The lvgl.scr_act() command gets the screen object and then we can add the obj_style to it.

lvgl.scr_act().add_style(obj_style,0)

Creating the Textarea

To start we will make a new textarea.

ta = lvgl.textarea( lvgl.scr_act() )

After that we will set its size to 320*240 pixels and set its position to 0,0.

ta.set_size( 320, 100 )
ta.set_pos( 0, 0 )

Finally we will need to connect the ta_style we created earlier to our textarea.

ta.add_style(ta_style,0)

Creating the Keyboard

First, we will generate a new keyboard.

kyb = lvgl.keyboard( lvgl.scr_act() )

Next, we will connect the textarea to the keyboard so that when you press a button, the textarea will display the pressed button.

kyb.set_textarea(ta)

Then the main keyboard style gets added. This is the one that sets the keyboards background color to black.

The lvgl.PART.MAIN tells the computer to put the style on the main part of the keyboard and the lvgl.STATE.DEFAULT makes it the default style. The bar( | ) tells the computer to run both of those commands together.

kyb.add_style(kb_style,lvgl.PART.MAIN | lvgl.STATE.DEFAULT)

After that, we will add another style to the keyboard buttons to change their color.

The lvgl.PART.ITEMS adds the style to the keyboards buttons.

kyb.add_style(btn_style,lvgl.PART.ITEMS | lvgl.STATE.DEFAULT )

What Happens Next

Today you have created a keyboard and textarea and styled them with different colors. Styles can also be used to add borders, shadows, opacity, etc. You can find a complete list at the LVGL docs.

The best way to learn code is to experiment. You could try adding other styles properties to the code above or just changing the color of the ones that already exist.

If you would like some more examples on textareas, you could try Micropython LVGL Textarea Examples, and for keyboards, Micropython LVGL Keyboard Examples might be helpful.

Filed Under: Micropython

Micropython LVGL Tileview Example

November 30, 2022 by Baxter

lvgl screen with text that says 'swipe->'

Today, I am going to show you how to create a program that will have multiple pages, and when you swipe the screen, it will change the visible page. Normally, it would take tons of code to pull this off, but with lvgl its a breeze.

To get this example to work you will need to add your screen code to the beginning of the example. If you want more information try How to get a LVGL Micropython screen to work.
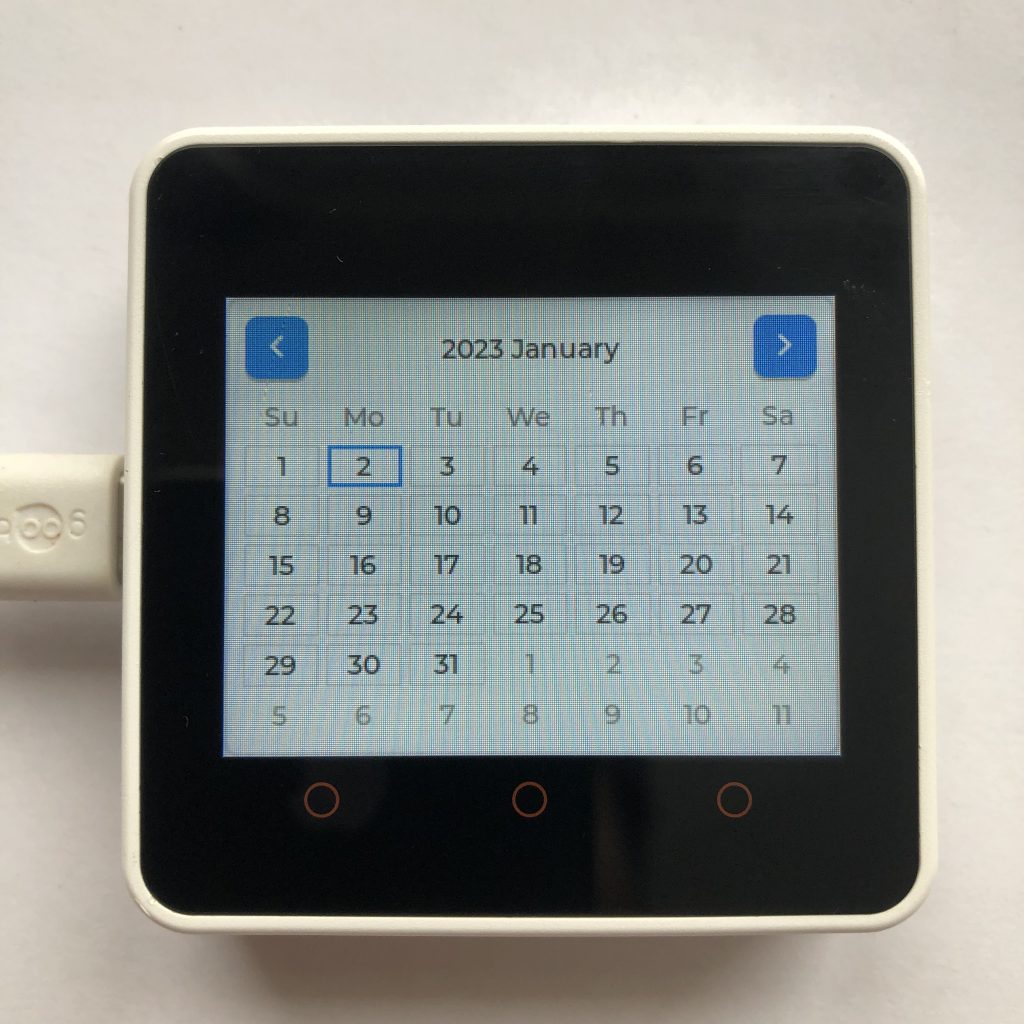
Here is the code:

import lvgl

tv = lvgl.tileview( lvgl.scr_act() )

def lb( text, src ):
    label = lvgl.label( src )
    label.set_text( text )
    label.center()

view1 =  tv.add_tile( 0, 0, lvgl.DIR.HOR )
lb( 'swipe ->', view1 )

view2 = tv.add_tile( 1, 0, lvgl.DIR.HOR )
lb( 'keep going ->', view2 )

view3 = tv.add_tile( 2, 0, lvgl.DIR.HOR | lvgl.DIR.BOTTOM )
lb( 'swipe down if you like', view3 )

view4 = tv.add_tile( 2, 1, 0 )

btn = lvgl.btn( view4 )
btn.center()

lb( 'Back', btn )

def handler( data ):
    tv.set_tile_id( 0, 0, lvgl.ANIM.ON )

btn.add_event_cb( handler, lvgl.EVENT.CLICKED, None )

Understanding This LVGL Code

Ok, now that you have seen all the code, let’s step through each section, so you can understand exactly what each part does. This will make it much easier to actually use the code in your future projects…

Setting Up the LVGL Tileview

First thing we have to do is import the lvgl graphics library.

import lvgl

Secondly, we create the tileview. For simplicity, we will abbreviate it as tv.

tv = lvgl.tileview( lvgl.scr_act() )

The Label Function

We are going to make a function to build the content of the pages that we will create later. Lets give it the name ‘lb’.

def lb( text, src ):

Then we want it to create a label on the current page (aka. src).

    label = lvgl.label( src )

After that the label should be given some text to display.

    label.set_text( text )

The label will look nicer if it’s in the center of the page.

    label.center()

Creating the First Page

We will start by creating a empty tile (what I call a page). The first two numbers are the column and row of the tile, and the lvgl.DIR.XYZ is the direction you are allowed to swipe in.

view1 = tv.add_tile( 0, 0, lvgl.DIR.HOR )

Because we created the ‘lb’ function earlier, all we have to do now is call it.

lb( 'swipe ->', view1 )

The Second Page

Setting this page up is practically identical to setting up the first one.

view2 = tv.add_tile( 1, 0, lvgl.DIR.HOR )
lb( 'keep going ->', view2 )

The Third Page

Except for the fact that this page allows you to swipe down as well as horizontally, it’s the same as the last two pages.

view3 = tv.add_tile( 2, 0, lvgl.DIR.HOR | lvgl.DIR.BOTTOM )
lb( 'swipe down if you like', view3 )

The Last Page

This page is a little more interesting. As usual we will start out by creating a new tile.

view4 = tv.add_tile( 2, 1, 0 )

For the last page we will want a button instead of a label. Like the label, we will also want to center it.

btn = lvgl.btn( view4 )
btn.center()

We want the button to have text, so that old ‘lb’ function can be reused to give the button a label.

lb( 'Back', btn )

When the button is pressed we want it to take us back to the first page. First thing we need to do is code a function to take us back.

def handler( data ):
    tv.set_tile_id( 0, 0, lvgl.ANIM.ON )

Then we connect that function to the button so that when its clicked the function is called.

btn.add_event_cb( handler, lvgl.EVENT.CLICKED, None )

What happens next?

Now that you know how tileviews work and how to create their pages, try running the code above, you will see how when you swipe, it smoothly transitions to the next page, and when you press the button on the last page, it takes you back to the first page.

Experimenting with code is a great way to learn, maybe you could add more pages or rearrange the ones that already exist.  

Filed Under: Micropython

Micropython LVGL Msgbox Example

November 28, 2022 by Baxter

The micropython lvgl library can be hard to find any good information on, so today I am going to give you some code and explain it. When you finish, you will have a program that creates 3 different message boxes and by pressing different buttons you will be able to pick which one is on the screen.

To get this example to work you will need to add your screen code to the beginning of the example. If you want more information try How to get a LVGL Micropython screen to work.
Here is the code:

import lvgl

msg = lvgl.msgbox( None, 'WHERE?', 'where do you want to go?', ['pre', 'next'], True )
msg.center()

def handler( data ):
    msg = data.get_current_target()
    btn = msg.get_active_btn_text()
    if btn == 'next':
        msg.close()
        new = lvgl.msgbox( lvgl.scr_act(), 'HERE', 'message here', None, True )
        new.center()
    elif btn == 'pre':
        msg.close()
        new = lvgl.msgbox( None, 'HELLO', 'you made it', None, False )
        new.center()
        title = new.get_title()
        title.set_style_text_color( lvgl.color_hex(0x0FFF00), 0 )

msg.add_event_cb( handler, lvgl.EVENT.VALUE_CHANGED, None )

Understanding This LVGL Code

Ok, now that you have seen all the code, let’s step through each section, so you can understand exactly what each part does. This will make it much easier to actually use the code in your future projects…

The Import Command

This adds the lvgl library to our project so we can use it.

import lvgl

Creating the Msgbox

This code creates a msgbox with the title ‘WHERE?’, the description ‘where do you want to go?’, and two buttons ‘pre’ and ‘next’.

msg = lvgl.msgbox( None, 'WHERE?', 'where do you want to go?', ['pre', 'next'], True )

Centering the Msgbox

It looks nicer if the box is in the center of the screen, so we add this.

msg.center()

Creating the Event Handler

This function will be used to control the active msgbox. The next steps will be mostly setting up the controls.

def handler( data ):

Finding the Button

First we need to find which button was pressed. This is the code that does that.

    msg = data.get_current_target()
    btn = msg.get_active_btn_text()

Check the Pressed button

Then we check if the pressed button has the text ‘next’. If it does, we will close the old msgbox and create a new one.

    if btn == 'next':
        msg.close()
        new = lvgl.msgbox( lvgl.scr_act(), 'HERE', 'message here', None, True )
        new.center()

Check again

If the button was not the ‘next’ button, we will check if it was the ‘pre’ button. If it is, the code will close the old box, create another box, and change the title color on the new box.

    elif btn == 'pre':
        msg.close()
        new = lvgl.msgbox( None, 'HELLO', 'you made it', None, False )
        new.center()
        title = new.get_title()
        title.set_style_text_color( lvgl.color_hex(0x0FFF00), 0 )

Start the Handler

Finally we connect the handler function to the msgbox, so when a button is pressed the function is called.

msg.add_event_cb( handler, lvgl.EVENT.VALUE_CHANGED, None )

What Happens Next

Once you have this code running, a message box will appear if you press the ‘pre’ button and a new box will appear and will have a green title. If on the first box you had pressed the ‘next’ button, it would make a new message box with some text and a close button.
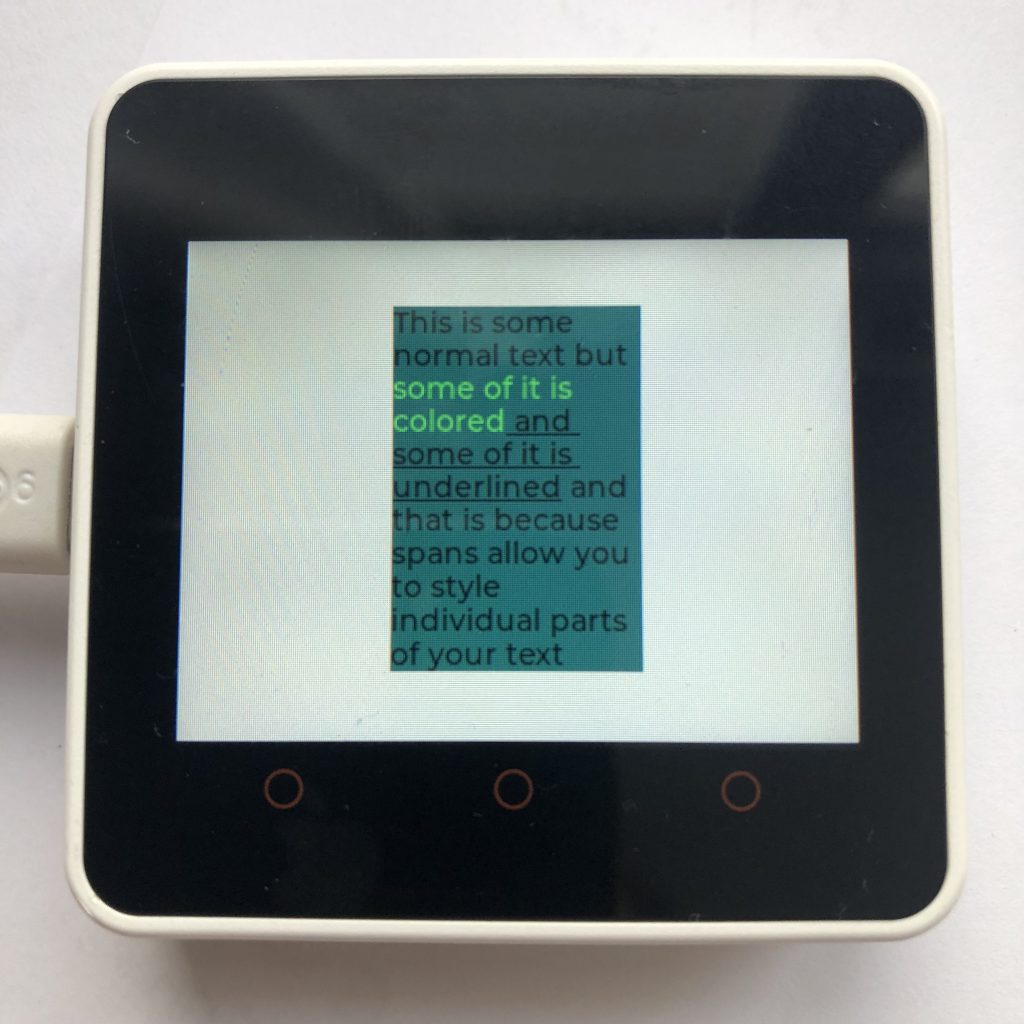
Experimenting with examples is a great way to learn code. If you modified this code, you could make a popup that warns you if your battery is low or a notification that your board has finished downloading a file.
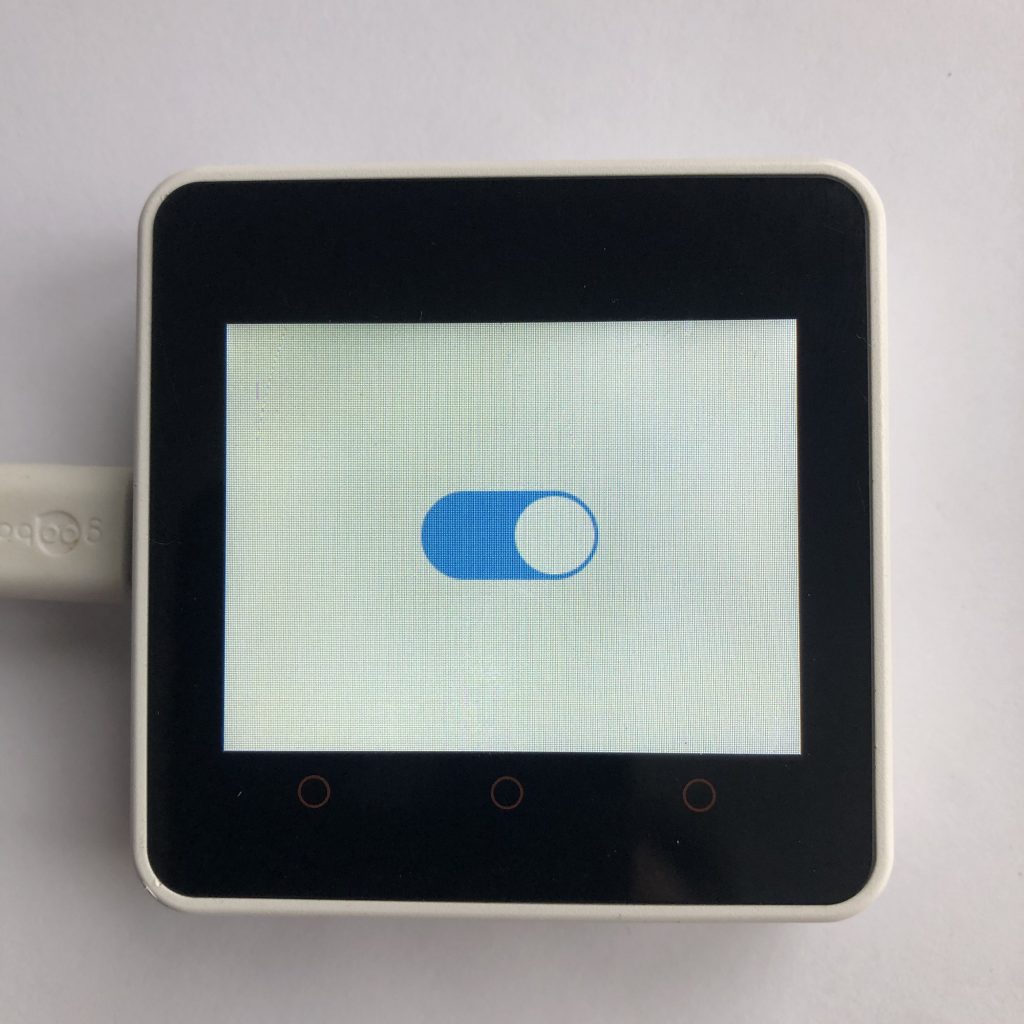
 

Filed Under: Micropython

Micropython LVGL List Example

November 23, 2022 by Baxter

pretend file system with a lvgl list containing folders and other things

As you probably already know, LVGL is a graphics library. What I’d like to show you today is how to create a list of items, and assign those items to a print command that you can see in the terminal window. This can be really helpful if you are trying to create your own filesystem.

Also, with just a little code modification, you could use this for working directly with any button that is clicked by the user.

When you are finished with this code tutorial today, you’ll be able to tap any of the items in this list, and you’ll see the name of the list item that you clicked in the terminal window. You can then develop additional code that will allow you to interact with this code to create additional actions.

To get this example to work you will need to add your screen code to the beginning of the example. If you want more information try How to get a LVGL Micropython screen to work.
Let’s get started with the code below…

import lvgl

def handler( data ):
    theBTN = data.get_target()
    print( ls.get_btn_text( theBTN ))
    

ls = lvgl.list( lvgl.scr_act() )
ls.set_size( 320, 240 )
ls.center()

ls.add_text( 'Internal' )

BACK = ls.add_btn( lvgl.SYMBOL.HOME, 'BACK' )
BACK.add_event_cb( handler, lvgl.EVENT.CLICKED, None )

FOLDER_1 = ls.add_btn( lvgl.SYMBOL.DIRECTORY, 'FOLDER 1' )
FOLDER_1.add_event_cb( handler, lvgl.EVENT.CLICKED, None )

FOLDER_2 = ls.add_btn( lvgl.SYMBOL.DIRECTORY, 'FOLDER 2' )
FOLDER_2.add_event_cb( handler, lvgl.EVENT.CLICKED, None )

FILE = ls.add_btn( lvgl.SYMBOL.FILE, 'FILE 1' )
FILE.add_event_cb( handler, lvgl.EVENT.CLICKED, None )

ls.add_text( 'External' )

CARD = ls.add_btn( lvgl.SYMBOL.SD_CARD, 'ED\'s Card' )
CARD.add_event_cb( handler, lvgl.EVENT.CLICKED, None )

DRIVE = ls.add_btn( lvgl.SYMBOL.USB, 'DRIVE LARGE' )
DRIVE.add_event_cb( handler, lvgl.EVENT.CLICKED, None )

Understanding This LVGL Code

Ok, now that you have seen all the code, let’s step through each section, so you can understand exactly what each part does. This will make it much easier to actually use the code in your future projects…

The Import Command

This basically imports the lvgl library, so we can use it to put things on our display.

import lvgl

The Terminal Printing Code

First, we will declare the handler function. Next, we will get the target button and store it in a variable. Finally, we will use the print command to print the name of the button to the terminal window.

def handler( data ):
     theBTN = data.get_target()
     print( ls.get_btn_text( theBTN ))

Creating The List And Declaring The Size

Here, we are telling LVGL that we want to use the list feature. We will also declare the size of the list and use and some formatting options so that our list displays correctly on the screen.

ls = lvgl.list( lvgl.scr_act() )
ls.set_size( 320, 240 )
ls.center()

Adding The First Label To The FileSystem View

We’ll use the add_text command to print a label to our screen with the word, “Internal”.

ls.add_text( 'Internal' )

Adding The Back/Home Button

Here, we are going to give our button the name “Back”, and then we will add the button to the display, and use the LVGL symbol “HOME” so that it shows on the screen.

You can see in the example screenshot that this symbol is a little house icon. In a true file system, clicking this button would take the user back to the main page or home page of the application.

BACK = ls.add_btn( lvgl.SYMBOL.HOME, 'BACK' )
BACK.add_event_cb( handler, lvgl.EVENT.CLICKED, None )

Adding The Folder Icons To The FileSystem List

In this code, we will create two more filesystem items to add to our list. We will give the items the names “Folder 1” and “Folder 2”, which will be shown on the display.

Notice that this time, we have chosen to use the LVGL symbol for a Directory, which is this folder icon you see in the example above.

FOLDER_1 = ls.add_btn( lvgl.SYMBOL.DIRECTORY, 'FOLDER 1' ) FOLDER_1.add_event_cb( handler, lvgl.EVENT.CLICKED, None )

FOLDER_2 = ls.add_btn( lvgl.SYMBOL.DIRECTORY, 'FOLDER 2' ) FOLDER_2.add_event_cb( handler, lvgl.EVENT.CLICKED, None )

Adding Files To The FileSystem List

This code is very similar to the Folder code above, but in this case, we are going to display a file icon and call the item, ‘FILE 1’. All the other code is the same as in the previous example.
FILE = ls.add_btn( lvgl.SYMBOL.FILE, 'FILE 1' ) 
FILE.add_event_cb( handler, lvgl.EVENT.CLICKED, None )

Adding Additional Labels To The FileSystem List

This code below is identical to the “Internal” label that you added earlier. You can see how you can use the combination of labels and icons to create a visual filesystem that has structure to it.

ls.add_text( 'External' )

Adding External Memory/SD Card Icons To The FileSystem List

This code will declare a “Card” button value, and we will use the built in LVGL symbol for an SD card. In a filesystem, you could use this to allow users to access the filesystem of an inserted SD card into their device.

CARD = ls.add_btn( lvgl.SYMBOL.SD_CARD, 'ED\'s Card' )
CARD.add_event_cb( handler, lvgl.EVENT.CLICKED, None )

Adding External Drive Icons To The FileSystem List

This code is very similar to the code above, but uses the USB icon from the LVGL library. You can imagine how you might use this icon and structure in a real filesystem list that you would interact with on your device.

DRIVE = ls.add_btn( lvgl.SYMBOL.USB, 'DRIVE LARGE' )
DRIVE.add_event_cb( handler, lvgl.EVENT.CLICKED, None )

What Happens Next?

Ok, now that you understand how this code works and can use the different types of symbols and the LVGL list feature, you can see how this can be used to build your own filesystem.

Try out the code above, and notice that when you click on any of the menu items, you will see the name of the button that was clicked on your terminal screen.

Now, you can imagine how this can be used to interact with the touch screen. You could develop your code further so that when a button is pushed, and the terminal reads the data, it then begins to process this further and execute additional code.

Using this simple code is a great way to get started with building a working filesystem so that you can interact with stored information on your device.

If you haven’t learned how to use the Flex and Grid layout features, these micropython lvgl layout examples would be a good place to go next to learn these features…

Filed Under: Micropython

Micropython LVGL Layout Examples

November 21, 2022 by Baxter

lvgl grid layout made of 5 boxes

What layouts are there?

Lvgl currently supports two layouts: FLEX and GRID. The flex layout is simple, but not very controllable.

The grid layout is more complicated, but gives you more control. This page has examples for both of them.

How to use these examples

To get these examples to work you will need to add some screen code to the beginning of each example. If you want more information try How to get a LVGL Micropython screen to work.
lvgl flex layout with three box stacked vertically

LVGL Flex Basic Example

This code creates a container with the flex layout enabled, and puts three objects in it.

import lvgl

cont = lvgl.obj( lvgl.scr_act() )
cont.set_size( 320, 240 )
cont.center()
cont.set_layout( lvgl.LAYOUT_FLEX.value )
cont.set_flex_flow( lvgl.FLEX_FLOW.COLUMN )

def area( text, width, height ):
    area = lvgl.obj( cont )
    area.set_size( width, height )
    
    label = lvgl.label( area )
    label.set_text( text )
    label.center()
    
    return area

area( 'one', 70, 70 )
area( 'two', 70, 70 )
area( 'three', 70, 70 )
lvgl flex layout made of 6 box

Flex Grow and New Line

Items in a flex layout can be set to fill any unused space in their row or column. This code shows how to set that grow factor, and how to force items onto new lines.

import lvgl

cont = lvgl.obj( lvgl.scr_act() )
cont.set_size( 320, 240 )
cont.center()
cont.set_layout( lvgl.LAYOUT_FLEX.value )
cont.set_flex_flow( lvgl.FLEX_FLOW.ROW_WRAP )

def area( text, width, height ):
    area = lvgl.obj( cont )
    area.set_size( width, height )
    
    label = lvgl.label( area )
    label.set_text( text )
    label.center()    
    return area

def grow_area( text, height, grow ):
    area = lvgl.obj( cont )
    area.set_flex_grow( grow )
    area.set_height( height )
    label = lvgl.label( area )
    label.set_text( text )
    label.center()    
    return area

area( 'one', 70, 45 )
grow_area( 'two', 50, 1 )
grow_area( 'three', 50, 2 )
grow_area( 'four', 50, 1 ).add_flag( lvgl.obj.FLAG.LAYOUT_1 ) #this is how you start a new line
area( 'five', 70, 50 )
area( 'six', 70, 50 )
lvgl layout with 6 boxes

LVGL Flex Align

The flex layout allows you to align its tracks (the rows or columns), and to align the items in the tracks. You can also tell it how to align different sized objects.

import lvgl

cont = lvgl.obj( lvgl.scr_act() )
cont.set_size( 320, 240 )
cont.center( )
cont.set_layout( lvgl.LAYOUT_FLEX.value )
cont.set_flex_flow( lvgl.FLEX_FLOW.ROW_WRAP )
cont.set_flex_align( lvgl.FLEX_ALIGN.SPACE_EVENLY, lvgl.FLEX_ALIGN.END, lvgl.FLEX_ALIGN.CENTER )

def area( text, width, height ):
    area = lvgl.obj( cont )
    area.set_size( width, height )
    
    label = lvgl.label( area )
    label.set_text( text )
    label.center()
    
    return area

area( 'one', 80, 50 )
area( 'two', 80, 70 )
area( 'three', 80, 70 )
area( 'four', 80, 70 )
area( 'five', 80, 50 )
lvgl grid layout with 4 buttons

LVGL Grid Basic Example

This Grid layout, as you can see, takes a little more code to get working. But if you can get them to work, they look pretty good.

import lvgl

#you can replace the lvgl.grid_fr(x) with pixel width/height
row = [ lvgl.grid_fr(1), lvgl.grid_fr(1), lvgl.GRID_TEMPLATE.LAST ]
column = [ lvgl.grid_fr(1), lvgl.grid_fr(1), lvgl.GRID_TEMPLATE.LAST ]

cont = lvgl.obj( lvgl.scr_act() )
cont.set_size( 200, 200 )
cont.center()
cont.set_layout( lvgl.LAYOUT_GRID.value )
cont.set_style_grid_row_dsc_array( row, 0 ) 
cont.set_style_grid_column_dsc_array( column, 0 )

def button( text, row_x, column_y ):
    btn = lvgl.btn( cont )
    
    label = lvgl.label( btn )
    label.set_text( text )
    label.center()
    
    btn.set_grid_cell( lvgl.GRID_ALIGN.STRETCH, row_x, 1, lvgl.GRID_ALIGN.CENTER, column_y, 1 )
    
    return btn

button( 'hi1', 0, 0 )
button( 'hi2', 1, 0 )
button( 'hi3', 0, 1 )
button( 'hi4', 1, 1 )
lvgl grid layout with 5 boxes

Spacing and Grids

The grid layout allows you to make items span multiple rows or columns.

import lvgl

row = [ lvgl.grid_fr(1), lvgl.grid_fr(1), lvgl.grid_fr(1), lvgl.grid_fr(1), lvgl.GRID_TEMPLATE.LAST ]
column = [ lvgl.grid_fr(1), lvgl.grid_fr(1), lvgl.grid_fr(1), lvgl.grid_fr(1), lvgl.GRID_TEMPLATE.LAST ]
 
cont = lvgl.obj( lvgl.scr_act() )
cont.set_size( 320, 240 )
cont.center()
cont.set_layout( lvgl.LAYOUT_GRID.value )
cont.set_style_grid_row_dsc_array( row, 0 )
cont.set_style_grid_column_dsc_array( column, 0 )

def area( text, row_x, column_y, width, height ):
    area = lvgl.obj( cont )
    
    label = lvgl.label( area )
    label.set_text( text )
    label.center()
    
    area.set_grid_cell( lvgl.GRID_ALIGN.STRETCH, row_x, width, lvgl.GRID_ALIGN.STRETCH, column_y, height )
    
    return area

area( 'tall', 0, 0, 1, 2 )
area( 'short', 1, 0, 3, 1 )
area( 'tiny', 1, 1, 1, 1 )
area( 'small', 2, 1, 2, 1 )
area( 'long', 0, 2, 4, 2 )

Whats next

Today you have learned how to use both the flex and grid layouts. If you want some more practice, try experimenting with the code. Maybe you could mix buttons and objects in your layouts and see what happens.

Whatever you do, knowing how to use layouts is a great skill to have.

Filed Under: Micropython

Micropython LVGL Textarea Examples

November 17, 2022 by Baxter

lvgl textarea with green cursor

What Are Textareas?

Textareas are intended for places where you need to display text that changes often. They are usually used with keyboards or some input device. This post has examples on creating textareas, styling cursors, and creating password textareas.

How to use these examples

To get these examples to work you will need to add some screen code to the beginning of each example. If you want more information try How to get a LVGL Micropython screen to work.
lvgl text area that says 'Hello World'

The Basic Example

This code creates a textarea and shows how adding text works.

import lvgl
from time import sleep

textarea = lvgl.textarea( lvgl.scr_act() )
textarea.set_text( 'Hello ' )
textarea.center()

sleep( 1 )
textarea.add_text( 'W' )
sleep( 0.5 )
textarea.add_text( 'o' )
sleep( 0.5 )
textarea.add_text( 'rld' )
sleep( 0.5 )
textarea.set_cursor_pos( 0 )
lvgl text area that says 'Hello world is'

Maximum Characters and One Line Mode

LVGL allows you to set the textarea to only use one line and to set the maximum number of characters that are allowed in the textarea.

import lvgl

textarea = lvgl.textarea( lvgl.scr_act() )
textarea.set_max_length( 15 )
textarea.center()
textarea.set_text( 'Hello world is to long' )
textarea.set_one_line( True )
textarea.set_cursor_click_pos( True )

#does not work with touch input might with mouse
textarea.set_text_selection( True )
lvgl text area that says 'heo word with out the'

Accepted Characters

Textareas can filter out any character they don’t want and not put them on the screen. This code creates a textarea that does not display the letter L.

import lvgl

textarea = lvgl.textarea( lvgl.scr_act() )

#l is the only letter not accepted
textarea.set_accepted_chars( 'abcdefghijk mnopqrstuvwxyz' )
textarea.set_text( 'hello world with out the l' )
textarea.center()
micropython lvgl textarea password

Passwords and Textareas

One of the features of micropython textareas is that they can be used for passwords. This code show the most import features of password textareas.

import lvgl
from time import sleep

textarea = lvgl.textarea( lvgl.scr_act() )
textarea.set_text( 'super secret text' )
textarea.center()
textarea.set_password_mode( True )
sleep( 2.5 )

#the bullet should be only one character long
textarea.set_password_bullet( 'O' )

#update text area to see new bullet
textarea.add_text( '' )

print( textarea.get_text() )
lvgl text area with cursor

The Cursor

Micropython lvgl allows you to create and style cursors. This code will randomly move the cursor around the screen and add some styles to it.

import lvgl
from time import sleep

textarea = lvgl.textarea( lvgl.scr_act() )
textarea.set_text( 'Hello this is some random text prettend it does not exist just forget what it says wait is it possible to forget what does not exist' )
textarea.center()

cursor_style = lvgl.style_t()
cursor_style.set_border_side( lvgl.BORDER_SIDE.TOP | lvgl.BORDER_SIDE.BOTTOM )
cursor_style.set_bg_color( lvgl.color_hex( 0x009A00 ))
cursor_style.set_bg_opa( 100 )

textarea.add_style( cursor_style,lvgl.PART.CURSOR | lvgl.STATE.FOCUSED )

textarea.add_state( lvgl.STATE.FOCUSED )

while True:
    textarea.set_cursor_pos( lvgl.rand( 0, 70 ))
    sleep( 0.5 )
    textarea.cursor_right()
    sleep( 0.5 )
    textarea.cursor_down()
    sleep( 0.5 )
    textarea.cursor_left()
    sleep( 0.5 )
    textarea.cursor_up()
    sleep( 0.5 )

Where to go next

Textareas are nice, but they are not super useful with out an input. A great input to use is keyboards.

You can wire up a custom keyboard with physical buttons, but if you want a simpler (but more annoying) keyboard, you could try micropython lvgl keyboard examples. The last example has code for connecting keyboards to textareas.

Filed Under: Micropython

How To Get A LVGL Micropython Screen To Work

November 16, 2022 by Baxter

The ILI9341 Display

This is some simple code to get a ili9341 display to work with micropython lvgl. You will want to add it, or your own screen code, to the beginning of most of the lvgl examples on this site.

Instead of putting it at the beginning, you could just put the code in the micropython boot file. It seems to work best there.
import lvgl

#this is the code that works for my screen:
#from ili9XXX import ili9341
#screen = ili9341(mosi=23, miso=38, clk=18, dc=15, cs=5, invert=True rot=0x10, width=320, height=240 )

# this is some generic code that might work better for you
from ili9XXX import ili9341
screen = ili9341(mosi=23, miso=38, clk=18, dc=15, cs=5,width=320, height=240)

#You will want some touch screen code
#here is what I use
from ft6x36 import ft6x36
touch = ft6x36()

Filed Under: Micropython

Micropython LVGL Tabview Examples

November 15, 2022 by Baxter

night styled micropython lvgl tabview

What are LVGL tabviews?

Tabviews allow you to have multiple pages and create buttons on the screen that move between the pages. Tabviews often allow you to swipe between pages too, instead of just pressing a button.
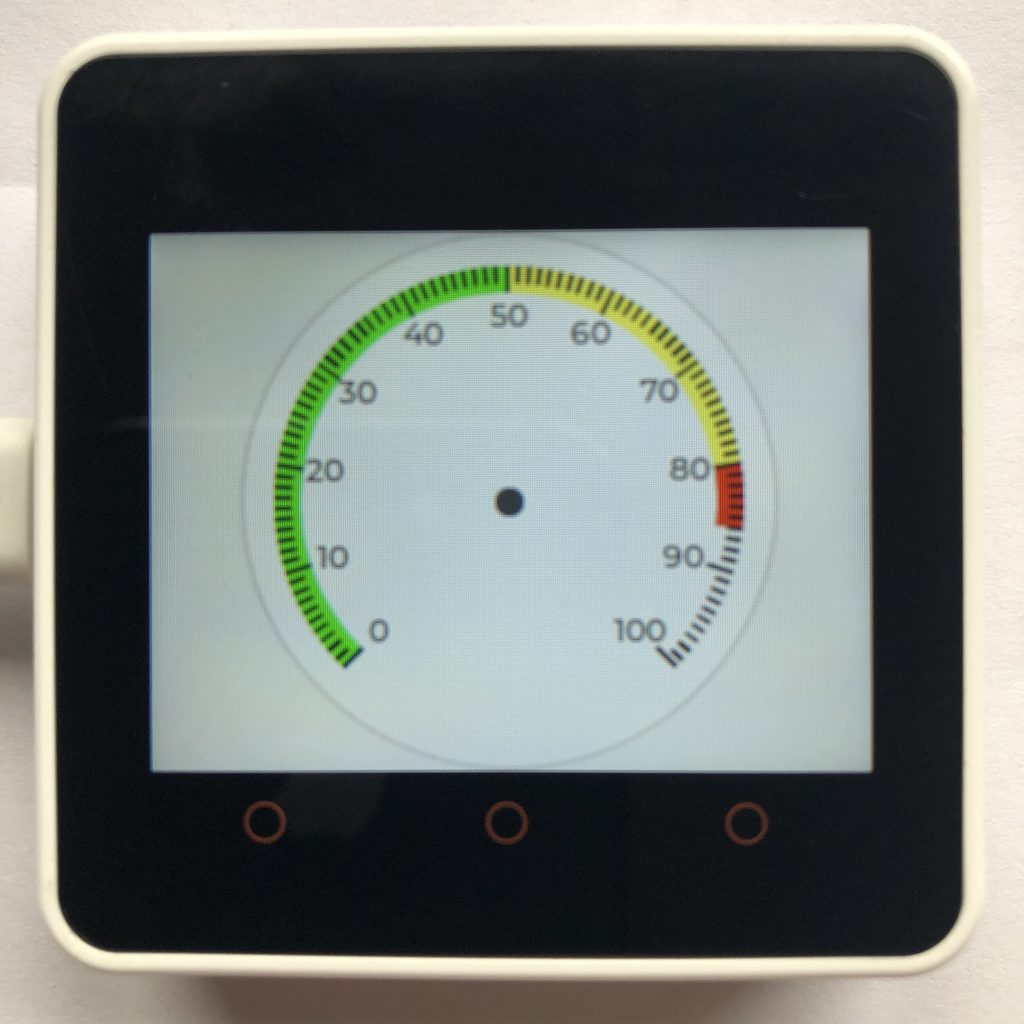
How to use these examples

To get these examples to work you will need to add some screen code to the beginning of each example. If you want more information try How to get a LVGL Micropython screen to work.

simple micropython lvgl tabview

The Basic Example

This code will create a tabview with two pages, and place the tabs on the top of the screen.

import lvgl

tabview = lvgl.tabview( lvgl.scr_act(), lvgl.DIR.TOP, 30 )
tabview.set_size( 320, 240 )
tabview.center()

firstTab = tabview.add_tab( 'first' )
firstLabel = lvgl.label( firstTab ) 
firstLabel.set_text( 'hello this is the first tab' )
firstLabel.center()

secondTab = tabview.add_tab( 'second' )
secondLabel = lvgl.label( secondTab )
secondLabel.set_text( 'somthing really interesting' )
micropython lvgl tabview that automatically changes the page

Having Code Set The Current Tab

Besides pressing the tab buttons or swiping, you can change the current open tab in code with the .set_act function.

import lvgl

tabview = lvgl.tabview( lvgl.scr_act(), lvgl.DIR.TOP, 30 )
tabview.set_size( 320, 240 )
tabview.center()

firstTab = tabview.add_tab( 'left' )
firstLabel = lvgl.label( firstTab )
firstLabel.set_text( 'that way ->' )
firstLabel.center()

secondTab = tabview.add_tab( 'right' )
secondLabel = lvgl.label( secondTab )
secondLabel.set_text( '<- that way' )
secondLabel.center()

from time import sleep
while True:
    tabview.set_act( 1, lvgl.ANIM.ON )
    sleep( 1 ) 
    tabview.set_act( 0, lvgl.ANIM.OFF )
    sleep( 1 )
micropython lvgl tabview that is positioned on the left side

Changing The Tab Button’s Position

The tab buttons don’t always have to be on the top. You can put them all over the place.

import lvgl

tabview = lvgl.tabview( lvgl.scr_act(), lvgl.DIR.LEFT, 30 )
tabview.set_size( 320, 240 )
tabview.center()

firstTab = tabview.add_tab( 'T1' )
firstLabel = lvgl.label( firstTab )
firstLabel.set_text( 'hello this is the first tab' )
firstLabel.center()

secondTab = tabview.add_tab( 'T2' )
secondLabel = lvgl.label( secondTab )
secondLabel.set_text( 'somthing really interesting' )

thirdTab = tabview.add_tab( 'T3' )
thirdLabel = lvgl.label( thirdTab )
thirdLabel.set_text( 'something else' )
micropyhton lvgl tabview that does not scroll

LVGL Tabview That Doesn’t Scroll

In this tabview, scrolling has been removed and it no longer plays an animation when changing screens.

import lvgl

def handler(data):
    anim = lvgl.anim_t.__cast__( data.get_param() )
    if anim:
        anim.time = 0

tabview = lvgl.tabview( lvgl.scr_act(), lvgl.DIR.TOP, 60 )
tabview.set_size( 320, 240 )
tabview.center()
cont = tabview.get_content()
cont.add_event_cb( handler, lvgl.EVENT.SCROLL_BEGIN, None )
cont.clear_flag( lvgl.obj.FLAG.SCROLLABLE )

firstTab = tabview.add_tab( 'T1' )
firstLabel = lvgl.label( firstTab )
firstLabel.set_text( 'Press the buttons' )
firstLabel.center()

secondTab = tabview.add_tab( 'T2' )
secondLabel = lvgl.label( secondTab )
secondLabel.set_text( 'swipping does not work' )

thirdTab = tabview.add_tab( 'T3' )
thirdLabel = lvgl.label( thirdTab )
thirdLabel.set_text( 'tab3 says nothing' )
night styled micropython lvgl tabview

Styling Tabviews

This example just shows how you can style tabviews and their different parts.

import lvgl

tabview = lvgl.tabview( lvgl.scr_act() ,lvgl.DIR.BOTTOM, 40 )
tabview.set_size( 320, 240 )
tabview.center()

firstTab = tabview.add_tab( 'T1' )
firstLabel = lvgl.label( firstTab )
firstLabel.set_text( 'hello this is the first tab' )
firstLabel.center()

secondTab = tabview.add_tab( 'T2' )
secondLabel = lvgl.label( secondTab )
secondLabel.set_text( 'somthing really interesting' )

thirdTab = tabview.add_tab( 'T3' )
thirdLabel = lvgl.label( thirdTab )
thirdLabel.set_text( 'something else' )

cont = tabview.get_content()
tabview.set_style_bg_color( lvgl.color_hex(0x404040), 0 )
cont.set_style_text_color( lvgl.color_hex(0x00FF00), 0 )

btn = tabview.get_tab_btns()
btn.set_style_bg_color( lvgl.color_hex(0x202020), 0)
btn.set_style_text_color( lvgl.color_hex(0x00ff00), 0)
btn.set_style_border_side( lvgl.BORDER_SIDE.TOP, lvgl.PART.ITEMS | lvgl.STATE.CHECKED )
btn.set_style_border_color( lvgl.color_hex(0x008000), lvgl.PART.ITEMS | lvgl.STATE.CHECKED )
btn.set_style_bg_color( lvgl.color_hex(0x006800), lvgl.PART.ITEMS | lvgl.STATE.CHECKED )
btn.set_style_text_color( lvgl.color_hex(0x00FF00), lvgl.PART.ITEMS | lvgl.STATE.CHECKED )

Conclusion of Tabview

Tabviews are great at displaying a lot of information in a small area of your screen. The examples on this page should have giving you a good start on how to create them.

If you liked tabviews you might like micropython lvgl textarea examples.

Filed Under: Micropython

Micropython LVGL Chart Examples

November 14, 2022 by Baxter

What are LVGL charts?

Charts are how you display a lot of data. It could show the local temperature over the last week or the height a plane is flying. This post has examples on creating and modifying charts.

Getting a Screen to Work In Micropython

This is some simple code to get a ili9341 display to work with micropython lvgl. You will want to add it or your own screen code to the beginning of all the examples on this page.

Instead of putting it at the beginning of your code you could just put this code in the micropython boot file. It seems to work best there.

import lvgl

#this is the code that works for my screen:
#from ili9XXX import ili9341
#screen = ili9341(mosi=23, miso=38, clk=18, dc=15, cs=5, invert=True rot=0x10, width=320, height=240 )

# this is some generic code that might work better for you
from ili9XXX import ili9341
screen = ili9341(mosi=23, miso=38, clk=18, dc=15, cs=5,width=320, height=240)

#You will want some touch screen code
#here is what I use
from ft6x36 import ft6x36
touch = ft6x36()
micropython lvgl bar chart

Basic LVGL chart

This code creates a simple bar chart and fills it with a list of numbers.

import lvgl

chart = lvgl.chart( lvgl.scr_act() )
chart.set_size( 300, 200 )
chart.center()
chart.set_type( lvgl.chart.TYPE.BAR )

series = chart.add_series( lvgl.color_hex( 0x0000ff ), lvgl.chart.AXIS.PRIMARY_Y )

values = [ 0, 10, 20, 30, 40, 40, 10, 50, 80, 20 ]
chart.set_ext_y_array( series, values )
micropython lvgl line chart with cursor

Cursor on a Chart

In lvgl you can create a cursor to select a specific point on your chart.

import lvgl

chart = lvgl.chart( lvgl.scr_act() )
chart.set_size( 300, 200 )
chart.center()

cur = chart.add_cursor( lvgl.color_hex( 0x000000 ), lvgl.DIR.LEFT | lvgl.DIR.BOTTOM )

series = chart.add_series( lvgl.color_hex( 0x0000ff ), lvgl.chart.AXIS.PRIMARY_Y )

values = [ 50, 10, 80, 30, 40, 67, 100, 90, 22, 25 ]
chart.set_ext_y_array( series, values )

chart.set_cursor_point( cur, series, 5 )
micropython lvgl scatter plot

LVGL scatter chart

Scatter plots allow you to put points anywhere you want. This code generates random numbers that look like a diagonal bar.

import lvgl

chart = lvgl.chart( lvgl.scr_act() )
chart.set_size( 320, 240 )
chart.center()
chart.set_type( lvgl.chart.TYPE.SCATTER )
chart.set_style_line_width( 0, lvgl.PART.ITEMS )
chart.set_div_line_count( 0, 0 )
chart.set_point_count( 100 )

series = chart.add_series( lvgl.color_hex( 0xFF0000 ), lvgl.chart.AXIS.PRIMARY_Y )


from time import sleep
while True:
    #minipulate all the random numbers so they make a bar
    x_num = lvgl.rand( 0, 100 )
    y_num = lvgl.rand( max( 0, x_num - 30 ), min( x_num + 30, 100 ))
    chart.set_next_value2( series, x_num, y_num )
    sleep( 0.05 )
micropython lvgl chart that is zoomed in horizontally

Zooming in on a chart

LVGL charts allow you to zoom in the data. You can scroll around to see the data that has been zoomed out. This code only zooms in on the horizontal axis.

import lvgl

chart = lvgl.chart( lvgl.scr_act() )
chart.set_size( 300, 200 )
chart.center()
chart.set_point_count( 100 )
chart.set_zoom_x( 512 )


series = chart.add_series( lvgl.color_hex( 0x440055 ), lvgl.chart.AXIS.PRIMARY_Y )

for x in range( 100 ):
    chart.set_next_value( series, lvgl.rand( 0, 100 ))
micropython lvgl chart that automatically scrolls when new data is added

Scrolling data

This code shows how LVGL charts automatically scroll all the data left, when you add more data than a chart can hold.

import lvgl

chart = lvgl.chart( lvgl.scr_act() )
chart.set_size( 200, 200 )
chart.center()
chart.set_point_count( 100 )
chart.set_style_size( 0, 0, lvgl.PART.INDICATOR )
chart.set_axis_tick( lvgl.chart.AXIS.PRIMARY_Y, 10, 5, 11, 9, True, 35 )

series1 = chart.add_series( lvgl.color_hex( 0x005544 ), lvgl.chart.AXIS.PRIMARY_Y )


from time import sleep
while True:
    chart.set_next_value( series1, lvgl.rand( 0, 100 ))
    sleep( 0.05 )

Conclusion of charts

Micropython charts may not be the most exciting thing you can make, but they can be extremely useful if you need to show a lot of data in a small area.

If you liked charts you might like micropython lvgl tabview examples.

Filed Under: Micropython

Micropython LVGL Keyboard Examples

November 10, 2022 by Baxter

What are micropython lvgl keyboards?

Lvgl keyboards allow you to create a complete touchscreen keyboard with a few lines of code. This post will show you five things you can do with them.

Getting a Screen to Work In Micropython

This is some simple code to get a ili9341 display to work with micropython lvgl. You will want to add it or your own screen code to the beginning of all the examples on this page.

Instead of putting it at the beginning of your code you could just put this code in the micropython boot file. It seems to work best there.

import lvgl

#this is the code that works for my screen:
#from ili9XXX import ili9341
#screen = ili9341(mosi=23, miso=38, clk=18, dc=15, cs=5, invert=True rot=0x10, width=320, height=240 )

# this is some generic code that might work better for you
from ili9XXX import ili9341
screen = ili9341(mosi=23, miso=38, clk=18, dc=15, cs=5,width=320, height=240)

#You will want some touch screen code
#here is what I use
from ft6x36 import ft6x36
touch = ft6x36()
micropython lvgl keyboard

The basics of LVGL keyboards

This code will create a keyboard and print the buttons pressed on your shell screen.

import lvgl

#function to print key presses
def handler( data ):
    tar = data.get_target()
    btn = tar.get_selected_btn()
    value = tar.get_btn_text( btn )
    print( value )

#create keyboard and add the handler function
kyb = lvgl.keyboard( lvgl.scr_act() )
kyb.add_event_cb( handler, lvgl.EVENT.VALUE_CHANGED, None )
micropython lvgl number keyboard

Having code control LVGL keyboards

This code will create a keyboard and then every second will switch between the different keyboard modes.

import lvgl

kyb = lvgl.keyboard( lvgl.scr_act() )

from time import sleep
while True:
    kyb.set_mode( lvgl.keyboard.MODE.TEXT_LOWER )
    sleep(1)
    kyb.set_mode( lvgl.keyboard.MODE.TEXT_UPPER )
    sleep(1)
    kyb.set_mode( lvgl.keyboard.MODE.SPECIAL )
    sleep(1)
    kyb.set_mode( lvgl.keyboard.MODE.NUMBER )
    sleep(1)
micropython lvgl custom keyboard

Creating custom keyboards

This code will create a custom lvgl keyboard and print the name of the buttons pressed in your shell.

import lvgl

#list of button texts
customMap = [ '34', 'hi', '\n', 'welcome', '']
#list of button sizes and settings
customCtrl = [ 2 | lvgl.btnmatrix.CTRL.CHECKABLE, lvgl.btnmatrix.CTRL.POPOVER, 1]

#function to print keypresses
def handler( data ):
    tar = data.get_target()
    btn = tar.get_selected_btn()
    value = tar.get_btn_text( btn )
    print( value )


kyb = lvgl.keyboard( lvgl.scr_act() )
kyb.add_event_cb( handler, lvgl.EVENT.VALUE_CHANGED, None )
#add key map were the lower case one used to be
kyb.set_map( lvgl.keyboard.MODE.TEXT_LOWER, customMap, customCtrl )
micropython lvgl styled keyboard

Styling LVGL keyboards

This code creates a keyboard and styles it. As usual, it will print the pressed button to your shell.

import lvgl

#function to print keypresses
def handler( data ):
    tar = data.get_target()
    btn = tar.get_selected_btn()
    value = tar.get_btn_text( btn )
    print( value )

#create black background
kyb_style = lvgl.style_t()
kyb_style.init()
kyb_style.set_bg_color( lvgl.color_hex( 0x000000 ))

#create normal button color
btn_style = lvgl.style_t()
btn_style.init()
btn_style.set_bg_color( lvgl.color_hex( 0x303030 ))
btn_style.set_text_color( lvgl.color_hex( 0x00DF00 ))

#create control button color
ctrl_btn_style = lvgl.style_t()
ctrl_btn_style.init()
ctrl_btn_style.set_bg_color( lvgl.color_hex( 0x101010 ))
ctrl_btn_style.set_text_color( lvgl.color_hex( 0x00FF00 ))

#create and style keyboard
kyb = lvgl.keyboard( lvgl.scr_act() )
kyb.add_event_cb( handler, lvgl.EVENT.VALUE_CHANGED, None )
kyb.add_style( kyb_style, 0 )
kyb.add_style( btn_style, lvgl.PART.ITEMS | lvgl.STATE.DEFAULT )
kyb.add_style( ctrl_btn_style, lvgl.PART.ITEMS | lvgl.STATE.CHECKED )
micropython lvgl textarea and keyboard on bottom Upload

Complete lvgl keyboard example

This code will create a keyboard and textarea and connect them together. If you press the little keyboard button in the corner, the keyboard will disappear.

import lvgl

#the text area, its connect to the keyboard at the bottom
ta = lvgl.textarea( lvgl.scr_act() )
ta.set_size( 320, 100 )
ta.set_pos( 0, 0 )

#the button that makes the keyboard visable
btn = lvgl.btn( lvgl.scr_act() )

def visible( data ):
    kyb.clear_flag( lvgl.obj.FLAG.HIDDEN ) 
    btn.add_flag( lvgl.obj.FLAG.HIDDEN )

#the buttons text
label = lvgl.label( btn )
label.center()
label.set_style_text_color( lvgl.color_hex( 0x000000 ), 0 )
label.set_text( lvgl.SYMBOL.KEYBOARD )

btn.add_flag( lvgl.obj.FLAG.HIDDEN )
btn.set_style_bg_color( lvgl.color_hex( 0xCFCFCF ), 0 )
btn.add_event_cb( visible, lvgl.EVENT.CLICKED, None )
btn.set_size( 48, 31 )
btn.align( lvgl.ALIGN.BOTTOM_LEFT, 0, 0 )


#the keyboard
def handler( data ):
    event = data.get_code()
    key = data.get_target()
    if event == lvgl.EVENT.READY:
        print( ta.get_text() )
    if event == lvgl.EVENT.CANCEL:
        key.add_flag( lvgl.obj.FLAG.HIDDEN )
        btn.clear_flag( lvgl.obj.FLAG.HIDDEN )


kyb = lvgl.keyboard( lvgl.scr_act() )
kyb.add_event_cb( handler, lvgl.EVENT.ALL, None )
kyb.set_popovers( True )
#connect the textarea to keyboard
kyb.set_textarea( ta )

Summery of LVGL keyboards

Keyboards have a lot of uses and are highly customizable. Best of all, they are not to complicated to work with. They can be a great addition to your projects.

If you liked keyboards you might like micropython lvgl chart examples.

Filed Under: Micropython

Micropython LVGL Animation Examples

November 8, 2022 by Baxter

What are LVGL animations?

In code, if you want to change the size of some text or move a button across the screen, it will usually happen instantly. The button will teleport across the screen or the the label will suddenly be large.

LVGL animations allow you to make things look real. You can make a button slide across the screen or a label slowly grow bigger.

Getting a Screen to Work for These Examples

This is some simple code to get a ili9341 display to work with micropython lvgl. You will want to add it or your own screen code to the beginning of all the examples on this page.

Instead of putting it at the beginning of your code you could just put this code in the micropython boot file. It seems to work best there.

import lvgl

#this is the code that works for my screen:
#from ili9XXX import ili9341
#screen = ili9341(mosi=23, miso=38, clk=18, dc=15, cs=5, invert=True rot=0x10, width=320, height=240 )

#this is some generic code that might work better for you
from ili9XXX import ili9341
screen = ili9341(mosi=23, miso=38, clk=18, dc=15, cs=5,width=320, height=240)

#You will probably want some touch screen code
#here is what I use
from ft6x36 import ft6x36
touch = ft6x36()
micropython lvgl label that says hi

Creating an LVGL animation

This animation will move a label from 0x to 200x in 4 seconds (4000 milliseconds). This is the foundation of animations.

import lvgl

label = lvgl.label( lvgl.scr_act() )
label.set_text( 'hi' )

animation = lvgl.anim_t()
animation.init()
animation.set_var( label )
animation.set_time( 4000 )
animation.set_values( 0, 200 )

animation.set_custom_exec_cb( lambda not_used, value : label.set_x( value ))

animation.start() 
micropython lvgl label that says hi

Animation controls

Animations have a lot of settings you can modify. These are the most important ones.

import lvgl

label = lvgl.label( lvgl.scr_act() )
label.set_text( 'hi' )

animation = lvgl.anim_t()
animation.init()
animation.set_var( label )
animation.set_values( 0, 100 )
animation.set_time( 1000 )

animation.set_custom_exec_cb( lambda not_used, value : label.set_x( value ))

#wait half a second before starting animation
animation.set_delay( 500 )

#play animation backward for 1 second after first play
animation.set_playback_time( 1000 )

#repeat animation infinitely 
animation.set_repeat_count( lvgl.ANIM_REPEAT.INFINITE )
animation.set_repeat_delay( 500 )

animation.start()
three micropython lvgl labels that say hello 1,hello 2,helllo 3

Using speed instead of time

If you wanted to, LVGL allows you to set the speed of an animations instead of the time of an animation. Sometimes this will simplify your code.

import lvgl

#create the slow short label
label1 = lvgl.label( lvgl.scr_act() )
label1.set_text( 'hello 1' )
label1.align( lvgl.ALIGN.CENTER, 0, -50 )

anim1 = lvgl.anim_t()
anim1.init()
anim1.set_var( label1 )
anim1.set_time( lvgl.anim_speed_to_time( 20, 0, 100 ))
anim1.set_values( 0, 100 )
anim1.set_repeat_count( lvgl.ANIM_REPEAT.INFINITE )
anim1.set_repeat_delay( 2000 )
anim1.set_custom_exec_cb( lambda not_used, value : label1.set_x( value ))


#create the fast long label
label2 = lvgl.label( lvgl.scr_act() )
label2.set_text('hello 2')
label2.align(lvgl.ALIGN.CENTER,-100,0)

anim2 = lvgl.anim_t()
anim2.init()
anim2.set_var( label2 )
anim2.set_time( lvgl.anim_speed_to_time( 40, -100, 100 ))
anim2.set_values( -100, 100 )
anim2.set_custom_exec_cb( lambda not_used, value : label2.set_x( value ))
anim2.set_repeat_count( lvgl.ANIM_REPEAT.INFINITE )
anim2.set_repeat_delay( 2000 )


#Create the fast short label
label3 = lvgl.label( lvgl.scr_act() )
label3.set_text( 'hello 3' )
label3.align( lvgl.ALIGN.CENTER, -100, 50 )

anim3 = lvgl.anim_t()
anim3.init()
anim3.set_var( label3 )
anim3.set_time( lvgl.anim_speed_to_time( 40, -100, 0 ))
anim3.set_values( -100, 0)
anim3.set_custom_exec_cb( lambda not_used, value : label3.set_x( value ))
anim3.set_repeat_count( lvgl.ANIM_REPEAT.INFINITE )
anim3.set_repeat_delay( lvgl.anim_speed_to_time( 40, -100, 0) + 2000 )


anim1.start()
anim2.start()
anim3.start()
Four micropython lvgl labels that say hello 1, hello 2, hello 3,hello 4

LVGL animation paths

Paths will make you animations look nicer. They modify your animation’s speed, like starting slow then speeding up.

This code shows three unique paths you can use.

import lvgl

#normal animation
label1 = lvgl.label( lvgl.scr_act() )
label1.set_text( 'hello 1' )
label1.align( lvgl.ALIGN.CENTER, -70, -60 )

anim1 = lvgl.anim_t()
anim1.init()
anim1.set_var( label1 )
anim1.set_time( 1000 )
anim1.set_values( -70, 20 )
anim1.set_repeat_count( lvgl.ANIM_REPEAT.INFINITE )
anim1.set_repeat_delay( 2000 )
anim1.set_custom_exec_cb( lambda not_used, value : label1.set_x( value ))


#this animation bounces the label when it ends
label2 = lvgl.label( lvgl.scr_act() )
label2.set_text( 'hello 2' )
label2.align( lvgl.ALIGN.CENTER, 30, -60 )

anim2 = lvgl.anim_t()
anim2.init()
anim2.set_var( label2 )
anim2.set_time( 1000 )
anim2.set_values( 30, 120 )
anim2.set_custom_exec_cb( lambda not_used, value : label2.set_x( value ))
anim2.set_repeat_count( lvgl.ANIM_REPEAT.INFINITE )
anim2.set_repeat_delay( 2000 )
anim2.set_path_cb( lvgl.anim_t.path_bounce )


#this animation goes past the end point then comes back
label3 = lvgl.label( lvgl.scr_act() )
label3.set_text( 'hello 3' )
label3.align( lvgl.ALIGN.CENTER, -70, 60 )

anim3 = lvgl.anim_t()
anim3.init()
anim3.set_var( label3 )
anim3.set_time( 1000 )
anim3.set_values( -70, 20 )
anim3.set_custom_exec_cb( lambda not_used, value : label3.set_x( value ))
anim3.set_repeat_count( lvgl.ANIM_REPEAT.INFINITE )
anim3.set_repeat_delay( 2000 )
anim3.set_path_cb( lvgl.anim_t.path_overshoot )


#this animation slowly starts and then slowly ends
label4 = lvgl.label( lvgl.scr_act() )
label4.set_text( 'hello 4' )
label4.align( lvgl.ALIGN.CENTER, 30, 60 )

anim4 = lvgl.anim_t()
anim4.init()
anim4.set_var( label4 )
anim4.set_time( 1000 )
anim4.set_values( 30, 120 )
anim4.set_custom_exec_cb( lambda not_used, value : label4.set_x( value ))
anim4.set_repeat_count( lvgl.ANIM_REPEAT.INFINITE )
anim4.set_repeat_delay( 2000 )
anim4.set_path_cb( lvgl.anim_t.path_ease_in_out )


anim1.start()
anim2.start()
anim3.start()
anim4.start()
micropython lvgl blue button

LVGL animation timelines

Timelines allow you to connect multiple animations together so controlling them is easier.

import lvgl

button = lvgl.btn( lvgl.scr_act() )
button.set_size( 50, 20 )
button.center()

anim1 = lvgl.anim_t()
anim1.init()
anim1.set_var( button )
anim1.set_time( 1000 )
anim1.set_values( -100, 100 )
anim1.set_custom_exec_cb( lambda not_used, value : button.set_x( value ))

anim2 = lvgl.anim_t()
anim2.init()
anim2.set_var( button )
anim2.set_time( 150 )
anim2.set_values( 100, 30 )
anim2.set_custom_exec_cb( lambda not_used, value : button.set_x( value ))

anim3 = lvgl.anim_t()
anim3.init()
anim3.set_var( button )
anim3.set_time( 2000 )
anim3.set_values( 30, -100 )
anim3.set_custom_exec_cb( lambda not_used, value : button.set_x( value ))

time = lvgl.anim_timeline_create()

lvgl.anim_timeline_add( time, 0, anim1 )
lvgl.anim_timeline_add( time, 1000, anim2 )
lvgl.anim_timeline_add( time, 1150, anim3 )

lvgl.anim_timeline_start( time )

Summery of Micropython LVGL animations

Animations are how you make your projects look nicer. They aren’t required for your project to work, but once you have got your project working they can take it to the next level.

If you liked animations you might also like micropython lvgl keyboard examples.

Filed Under: Micropython

LVGL Micropython Menu Examples

November 4, 2022 by Baxter

Micropython LVGL Menu Demo with pages and sidebar

What This Tutorial Will Teach You…

If you want to create a system that has pages that you can move around in, like a browser or file system, then menus are what you want.

This post is a tutorial on how to create menus and edit their pages.

Getting a Screen to Work In Micropython

This is some simple code to get a ili9341 display to work with micropython lvgl. You will want to add it or your own screen code to the beginning of all the examples on this page.

Instead of putting it at the beginning of your code you could just put this code in the micropython boot file. It seems to work best there.

import lvgl

#this is the code that works for my screen:
#from ili9XXX import ili9341
#screen = ili9341(mosi=23, miso=38, clk=18, dc=15, cs=5, invert=True rot=0x10, width=320, height=240 )

# this is some generic code that might work better for you
from ili9XXX import ili9341
screen = ili9341(mosi=23, miso=38, clk=18, dc=15, cs=5,width=320, height=240)

#You will want some touch screen code
#here is what I use
from ft6x36 import ft6x36
touch = ft6x36()
LVGL Micropython simple menu

Simple Menu

This code creates a menu with a page and a sidebar. It shows the basics of creating menus.

import lvgl

Menu = lvgl.menu( lvgl.scr_act() )
Menu.set_size( 320, 240 )

#create the main page
Home_Page = lvgl.menu_page( Menu, None )
label = lvgl.label( Home_Page )
label.set_text( 'this is as simple as it gets' )

#create a sidebar
Side_Page = lvgl.menu_page( Menu, None )
label2 = lvgl.label( Side_Page )
label2.set_text( 'sidebar' )

#make them visable
Menu.set_page( Home_Page )
Menu.set_sidebar_page( Side_Page )
LVGL Micropython Menu Formatting  example

Menu Sections, Containers, and Separators

Menus have some functions for formatting parts of the screen. They are Sections, Containers, and Separators.

They seem to use the Flexbox layout which is a powerful tool, but can be tricky to use.

import lvgl

Menu = lvgl.menu( lvgl.scr_act() )
Menu.set_size( 320, 240 )
Menu.set_style_bg_color( lvgl.color_hex( 0x505050 ), 0 )

#create the page
Home_Page = lvgl.menu_page( Menu, None )

#create some normal text
cont = lvgl.menu_cont( Home_Page )
title = lvgl.label( cont )
title.set_text( 'Group' )

#create a section
section = lvgl.menu_section( Home_Page )

#create some text in the section
container1 = lvgl.menu_cont( section )
label1 = lvgl.label( container1 )
label1.set_text( 'conatiner 1' )

lvgl.menu_separator( section )

container2 = lvgl.menu_cont( section )
label2 = lvgl.label( container2 )
label2.set_text( 'conatiner 2' )

Menu.set_page( Home_Page )
Micropyhton LVGL Menu with click me text button at top

Changing Pages

The whole point of a menu is to show multiple pages. Here is the best way to change which page you show.

import lvgl

Menu = lvgl.menu( lvgl.scr_act() )
Menu.set_size( 320, 240 )

#create the main page
Main_Page = lvgl.menu_page( Menu, None )
label = lvgl.label( Main_Page )
label.set_text( 'CLick Me' )
label.set_size( 100, 50 )

#create another page
Other_Page = lvgl.menu_page( Menu, None )
label2 = lvgl.label( Other_Page )
label2.set_text( 'You found page two' )

#if text clicked load Other_Page
Menu.set_load_page_event( label, Other_Page )

#make Main_Page visable
Menu.set_page( Main_Page )
LVGL micropython Menu with blue button on it

Loading Pages

Another way you can change the current page is to set it manually with the .set_page() function. This gets a little more complicated but gives you more choices.

import lvgl

Menu = lvgl.menu( lvgl.scr_act() )
Menu.set_size( 320, 240 )

#create destination page
Des_Page = lvgl.menu_page( Menu, None )
label2 = lvgl.label( Des_Page )
label2.set_text( 'you found page two' )

#create the main page
Main_Page = lvgl.menu_page( Menu, None )
btn = lvgl.btn( Main_Page )
btn.set_size( 100, 100 )

def handler( data ):
        Menu.set_page( Des_Page )
        
btn.add_event_cb( handler, lvgl.EVENT.PRESSED, None )

#make Home_Page visable
Menu.set_page( Main_Page )
LVGL micropyhton demo menu with pages and sidebar

Simple Menu System

This is a simple menu system to give you an idea of what menus can do, but if you build one, I would suggest putting more into the design than I did.

import lvgl

Menu = lvgl.menu( lvgl.scr_act() )
Menu.set_size( 320, 240 )
Menu.set_style_bg_color( lvgl.color_hex( 0xA0A0A0 ), 0 )

#Main page
Main_pg = lvgl.menu_page( Menu, 'Welcome' )

#Main page content
section = lvgl.obj( Main_pg )
section.set_size( 200, 200 )

intro = lvgl.label( section )
intro.set_width( 172 )
intro.set_long_mode( lvgl.label.LONG.WRAP )
intro.set_flex_grow( 1 )
intro.set_text( 'These buttons will act like links.' )

link1 = lvgl.btn( section )
link1.set_size( 55, 20 )
link1.align( lvgl.ALIGN.CENTER, -45, 0 )
link1_label = lvgl.label( link1 )
link1_label.set_text( 'Page 1' )
link1_label.center()

link2 = lvgl.btn( section )
link2.set_size( 55, 20 )
link2.align( lvgl.ALIGN.CENTER, 45, 0)
link2_label = lvgl.label( link2 )
link2_label.set_text( 'Page 3' )
link2_label.center()

#Main page side bar
Main_Sidebar = lvgl.menu_page( Menu, 'Files' )
Sidebar_section = lvgl.obj( Main_Sidebar )
Sidebar_section.set_size( 60, 200 )

Page_link1 = lvgl.label( Sidebar_section )
Page_link1.set_text( 'Pg 1' )

seperator = lvgl.line( Sidebar_section )
pt = [{'x':0,'y': 28},{'x': 30, 'y': 28}]
seperator.set_points( pt, 2 )

Page_link2 = lvgl.label( Sidebar_section )
Page_link2.set_text( 'Pg 2' )
Page_link2.set_y( 40 )

seperator = lvgl.line(Sidebar_section)
pt = [{'x':0,'y': 68},{'x': 30, 'y': 68}]
seperator.set_points( pt,2 )

Page_link3 = lvgl.label( Sidebar_section )
Page_link3.set_text( 'Pg 3' )
Page_link3.set_y( 80 )
#End of main page

#Page 1
Page1 = lvgl.menu_page( Menu, None )
Page1_label = lvgl.label( Page1 )
Page1_label.set_text( 'This is page 1' )

#page2
Page2 = lvgl.menu_page( Menu, None )
Page2_label = lvgl.label( Page2 )
Page2_label.set_text( 'This is page 2' )

#page3
Page3 = lvgl.menu_page( Menu, None )
Page3_label = lvgl.label( Page3 )
Page3_label.set_text( 'This is page 3' )

#setup all the links
Menu.set_load_page_event( link1, Page1 )
Menu.set_load_page_event( link2, Page3 )
Menu.set_load_page_event( Page_link1, Page1 )
Menu.set_load_page_event( Page_link2, Page2 )
Menu.set_load_page_event( Page_link3, Page3 )

#start Main Page
Menu.set_page( Main_pg )
Menu.set_sidebar_page( Main_Sidebar )

In Conclusion

You should now have a idea of how to create menus in lvgl and some of the things you can do with them.

If you liked menus then micropython lvgl animation examples might interest you.

Filed Under: Micropython

Micropython LVGL Canvas Examples

October 20, 2022 by Baxter

What Are Canvases?

Canvas allow you to draw on your screen. You can control individual pixels, draw shapes, write text, and do much more.

Getting the Screen to Work In Micropython

This is some simple code to get a ili9341 display to work with micropython lvgl. You will want to add it or your own screen code to the beginning of all the examples on this page.

Instead of putting it at the beginning you could just put the code in the micropython boot file. It seems to work best there.

import lvgl

#this is the code that works for my screen:
#from ili9XXX import ili9341
#screen = ili9341(mosi=23, miso=38, clk=18, dc=15, cs=5, invert=True rot=0x10, width=320, height=240 )

# this is some generic code that might work better for you
from ili9XXX import ili9341
screen = ili9341(mosi=23, miso=38, clk=18, dc=15, cs=5,width=320, height=240)

#You will probably want some touch screen code
#here is what I use
from ft6x36 import ft6x36
touch = ft6x36()
lvgl canvas with red line on it

Getting a canvas to work

This code will create a canvas and put a little line on it. This is a great place to start with canvases.

import lvgl

width = 220
height = 220
size_of_color = 4

buffer = bytearray(width*height*size_of_color)

canvas = lvgl.canvas(lvgl.scr_act())
canvas.set_buffer(buffer,width,height,lvgl.img.CF.TRUE_COLOR)
canvas.center()

canvas.fill_bg(lvgl.color_hex(0x00ff00), 255)
for x in range(200):
    canvas.set_px_color(x+10,40,lvgl.color_hex(0xff0000))
lvgl canvas with green shapes on it and the text ''Hello World"

Canvas shapes

The whole point of canvases is to draw things. These are the main draw routes you will want to know.

import lvgl

width = 220
height = 220
size_of_color = 4

buffer = bytearray(width*height*size_of_color)

canvas = lvgl.canvas(lvgl.scr_act())
canvas.set_buffer(buffer,width,height,lvgl.img.CF.TRUE_COLOR)
canvas.center()


#the rectangle
rect = lvgl.draw_rect_dsc_t()
rect.init()
rect.bg_color = lvgl.color_hex(0x00ff00)

canvas.draw_rect(45,120,90,10,rect)


#the arc
arc = lvgl.draw_arc_dsc_t()
arc.init()
arc.color = lvgl.color_hex(0x00ff00)

canvas.draw_arc(110,106,67,160,0,arc)


#the text
label = lvgl.draw_label_dsc_t()
label.init()
label.color = lvgl.color_hex(0x00ff00)

canvas.draw_text(60,104,100,label,'Hello World')


#the line
line = lvgl.draw_line_dsc_t()
line.init()
line.color = lvgl.color_hex(0x00ff00)

points = [
    {'x':50, 'y':100},
    {'x':160, 'y':100},
    {'x':140, 'y':130},
    {'x':200, 'y':130}
    ]

canvas.draw_line(points,4,line)


#the polygon aka triangle
#polygons use the rectangle draw function 
ply = lvgl.draw_rect_dsc_t()
ply.init()
ply.bg_color = lvgl.color_hex(0x00ff00)

points = [
    {'x':150, 'y':125},
    {'x':200, 'y':125},
    {'x':175, 'y':88}
    ]

canvas.draw_polygon(points,3,ply)
lvgl canvas with blue box in upper-right corner

Making things move

Canvases allow you to make things move. This code moves a box around the screen.

import lvgl

width = 220
height = 220
size_of_color = 4

buffer = bytearray(width*height*size_of_color)

canvas = lvgl.canvas(lvgl.scr_act())
canvas.set_buffer(buffer,width,height,lvgl.img.CF.TRUE_COLOR)
canvas.center()


draw_style = lvgl.draw_rect_dsc_t()
draw_style.init()
draw_style.bg_color = lvgl.color_hex(0x0000ff)

draw_style_black = lvgl.draw_rect_dsc_t()
draw_style_black.init()
draw_style_black.bg_color = lvgl.color_hex(0x000000)


old_x = 50

def move(x):
    global old_x
    canvas.draw_rect(old_x,20,40,20,draw_style_black)
    canvas.draw_rect(x,20,40,20,draw_style)
    old_x = x
    
import time
while True:
    for x in range(100):
        move(x+50)
        time.sleep(0.1)
lvgl canvas with red box that is rotated 45 degrees

Rotating a canvas

Canvases can be used to edit images. This code takes a picture of the canvas then rotates that picture on the canvas.

import lvgl

width = 220
height = 220
size_of_color = 4

buffer = bytearray(width*height*size_of_color)

canvas = lvgl.canvas(lvgl.scr_act())
canvas.set_buffer(buffer,width,height,lvgl.img.CF.TRUE_COLOR)
canvas.center()

rect = lvgl.draw_rect_dsc_t()
rect.init()
rect.bg_color = lvgl.color_hex(0xFF0000)
rect.radius = 15

canvas.draw_rect(60,85,100,50,rect)

temp = lvgl.img_dsc_t()
temp.header.w = 220
temp.header.h = 220
temp.data_size = len(buffer)
temp.header.cf = lvgl.img.CF.TRUE_COLOR
temp.data = buffer[:]

import time
time.sleep(2)

canvas.transform(temp,450,256,0,0,110,110,True)
lvgl canvas with red box that is half blurred

Blurring a canvas

Blurring is another effect that canvases help you do. This code blurs half of a rectangle.

import lvgl

width = 220
height = 220
size_of_color = 4

buffer = bytearray(width*height*size_of_color)

canvas = lvgl.canvas(lvgl.scr_act())
canvas.set_buffer(buffer,width,height,lvgl.img.CF.TRUE_COLOR)
canvas.center()

rect = lvgl.draw_rect_dsc_t()
rect.init()
rect.bg_color = lvgl.color_hex(0xFF0000)
rect.radius = 15

canvas.draw_rect(60,85,100,50,rect)
area = lvgl.area_t()
area.set_width(100)
area.set_height(150)
area.move(10,35)


canvas.blur_hor(area,20)
canvas.blur_ver(area,20)

What you have learned

This post should give you some good practice with micropython canvases. They can be hard to work with, but in the end, they are extremely useful.

If you liked canvases you might like micropython lvgl menus.

Filed Under: Micropython

Micropython LVGL Meter Examples

October 10, 2022 by Baxter

What you will learn

When creating a GUI, meters are extremely useful. LVGL meters take a bit of practice to work with, so this page contains some examples of the things you will want to know.

Getting the Screen to Work In Micropython

This is some simple code to get a ili9341 display to work with micropython lvgl. You will want to add it or your own screen code to the beginning of all the examples on this page.

Instead of putting it at the beginning you could just put the code in the micropython boot file. It seems to work best there.

import lvgl

#this is the code that works for my screen:
#from ili9XXX import ili9341
#screen = ili9341(mosi=23, miso=38, clk=18, dc=15, cs=5, invert=True rot=0x10, width=320, height=240 )

# this is some generic code that might work better for you
from ili9XXX import ili9341
screen = ili9341(mosi=23, miso=38, clk=18, dc=15, cs=5,width=320, height=240)

#You will probably want some touch screen code
#here is what I use
from ft6x36 import ft6x36
touch = ft6x36()
LVGL meter pointing at 80

Simple LVGL Meters

This is a simple example on creating and using meters. It will randomly move the hand around.

import lvgl

meter = lvgl.meter(lvgl.scr_act())
meter.set_size(200,200)
scale = meter.add_scale()
meter.set_scale_ticks(scale,51,2,10,lvgl.color_black())
meter.set_scale_major_ticks(scale,5,4,15,lvgl.color_black(),10)
meter.center()

arm = lvgl.meter_indicator_t()
arm = meter.add_needle_line(scale,2,lvgl.color_hex(0x000000),0)

import time
import random

while True:
    time.sleep(0.5)
    number = random.randint(0,100)
    meter.set_indicator_value(arm,number)
LVGL face clock made from meter

Meter Clock

If you want to make a old style clock, meters are the perfect way to do it. Here is a simple clock I made.

import lvgl

meter = lvgl.meter(lvgl.scr_act())
meter.set_size(240,240)
meter.center()

#minute and second scale
min_scale = meter.add_scale()
meter.set_scale_ticks(min_scale,60,2,8,lvgl.color_black())
meter.set_scale_range(min_scale,1,60,354,270)


#hour scale
hour_scale = meter.add_scale()
meter.set_scale_ticks(hour_scale,12,2,10,lvgl.color_black())
meter.set_scale_major_ticks(hour_scale,1,5,8,lvgl.color_black(),12)
meter.set_scale_range(hour_scale,1,12,330,300)

sec_ind = lvgl.meter_indicator_t()
sec_ind = meter.add_needle_line(min_scale,2,lvgl.color_hex(0x000000),-14)

min_ind = lvgl.meter_indicator_t()
min_ind = meter.add_needle_line(min_scale,2,lvgl.color_hex(0x000000),-20)

hour_ind = lvgl.meter_indicator_t()
hour_ind = meter.add_needle_line(hour_scale,4,lvgl.color_hex(0x000000),-70)

import time
hour = 3
minute = 20
sec = 1
while True:
    time.sleep(1)
    sec += 1
    if sec >= 61:
        sec = 1
        minute += 1
        if minute >= 61:
            minute = 1
            hour += 1
            if hour >= 13:
                hour = 1
    meter.set_indicator_value(sec_ind,sec)
    meter.set_indicator_value(min_ind,minute)
    meter.set_indicator_value(hour_ind,hour)
LVGL meter with blue shaded area

Large Fill Meter

This meter shades the numbers you choose. It would be great if you where creating timer.

import lvgl

meter = lvgl.meter(lvgl.scr_act())
meter.set_size(240,240)
meter.center()

scale = meter.add_scale()
meter.set_scale_ticks(scale,101,2,8,lvgl.color_black())
meter.set_scale_major_ticks(scale,10,4,15,lvgl.color_black(),10)

ind = lvgl.meter_indicator_t()
ind = meter.add_arc(scale,120,lvgl.color_hex(0x0077ff),10)


import time
while True:
    for x in range(101):
        meter.set_indicator_end_value(ind, x)
        time.sleep(0.1)
    for x in range(100,-1,-1):
        meter.set_indicator_end_value(ind, x)
        time.sleep(0.1)
LVGL meter with multicolored bar

Color Changing Meter

This meter has a bar that changes color as it moves forward. This would make a good speedometer.

import lvgl

meter = lvgl.meter(lvgl.scr_act())
meter.set_size(240,240)
meter.center()

scale = meter.add_scale()
meter.set_scale_ticks(scale,101,2,8,lvgl.color_black())
meter.set_scale_major_ticks(scale,10,2,12,lvgl.color_black(),10)

green = lvgl.meter_indicator_t()
green = meter.add_arc(scale,12,lvgl.color_hex(0x00FF00),0)
yellow = lvgl.meter_indicator_t()
yellow = meter.add_arc(scale,12,lvgl.color_hex(0xF7FF47),0)
red = lvgl.meter_indicator_t()
red = meter.add_arc(scale,12,lvgl.color_hex(0xFF0000),0)

meter.set_indicator_start_value(green, 0)
meter.set_indicator_end_value(green, 0)

meter.set_indicator_start_value(yellow, 50)
meter.set_indicator_end_value(yellow, 50)

meter.set_indicator_start_value(red, 80)
meter.set_indicator_end_value(red, 80)


def write_pos(pos):
    if pos > 80:
        meter.set_indicator_end_value(green, 50)
        meter.set_indicator_end_value(yellow, 80)
        meter.set_indicator_end_value(red, pos)
    elif pos < 50:
        meter.set_indicator_end_value(green, pos)
        meter.set_indicator_end_value(yellow, 50)
        meter.set_indicator_end_value(red, 80)    
    else:
        meter.set_indicator_end_value(green, 50)
        meter.set_indicator_end_value(yellow, pos)
        meter.set_indicator_end_value(red, 80)
        

import time
while True:
    for x in range(101):
        write_pos(x)
        time.sleep(0.1)
    for x in range(100,-1,-1):
        write_pos(x)
        time.sleep(0.1)
LVGL meter with green tick line

Tick Line Changing

Meters allow you to change the tick lines to point to a number. This can make some nice dials, but from my experience, they are really slow and bog down your microcontroller.

import lvgl

meter = lvgl.meter(lvgl.scr_act())
meter.set_size(240,240)
meter.center()

scale = meter.add_scale()
meter.set_scale_ticks(scale,61,2,8,lvgl.color_black())
meter.set_scale_major_ticks(scale,10,4,12,lvgl.color_black(),10)


lines = lvgl.meter_indicator_t()
lines  = meter.add_scale_lines(scale,lvgl.color_hex(0x00ff00),lvgl.color_hex(0x00ff00),False, 4)

import time
while True:
    for x in range(99):
        meter.set_indicator_start_value(lines, x)
        meter.set_indicator_end_value(lines, x+1)
        time.sleep(0.1)
    for x in range(99,-1,-1):
        meter.set_indicator_start_value(lines, x)
        meter.set_indicator_end_value(lines, x+1)
        time.sleep(0.1)

In conclusion

Meters are a simple way to make your project look much nicer, but they can take a little work to use.

If you want a more custom way to show data on your screen, lvgl canvas examples could be helpful.

Filed Under: Micropython

Micropython LVGL Event Examples

October 7, 2022 by Baxter

What Are LVGL Events?

Events are how lvgl controls action. If you click a button, it will call an event to tell you a button was pressed. This page has five examples on events and how they work.

Getting the Screen to Work

This is some simple code to get a ili9341 display to work with micropython lvgl. You will want to add it or your own screen code to the beginning of all the examples on this page.

Instead of putting it at the beginning you could just put the code in the micropython boot file. It seems to work best there.

import lvgl

#this is the code that works for my screen:
#from ili9XXX import ili9341
#screen = ili9341(mosi=23, miso=38, clk=18, dc=15, cs=5, invert=True rot=0x10, width=320, height=240 )

# this is some generic code that might work better for you
from ili9XXX import ili9341
screen = ili9341(mosi=23, miso=38, clk=18, dc=15, cs=5,width=320, height=240)

#You will want some touch screen code
#here is what I use
from ft6x36 import ft6x36
touch = ft6x36()
screen with lvgl button that says "click me"

Buttons and Events

This is about as simple as it gets. If you hit the button, it prints “button clicked” on your computer.

import lvgl

button = lvgl.btn( lvgl.scr_act() )
button.set_size( 70, 30 )
button.center()

label = lvgl.label( button )
label.set_text( 'click me' )
label.center()

def handler(data):
    event_type = data.get_code()
    if event_type == lvgl.EVENT.CLICKED:
        print( 'button clicked' )
    

button.add_event_cb( handler, lvgl.EVENT.ALL, None )
lvgl label and slider

Sliders and Events

This example shows you how to use events to get the position of a slider and display it on your screen.

import lvgl

label = lvgl.label( lvgl.scr_act() )
label.set_text( '0' )
label.center()
label.set_x( -90 )


def handler( data ):
    the_slider = data.get_target()
    the_value = the_slider.get_value()
    label.set_text( str ( the_value ) )
    print(the_value)

 
slider = lvgl.slider( lvgl.scr_act() )
slider.center()
slider.set_width( 100 )
slider.add_event_cb( handler, lvgl.EVENT.VALUE_CHANGED, None )
lvgl button matrix

Button Matrixs and Micropython Events

Button matrixs allow you to create a lot of buttons quickly, but they are a little more complicated to work with. Here is the rough idea:

import lvgl

buttonMap = ['A','B','C','\n',
             'D']

def handler(data):
    target = data.get_target()
    btn = target.get_selected_btn()
    label = target.get_btn_text(btn)
    print(label,'pressed')

matrix = lvgl.btnmatrix(lvgl.scr_act())
matrix.set_map(buttonMap)
matrix.set_btn_width(5,3)
matrix.center()
matrix.add_event_cb(handler,lvgl.EVENT.VALUE_CHANGED,None)
lvgl keyboard

Keyboards and Events

Keyboards are a special type of button matrix. They are automatically formatted and setup with the alphabet, symbols, and numbers. You don’t have to create all those buttons.

import lvgl

def handler(data):
    target = data.get_target()
    btn = target.get_selected_btn()
    label = target.get_btn_text(btn)
    print(btn,label,'pressed')


kyb = lvgl.keyboard(lvgl.scr_act())
kyb.add_event_cb(handler,lvgl.EVENT.VALUE_CHANGED,None)
two lvgl buttons

Event Bubbling

Event bubbling allows a parent object to collect the events of its children. If setup completely, you could run your entire program with only one handler function.

import lvgl


#event bubbling allows a parent object to collect all the events of its children
def handler( data ):
    obj = data.get_target()
    if type( obj ) == type( lvgl.btn() ):
        print( 'button pressed' )


obj = lvgl.obj( lvgl.scr_act() )
obj.set_size( 250, 240 )
obj.center()
obj.add_event_cb( handler, lvgl.EVENT.CLICKED, None )

leftButton = lvgl.btn( ob j)
#each button has to enable event bubbling
leftButton.add_flag( lvgl.obj.FLAG.EVENT_BUBBLE )
leftButton.set_size( 80, 40 )
leftButton.center()
leftButton.set_pos( -50, 0 )

leftLabel = lvgl.label( leftButton )
leftLabel.center()
leftLabel.set_text( 'left' )


rightButton = lvgl.btn( obj )
rightButton.add_flag( lvgl.obj.FLAG.EVENT_BUBBLE )
rightButton.set_size( 80, 40 )
rightButton.center()
rightButton.set_pos( 50, 0 )

rightLabel = lvgl.label( rightButton )
rightLabel.center()
rightLabel.set_text( 'right' )

What You Learned

This page has show you how to work with buttons, sliders, and matrixs. Using these should give you some nice inputs for your projects.

If you like lvgl events you might also like lvgl meters.

Filed Under: Micropython

Micropython LVGL Examples

October 5, 2022 by Baxter

What Examples Are Given…

This page has six examples on how to use micropython lvgl. The first one is code to get some screens to work. The rest are examples on label color and lvgl inheritance.

Getting the Screen to Work

This is some simple code to get a ili9341 display to work with micropython lvgl. You will want to add it or your own screen code to the beginning of all the other examples on this page.

Instead of putting it at the beginning you could just put the code in the micropython boot file. It seems to work best there.

import lvgl

#this is the code that works for my screen:
#from ili9XXX import ili9341
#screen = ili9341(mosi=23, miso=38, clk=18, dc=15, cs=5, invert=True rot=0x10, width=320, height=240 )

# this is some generic code that might work better for you
from ili9XXX import ili9341
screen = ili9341(mosi=23, miso=38, clk=18, dc=15, cs=5,width=320, height=240)

#You will probably want some touch screen code
#here is what I use
from ft6x36 import ft6x36
touch = ft6x36()
Blue LVGL label that says "really cool sentence"

Changing Text Color

This code uses styles to change a label’s text color. If you want a better explanation here is a page on LVGL labels

import lvgl
label = lvgl.label(lvgl.scr_act())
label.set_text("really cool sentence.")

blueStyle = lvgl.style_t()
blueStyle.init()
blueStyle.set_text_color(lvgl.color_hex(0x00009c))

label.add_style(blueStyle,0)
Green LVGL label with black background that says "green is what i need"

Highlighting Text

An example on changing the background color in lvgl.

import lvgl 

highlight = lvgl.style_t()
highlight.init()


highlight.set_bg_opa(255)
#opacity (opa) is how visable the background is, 255 is completely visable and 0 is transparent
highlight.set_bg_color(lvgl.color_hex(0x000000))
highlight.set_text_color(lvgl.color_hex(0x009A00))

importantText = lvgl.label(lvgl.scr_act())
importantText.add_style(highlight, 0)
importantText.set_text("green is what I need")
importantText.set_pos(70,0)
3 examples of LVGL recoloring

Coloring Sections of Text

Recoloring allows you to change the color of a small part of text.

import lvgl
# recoloring
text = lvgl.label(lvgl.scr_act())
text.set_recolor(True)  
text.set_text('I am #ff00ff text#. #00ff00 What are # you?')

text.center()
text.set_y(-60)

# recoloring works only on one line
otherText = lvgl.label(lvgl.scr_act())
otherText.set_recolor(True)  
otherText.set_text('I am #ff00ff text. \n # #00ff00 What are # you?')

otherText.center()

# but you can recolor both lines individually 
lastText = lvgl.label(lvgl.scr_act())
lastText.set_recolor(True)  
lastText.set_text('I am #ff00ff text. # \n #00ff00 What are # you?')

lastText.center()
lastText.set_y(60)
example of  LVGL position inheritance

LVGL Posistion Inheritance

Lvgl uses inheritance, and it can make your program do weird things. So, it’s good to get familiar with it.

import lvgl


labelOne = lvgl.label(lvgl.scr_act())
labelOne.set_text('hi')
labelOne.set_x(20)
labelOne.set_y(20)
#first label with normal position x = 20 and y = 20 


#second label inherits from first label which has x=20,y=20

labelTwo =  lvgl.label(labelOne)
labelTwo.set_text('hi')
labelTwo.set_x(30)
labelTwo.set_y(30)
#labelTwo's actual positon is x=20+30,y=20+30 or x=50,y=50


#previous label's position was 50,50
#labelThree's position is 50+40,50+40
labelThree =  lvgl.label(labelTwo)
labelThree.set_text('hi')
labelThree.set_x(40)
labelThree.set_y(40)

#previous label's position was 90,90
#labelThree's position is 90+50,90+50
labelFour =  lvgl.label(labelThree)
labelFour.set_text('hi')
labelFour.set_x(50)
labelFour.set_y(50)
example of LVGL style inheritance

LVGL Style Inheritance

In lvgl objects can also inherit styles too. Here is what that looks like.

import lvgl


redStyle = lvgl.style_t()
redStyle.init()
redStyle.set_text_color(lvgl.color_hex(0xf50000))


labelOne = lvgl.label(lvgl.scr_act())
labelOne.set_text('hello')
labelOne.set_x(10)
labelOne.set_y(5)
labelOne.add_style(redStyle,0)


#because labelTwo inherits from labelOne it has the same style as labelOne
labelTwo =  lvgl.label(labelOne)
labelTwo.set_text('hi')
labelTwo.set_x(50)

Wrapping Up

These examples should give you some practice with micropython lvgl and hopefully demystify coloring and inheritance for you.

Filed Under: Micropython

Micropython LVGL Label Examples

September 15, 2022 by Baxter

LVGL label that says hello world!

How to work with LVGL

To use this code you will need a micropython firmware that has the lvgl module installed. Lv micropython is the best place to get started if you don’t have one.

There is some example code at the end of this page showing how all of this works together. If the part on styles seems confusing, the example might help. Here is what this post will show you how to do.

What are LVGL labels

Labels are how you put text on your screen. Labels have some simple methods to set their position and text, but if you want full control you will need to use styles unfortunately.

How labels work

To create a label use lvgl.label(). This will return a label that is inside of the object you give it. lvgl.scr_act() is the screen object so lvgl.label( lvgl.scr_act() ) will put a label on the screen. You can put a label in most other lvgl objects like buttons, windows, lists or even another label.

Position

To set the position use .set_x() and .set_y(). The numbers you give these functions are how many pixel you want to skip before the label appears. To make your code more consise you can use .set_pos(). It takes both the x and y values like this YourLabel.set_pos( YourX, YourY ).

More on Position

The label’s position is based off of its parents. If you set x to 50 pixels and the label’s parent’s x is set to 25 pixels, the label’s position on the screen will be 50+25 or 75 pixels. If a label’s parent is the screen, then its position will be exactly the number you put in. In our example, that would be 50 pixels. If your text seems to be in the completely wrong place, this might be your problem, but most of the time you don’t need to worry about this.

Text

To set a label’s text you use .set_text() and put the text you want in the parentheses. The default font seems to work with only English text, but lvgl does allow you to change fonts, if you want to use another language.

Changing the Text Color of Labels

If you want to change the color of a label, you have to go through styles. This will take three steps.

Creating the Style

To create a style, use lvgl.style_t(). This returns a empty style. To use it you will first need to initialize it with .init(). If you create a style called BigStyle and wanted to initialize it use BigStyle.init().

Setting the Color

Set the color with .set_text_color(). To tell lvgl the color you want use lvgl.color_hex() and give the color you want in hexadecimal. To bring this all together if you had a style called BrightStyle and wanted it green. You would use BrightStyle.set_text_color( lvgl.color_hex(0x00FF00) )

Connecting the Style and Label

The last thing to do is hook the label and style together. This is how its done YourLabel.add_style( YourStyle ,0) . The zero is part of another complex style feature. Ignore it for now. That is how you set text color in lvgl. With all that work, it’s almost not worth it to change the color.

Here is a some simple style code with all the things explained above and what it looks like on my label.

customStyle = lvgl.style_t()
customStyle.init()
customStyle.set_text_color(
   lvgl.color_hex(0x00FFFF))
myLabel.add_style( customStyle ,0)
LVGL label that says hello world!

Example Code

Examples are a great way to to explain code. So this is a simple program to display text on your screen, set its position, and change its color. You will probably need to change the screen setup code for it to work with your screen.

import lvgl

# put your screen setup code here:
from ili9XXX import ili9341
screen = ili9341(mosi=23, miso=38, clk=18, dc=15, cs=5,width=320, height=240) 

#You don't need but will probably want some touch screen code
#here is what I use
from ft6x36 import ft6x36
touch = ft6x36()


label = lvgl.label(lvgl.scr_act())
label.set_text('hello world!')
label.set_x(50)
label.set_y(50)

myStyle = lvgl.style_t()
myStyle.init()
myStyle.set_text_color(
   lvgl.color_hex(0x00FF00))

label.add_style(myStyle,0)

What you have learned

In conclusion, this is how you create labels, position them, and change their color. This is most of what you will need to do with them.

If you want to learn more about lvgl, micropython LVGL events might interest you.

Filed Under: Micropython

Recent Posts

  • How to Shorten Your Micropython LVGL Code
  • FreeRTOS Mutex Example
  • FreeRTOS Task Notification Example
  • FreeRTOS Queue Example
  • FreeRTOS Semaphore Example

Categories

  • Arduino
  • ESP32 Web Page
  • FreeRTOS
  • LEGO Technic
  • LEGO tips
  • LEGO war robots
  • Lego's
  • Legos
  • LEGOS-build your own
  • Micropython

Copyright © 2025 · Minimum Pro Theme on Genesis Framework · WordPress · Log in