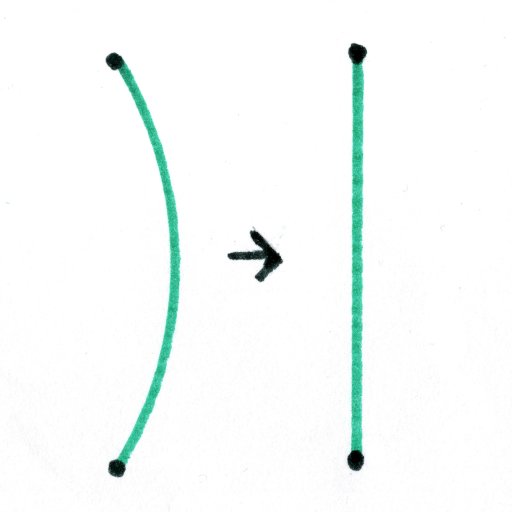
If you have ever tried to make a robot arm, one problem you have probably ran into is being able to draw straight lines.
It turns out that robot arms love to draw arcs, so today I will show you the system I used to move my robot arm in straight lines instead of arcs.
The Basic Plan
Before we go any farther, lets look at the basic way, we will solve the problem, and of course before we look at the solution, its important to look at the problem itself.
The problem
There is really only two more things you need to now about the arcs the arm draws.
First of all, the arc’s size depends on how far the arm moves. For example when I tell my robot arm to move 4 cm the arc it makes is almost nonexistent, but if I tell it to move 50 cm, it makes a big arc.
Secondly, the arcs in the pictures are exaggerated to make them visible, but usually they are much smaller and only get big and problematic when you move large distances.
It really does not matter, but this page would be a bit incomplete, if I did not mention that the shape the robot draws, may not be an arcs at all, but something similar like a segment of an ellipse or a parabola.
The Solution
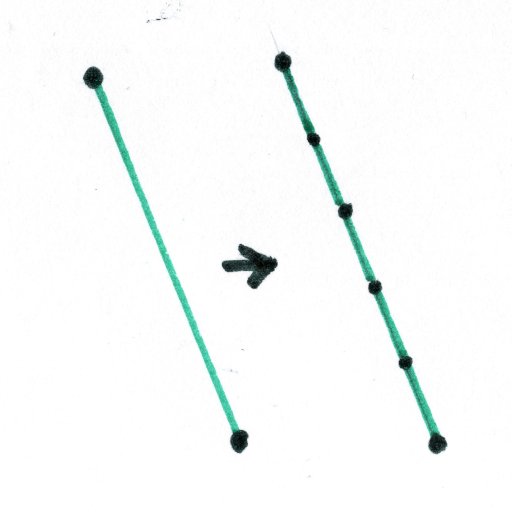
Because small lines have very small arcs, We can solve our problem by taking the big line we want to move, and dividing it into a bunch of smaller lines.

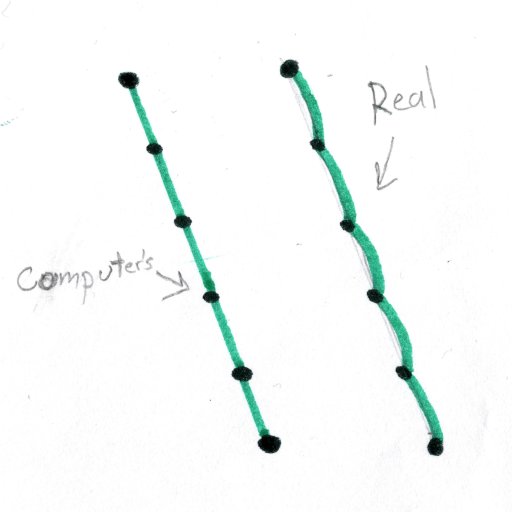
Then if we use all of those little lines to move the robot arm, it will move something like this.

As you can see the resulting line is pretty close to the straight line. If we make the little line segments smaller and smaller, the resulting line will become straighter and straighter, so now lets do it.
Rise and Run
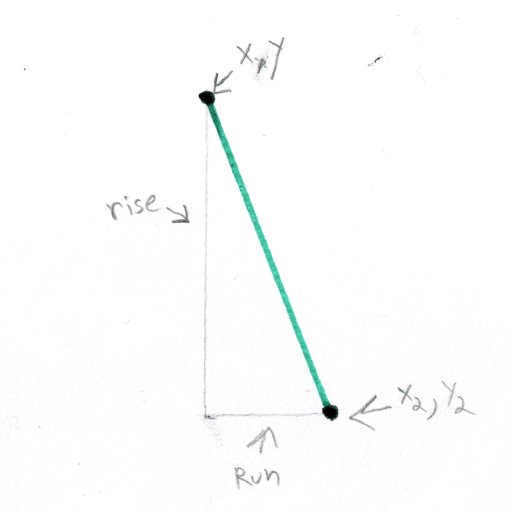
When we can calculate all of those little line segments, we are going to need to find two important numbers and here is how you find them. The first number we need is the height of our line which is called the Rise of the line, and then we need to find the width of our line called the Run.
This picture should hopefully clear up what I a trying to say.

We use the following equation to find the rise of our line.
y2-yAnd calculating the run is also very simple.
x2-xThe Math
We are going to create a few random start values. We’ll say that we need to process a line that starts at 0,10 and ends at 5,0 and we want to divided it into a bunch of smaller line segments with a size of 2 (this will be explained later).
We will start by defining some variables with the above values.
int x = 0;
int y = 10;

int x2 = 5;
int y2 = 0;

float size = 2.00;
This is also a good place to define a few variables we will need later.
float unit;
float x_pluss;
float y_pluss;
Next, we need to calculate the rise and run for our line.
float rise = y2-y;
float run = x2-x;
For this scenario, the rise = 10 and the run = -5. Now we need to check if the abs of run is greater than or equal to the abs of rise.
If you are not familiar with the abs (Absolute Value) function, all it does is make sure we never get a negative number, for example abs(-10) = 10 and abs(10) = 10.
if (abs(run) >= abs(rise)) {
  unit = abs(run) / size;
} else {
  unit = abs(rise) / size;
}
That block of code we just ran calculates how many small lines are able to fit into our big line and sets the unit variable equal to that number.
Line Size
The above equations use the size variable, which we set earlier to 2. The size variable controls how big each little line is.
Unfortunately, setting size to 2 does not mean that every line segment is 2 long, but instead means every line will be approximately any where from 2 to 2.8384 in length. If you use a different number for size you can use the following equations to calculate the smallest and biggest possible length of your lines.
float smallest_size = size;
float biggest_size = size*sqrt(2);
The Small Lines
The next thing ,we need to do is calculate what the rise and run of each of the little lines needs to be. For now we will call the run x_pluss and the rise y_pluss.
x_pluss = run / unit;
y_pluss = rise / unit;
Generating the lines
We actually create the lines by generating a bunch of points, and if you tell your robot to move from one point to the next, it will create the mini lines.
We will create all the points, with the following for loop.
float point_x = x;
float point_y = y;
for (int i = 0; i < unit; i++) {
  // so something here
  point_x += x_pluss;
  point_y += y_pluss;
}
// so something here
You have two options now, where the code says //do something here you could run some code the stores all of the points in a array, and then you could use those points later, but that can be a complicated process, so for my machine as soon as I calculated a point I made the robot move to that point. It went something like this.
float point_x = x;
float point_y = y;
for (int i = 0; i < unit; i++) {
  move_arm(point_x, point_y);
  point_x += x_pluss;
  point_y += y_pluss;
}
move_arm(x2, y2);
Take note that I have the arm move one more time out side of the for loop. You have to have that there to make sure the robot moves to the end destination.
The Example
The following code using the above code, and has a few extra lines, so that when you run it, if you open the serial monitor you can type in four numbers like 0,10,5,0 and the Arduino board will run the math on those number and then print the results to the serial monitor.
void move_arm(float x, float y) {
  Serial.print("Move x: ");
  Serial.print(x);
  Serial.print(" Move y: ");
  Serial.println(y);
}


void setup() {
  Serial.begin(9600);
  Serial.setTimeout(300);
}

void loop() {
  // put your main code here, to run repeatedly:
  while (not Serial.available()) delay(1);


  int x = Serial.parseInt();
  int y = Serial.parseInt();

  int x2 = Serial.parseInt();
  int y2 = Serial.parseInt();

  float size = 2.00;

  float unit;
  float x_pluss;
  float y_pluss;

  float rise = y2 - y;
  float run = x2 - x;

  if (abs(run) >= abs(rise)) {
    unit = abs(run) / size;
  } else {
    unit = abs(rise) / size;
  }
  x_pluss = run / unit;
  y_pluss = rise / unit;

  float point_x = x;
  float point_y = y;
  for (int i = 0; i < unit; i++) {
    move_arm(point_x, point_y);
    point_x += x_pluss;
    point_y += y_pluss;
  }
  move_arm(x2,y2);


  Serial.print("Size: ");
  Serial.print(size);
  Serial.print(" Unit: ");
  Serial.print(unit);
  Serial.print(" Xp: ");
  Serial.print(x_pluss);
  Serial.print(" Yp: ");
  Serial.print(y_pluss);
  Serial.print(" Rise: ");
  Serial.print(rise);
  Serial.print(" Run: ");
  Serial.print(run);
}
Customizing the Code
One last thing to talk about is the size variable. The rough gist is that when you set the size to a small number the arm will move in a pretty straight line, but it will also take a lot of computer power to run the arm.
For the most part you can just play around with the number until you get the results you want. For my robot, I use the number 1. Because my inverse kinematics program measures things in cm, setting size to 1 means that my arm moves in little lines about 1 cm long.
And that is an important point, this code gives x,y coordinates out which are going to need to be fed to your inverse kinematics driver to work.
If you are building a robot arm you might be interested in How to Control a Robot Arm With Arduino (Inverse Kinematics) and Using an Arduino to Accurately Position a Stepper Motor In Degrees