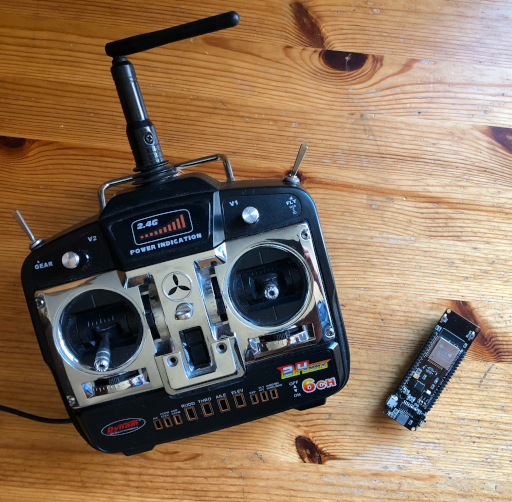
Because so many projects require a remote control, many people build there own.
So I did the same. For my project, I chose to use an ESP8266 as the Transmitter and an ESP32 as the receiver. Then I quickly wiped up some code to run it with, and it worked, but just barely plus it was a pain to use.
So I took what I learned from that, and created the code on this page, and today I will explain how you can use it for your own remote.
What This Code Does
The code has three main things it does.
- The Transmitter automatically pairs with a near by Receiver.
- If the connection is lost, The Transmitter will try to reconnect.
- You can have multiple transmitters and receivers, and they should all work with each other.
And to be upfront here is two things that could be improved about the code.
- Using WiFi is over kill, a simpler protocol like ESPNOW would be more efficient.
- The pairing process is very simple, and will not work well if you have multiple transmitters and receivers on at the same time.
The Code
Here is the Transmitter Code for the ESP8266
#include <ESP8266WiFi.h>


#define PASSWORD "REMOTE_V1"

String name = "";
uint32_t last_message = 0;
bool waiting = false;


String connect_to_reciever() {
  int count = WiFi.scanNetworks();
  for (int i = 0; i < count; i++) {
    if (strncmp((WiFi.SSID(i)).c_str(), "REMOTEDV", 8) == 0) {
      Serial.print("\nName: ");
      Serial.print(WiFi.SSID(i));
      Serial.print("  Strength: ");
      Serial.println(WiFi.RSSI(i));
      return WiFi.SSID(i);
    }
  }
  return "";
}


void setup() {
  Serial.begin(115200);

  name = connect_to_reciever();

  while (name == "") {
    Serial.print("<looking>");
    delay(50);
    name = connect_to_reciever();
  }

  Serial.println("");
  Serial.println(name);

  WiFi.begin(name, "REMOTE_V1");
  while (WiFi.status() != WL_CONNECTED) {
    delay(100);
    Serial.print(".");
  }
  Serial.print("\n");
}


void loop() {
  if (WiFi.status() != WL_CONNECTED) {
    Serial.println("\nLost Connection");
    WiFi.begin(name, PASSWORD);
    while (WiFi.status() != WL_CONNECTED) {
      delay(100);
      Serial.print(".");
    }
    Serial.println();
  }


  WiFiClient client;
  if (client.connect("192.168.4.1", 80)) {
    last_message = millis();
    while (millis() - last_message <= 2000) {
      if (waiting) {
        while (client.available()) {
          client.read();
          waiting = false;
          last_message = millis();
        }
      } else {
        char data[] = "hello there";
        client.print(data);
        waiting = true;
        last_message = millis();
      }
    }
    waiting = false;
  }
  Serial.println("Client Timed Out");
}
And here is the Receiver code for the ESP32.
#include <WiFi.h>


#define NETWORKNAME "REMOTEDV-ImCar"
#define PASSWORD "REMOTE_V1"


WiFiServer remote(80);

void setup() {
  Serial.begin(115200);

  WiFi.mode(WIFI_AP);

  IPAddress ip(192, 168, 4, 1);
  IPAddress net(255, 255, 255, 0);

  WiFi.softAPConfig(ip, ip, net);
  WiFi.softAP(NETWORKNAME, PASSWORD,1,false,1);

  remote.begin();
}


bool reply = false;
uint32_t last_message = 0;


void loop() {
  WiFiClient client = remote.available();
  if (client) {
    Serial.println("Got a remote");
    last_message = millis();
    while (client.connected()) {
      if(millis() - last_message >= 2000){
        break;
      }
      if (!reply) {
        while (client.available()) {
          Serial.write(client.read());
          reply = true;
          last_message = millis();
        }
      } else {
        delay(100);
        client.print("got it");
        Serial.println("");
        reply = false;
        last_message = millis();
      }
    }

  }
  reply = false;
  Serial.println("No Connection");
}
Setting It Up
At this point if you wanted to, you could upload both programs to your boards, and run the code, but all that would happen is that the transmitter would send “hello there” to the receiver repeatedly so lets look at how you send your own data.
Transmitter code line 73-74
char data[] = "hello there";
client.print(data);
Thankfully the sending code is really easy, You can simple change the text inside of the data string. In fact, the data does not even have to be a string. You can send integers or just raw binary data, if you want.
Even so strings are really easy to process on the receiving side, so we will stick with them.
Receiver code line 39-43
while (client.available()) {
   Serial.write(client.read());
   reply = true;
   last_message = millis();
}
You can ignore the “reply = true;” and “last_message = millis();”. They are just there to make sure the boards stay in sink.
You can read the incoming data by using the client .read() function. Because it returns only one byte, normally you would use code that looks more like this.
if (client.available()) {
  String buf = "";
  while (client.available()) {
     buf += (char)client.read();
  }

  Serial.println(buf);
  //do something else with buf

  reply = true;
  last_message = millis();
}
Because I have no idea how your remote is setup, The best I can do now is point you in the right direction.
I would suggest you look into the ArduinoJson library. It allows you to turn ints, bools, chars, etc into text, which you can easily send over WiFi, and then your receiver can use that library to turn the text back into the original ints, bools, chars, etc.
What is really nice about the ArduinoJson library is that it can process data as it comes in, so you will not have to write code that buffers the data.
Some Additional Settings
Every receiver creates an access point. The name of that access point is defined at the begging of the code.
Receiver code line 4
#define NETWORKNAME "REMOTEDV-ImCar"The name has to start with REMOTEDV (it stands for Remote Device), but otherwise you can change the name as much as you want.
If you want multiple receivers to be on at the same time, you will need to make sure they all have different names.
The network Password is also defined at the beginning.
Receiver code line 5 and transmitter code line 4.
#define PASSWORD "REMOTE_V1"You can change this if you want, but you will need to make sure the transmitter and receiver have the same password.
Things To Keep In Mind
First, the reconnect mechanism works pretty well, but the one downside to it is that it takes about 5 second for it to kick in.
And Second, you don’t have to just use ESP boards. If you rewrite the code a bit, you should be able to support pretty much any microcontroller that has wifi.
If you are look at ways to remotely control your projects with WiFi, you might also like to see how to create a text input webserver.