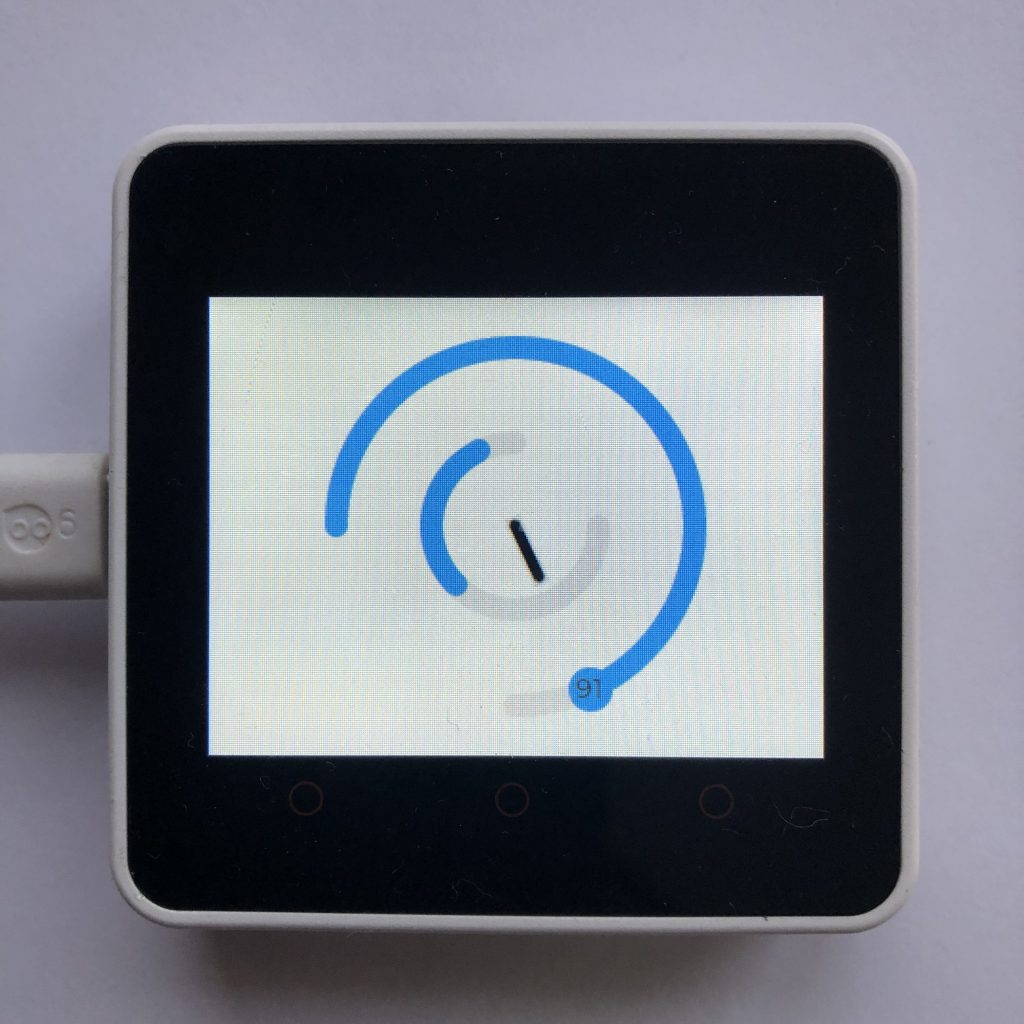
It always seems difficult to make a GUI interesting. Thankfully, the LVGL library has some useful objects to help our projects. One of those objects is the arc. They are like sliders, but are curved and have a few more settings.
Today, I am going to show and explain some code for creating and positioning arcs, modifying some of their features, and getting their current value. By the end you should have a firm understanding of arcs.
To get this example to work you will need to add your screen code to the beginning of the example. If you want more information try How to get a LVGL Micropython screen to work.
Here is that code:
import lvgl

arc_main = lvgl.arc(lvgl.scr_act())
arc_main.set_size(200,200)
arc_main.set_bg_angles(180,90)
arc_main.center()

min_arc = lvgl.arc(lvgl.scr_act())
min_arc.set_size(100,100)
min_arc.set_bg_angles(0,270)
min_arc.set_mode(lvgl.arc.MODE.SYMMETRICAL)
min_arc.center()
min_arc.remove_style(None,lvgl.PART.KNOB)

label = lvgl.label(lvgl.scr_act())
label.set_text('0')

pointer = lvgl.obj(lvgl.scr_act())
pointer.set_size(10,40)
pointer.set_style_bg_color(lvgl.color_hex(0x000000),0)
pointer.center()

label.set_text('91')
min_arc.set_value(91)
arc_main.set_value(91)

arc_main.align_obj_to_angle(label,0)
arc_main.rotate_obj_to_angle(pointer,-80)

def new_val(data):
    arc = data.get_target()

    label.set_text(str(arc.get_value()))

    min_arc.set_value(arc.get_value())

    arc_main.set_value(arc.get_value())
    arc_main.align_obj_to_angle(label,0)
    arc_main.rotate_obj_to_angle(pointer,-80)

arc_main.add_event_cb(new_val,lvgl.EVENT.VALUE_CHANGED,None)
min_arc.add_event_cb(new_val,lvgl.EVENT.VALUE_CHANGED,None)
Understanding This LVGL Code
Ok, now that you have seen all the code, let’s step through each section, so you can understand exactly what each part does. This will make it much easier to actually use arcs in your future projects…
The Setup
First we have to import the LVGL library.
import lvglCreating the Main Arc
We want a large arc to go around the screen, so first we have to create an empty arc object.
arc_main = lvgl.arc(lvgl.scr_act())Secondly, we want to set the size of are new arc.
arc_main.set_size(200,200)Then we will set the start and end angle of our arc.
arc_main.set_bg_angles(180,90)Lastly, we will put the arc in the center of the screen.
arc_main.center()The Small Arc
We also want a smaller arc in the center of the screen, so let’s create that.
min_arc = lvgl.arc(lvgl.scr_act())Then we set its size.
min_arc.set_size(100,100)Next, the angles need to be set.
min_arc.set_bg_angles(0,270)Instead of our arc shading the background blue from the start, we want it to start shading from the middle. You can see that happening in the picture at the beginning of this page. To do that, we will have to change the mode.
min_arc.set_mode(lvgl.arc.MODE.SYMMETRICAL)Then we center the small arc.
min_arc.center()The last little detail is to remove the blue knob.
min_arc.remove_style(None,lvgl.PART.KNOB)The Label
We want the arc’s knob to have the current position written on it, so we need to create a label now. Later we will setup the code that has it follow the knob.
label = lvgl.label(lvgl.scr_act())Next, let’s set the default text to 0.
label.set_text('0')The Pointer
In center of the screen we want an indicator that points to where the arc currently is. To start we will make our pointer out of an object.
pointer = lvgl.obj(lvgl.scr_act())Then we will set its size, making it tall and thin.
pointer.set_size(10,40)After that we will make it black.
pointer.set_style_bg_color(lvgl.color_hex(0x000000),0)And of course we will center it on the screen.
pointer.center()Creating a Default Value
If we left this program as is, when it starts up, all of the arcs, pointers, and labels would be in random positions. We need to set them all to the correct values.
The default value I decided for this system is 91, so we need to set the label’s text to 91 first.
label.set_text('91')Then we will set both of the arcs to position 91.
min_arc.set_value(91)
arc_main.set_value(91)
Finally, we need to put the label on the main arc’s knob, and make the pointer point at the the main arc’s knob.
arc_main.align_obj_to_angle(label,0)
arc_main.rotate_obj_to_angle(pointer,-80)
How to Update Everything
Whenever the arcs are moved, we need to update the rest of the screen. Because we have two arcs, we normally would need two functions to update the screen, but since the arcs update the same thing, we will make one function and have both of them use it.
To start, we define our new function.
def new_val(data):When the function is called, we need to be able to tell which arc called it so we add this.
arc = data.get_target()Then we get the new value of that arc and set the label’s text to that value.
label.set_text(str(arc.get_value()))After that, we are going to set the the arc that did not change to the value of the one that changed. Unfortunately, we don’t know which arc did not change, so we simply update both arcs.
    min_arc.set_value(arc.get_value())
    arc_main.set_value(arc.get_value())
The last thing we need to do is move the label to the new arcs position and point the pointer at the arc.
    arc_main.align_obj_to_angle(label,0)
    arc_main.rotate_obj_to_angle(pointer,-80)
Setting Up the Events
Finally, we need to connect that function to both the arcs, so when their value changes, that function gets called.
arc_main.add_event_cb(new_val,lvgl.EVENT.VALUE_CHANGED,None)
min_arc.add_event_cb(new_val,lvgl.EVENT.VALUE_CHANGED,None)
What Happens Next?
Once you have run the program above, it will create two arcs, a pointer, and a label. If you move ether one of the arcs, the other arc will move with it. The current position will be displayed on the label, and the pointer will point at the position of the main arc.
While the example on this page is not extremely useful, it does show you most of the features available for arcs, and gives you a chance to experiment with arcs to see how they work.
Events are used with arcs to get their values. If you want some more examples on how events work, Micropython LVGL Event Examples might be helpful.