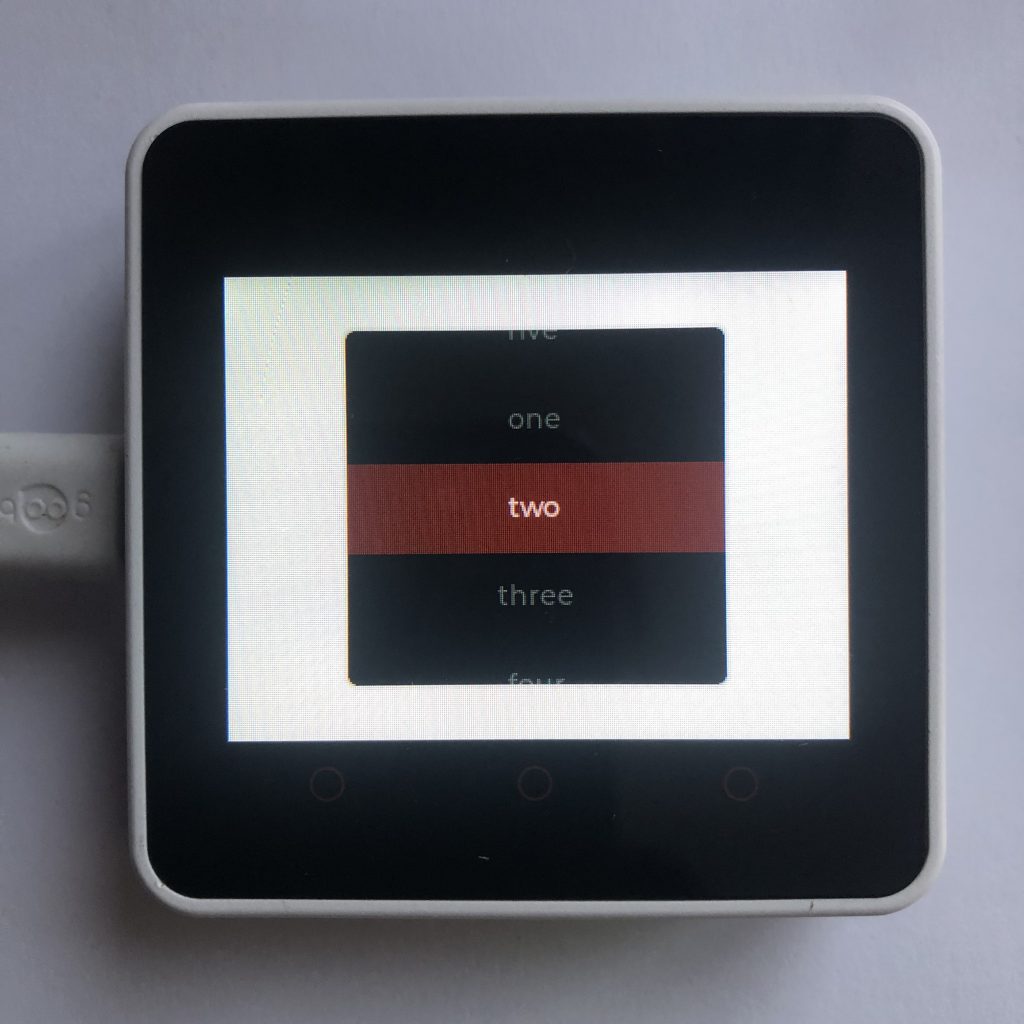
Trying to get a lot of information on a small screen is hard. Fortunately, LVGL has a widget called the roller. It allows you to let the user choose between a large amount of options, but at the same time, the roller only takes a small amount of your screen space.
Rollers work by showing only a few of the options available, usually three, and then if you want to see the other options you have to scroll up or down. Today I would like to show you how to create and style your own roller and print the selected option in your terminal.
To get this example to work you will need to add your screen code to the beginning of this example. If you want more information try How to get a LVGL Micropython screen to work.
Here is that code:
import lvgl

names = ['one','two','three','four','five']
text = '\n'.join(names)

#Another way you could have create the list above.
other_way_text = 'one\ntwo\nthree\nfour\nfive'


roll = lvgl.roller(lvgl.scr_act())
roll.set_size(200,100)
roll.center()
roll.set_options(text,lvgl.roller.MODE.INFINITE)

main = lvgl.style_t()
main.init()
main.set_text_line_space(30)
main.set_bg_color(lvgl.color_hex(0x000000))

select = lvgl.style_t()
select.init()
select.set_bg_color(lvgl.color_hex(0x300000))
select.set_text_color(lvgl.color_hex(0xFFAAAA))

roll.add_style(main,lvgl.PART.MAIN)
roll.add_style(select,lvgl.PART.SELECTED)
roll.set_visible_row_count(4)

def handler(data):
    roller = data.get_target()
    print(names[roller.get_selected()])

roll.add_event_cb(handler,lvgl.EVENT.VALUE_CHANGED,None)
How Does This Code Work?
Since you’ve seen the program above, why don’t we walk through the code and see how it works. This should make it clearer so you know how you can modify this code for your own uses…
The Setup
Before we can use the LVGL library we need to import it.
import lvglThe Options
Selecting which option you want is the whole point of the roller, so we have to create the options.
First, we will create a list of the option names.
names = ['one','two','three','four','five']Then we will have to create a string with all of those names, each one being separated by a ‘\n’.
text = '\n'.join(names)Another potentially simpler way you could create that list is to do it by hand, like this.
other_way_text = 'one\ntwo\nthree\nfour\nfive'Creating the Roller
To begin, we need to create a empty roller object.
roll = lvgl.roller(lvgl.scr_act())Secondly, we will set the size of the roller. Later on we will adjust the height, but the width will stay 200 throughout the program.
roll.set_size(200,100)Everything looks better when put in the center of the screen.
roll.center()Now we have to add the options that we created earlier and set the mode.
Rollers have two modes available, NORMAL and INFINITE. In INFINITE mode, when you scroll to the last option and continue scrolling, it will send you back to the first option. In NORMAL mode, if you hit the last option, it doesn’t let you scroll any more.
roll.set_options(text,lvgl.roller.MODE.INFINITE)The Main Style
To make our roller look better, we need to add some styles. The first style will set the background properties.
To start, we need to create and initialize our style.
main = lvgl.style_t()
main.init()
Then we will set the text spacing (how far apart the options are).
main.set_text_line_space(30)Lastly, we’re going to set the background color to black.
main.set_bg_color(lvgl.color_hex(0x000000))The Selected Style
This style modifies the option that is currently selected. As usual we create and initialize the new style.
select = lvgl.style_t()
select.init()
Secondly, we will set the background color to a dark red.
select.set_bg_color(lvgl.color_hex(0x300000))Finally, we will set the text color to a reddish gray.
select.set_text_color(lvgl.color_hex(0xFFAAAA))Adding the Styles to the Roller
First, we will add the main style to the roller.
roll.add_style(main,lvgl.PART.MAIN)Then we will add the select style to the roller. The lvgl.PART.SELECTED is what apples this style only to the selected options.
roll.add_style(select,lvgl.PART.SELECTED)Editing the Roller Height
To make the roller look more professional, we’ll set the ruler to display only 4 options at a time. Because of how rollers work, it will display 3 options in the middle and half of one option at the top and at the bottom of the roller.
roll.set_visible_row_count(4)Printing The Selected Option
The function below will be called when the roller’s value changes. It simply gets the roller object, then gets the index of the option that was selected. Lastly, we feed that index into the list of names we created earlier to get the name of the selected option.
def handler(data):
    roller = data.get_target()
    print(names[roller.get_selected()])
The next thing we will need to do is connect the handler to the roller and set the handler to only be called when the roller’s value changes.
roll.add_event_cb(handler,lvgl.EVENT.VALUE_CHANGED,None)What next?
Since you now can create rollers and style them, and you know how to print out the currently selected option, you can now modify the code above or create entirely new code for your own custom rollers.
If you have a screen with more space available on it, then another widget that works similar to the roller is the list. You can find some more information that might be helpful about them at Micropython LVGL List Example.